How to Easily Create Shortcuts on Desktop in Windows 11 – a step-by-step technical guide to speed up access to apps, files, and games. This article covers three proven methods including Microsoft Store apps and game shortcuts with custom parameters.
Desktop shortcuts save navigation time. For professionals, technicians, and gamers, quick access to critical programs or documents is essential. This article presents how to easily create shortcuts on desktop in Windows 11 in detail, from standard methods to advanced techniques. All steps have been tested on Windows 11 but also work on Windows 10, 8, and 7.
A shortcut is not the original file. Deleting a shortcut will not uninstall the program or delete the document.
Method 1: How to Easily Create Shortcuts on Desktop in Windows 11 from Start Menu
This method is fastest for apps already installed and listed in the Start menu. Follo (typo – should be “Follow”) these steps.
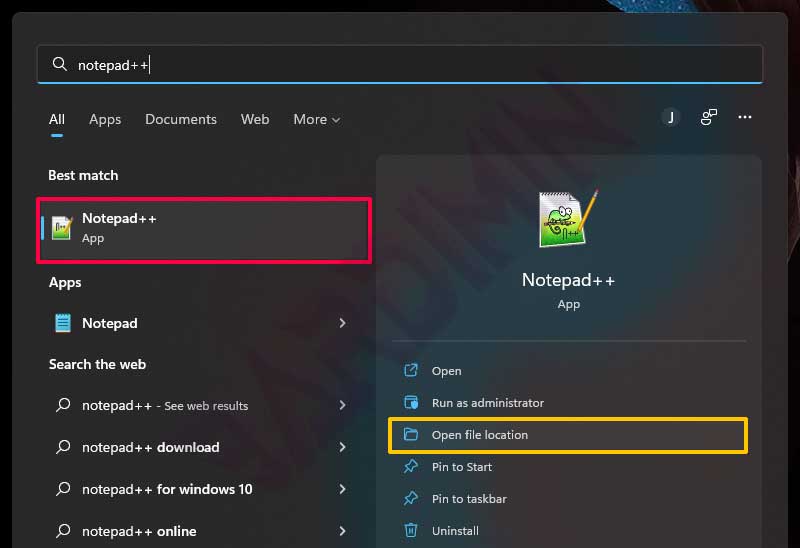
- Click the Start button, then type the app name (e.g., Calculator or Game Bar).
- Right-click the search result, then select “Open file location”.
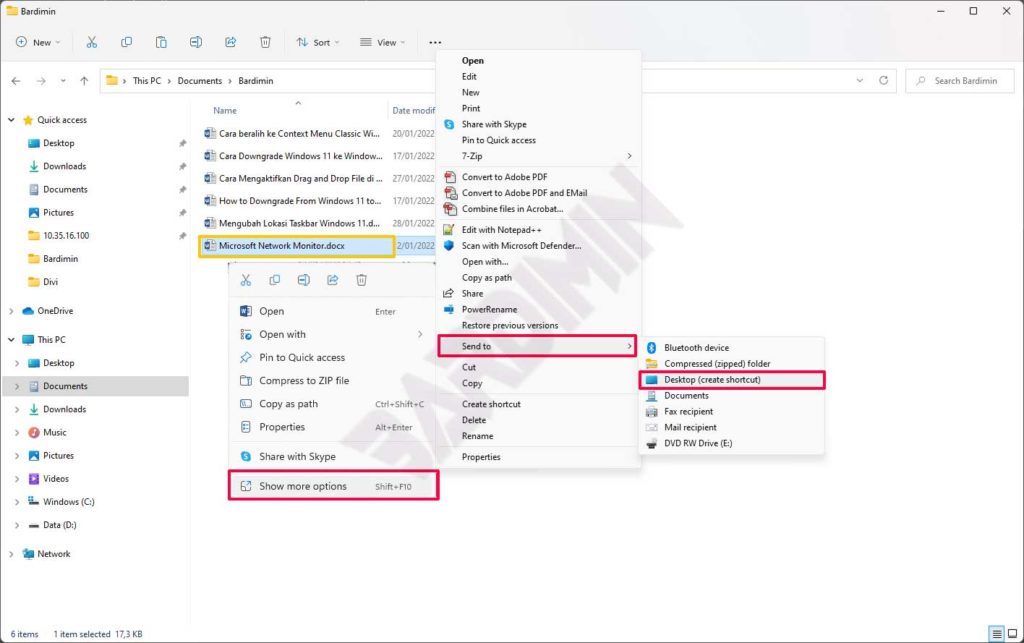
- File Explorer opens and highlights the app’s shortcut location. Right-click the app icon, then choose “Show more options” (or press Shift+F10).
- Select “Send to >> Desktop (create shortcut)”. The shortcut appears immediately on your desktop.
This method works for most traditional desktop applications. However, for apps from the Microsoft Store, this approach is unavailable. Use the third method described below.
Method 2: Create Shortcuts for Files, Folders, or Apps via File Explorer (Universal Way)
This technique is the most universal. You can create shortcuts for .exe, .docx, .xlsx files, and even folders. Here is how.
- Open File Explorer (press Win + E).
- Navigate to the desired file or folder location.
- Right-click the object, select “Show more options” (on Windows 11), then “Send to >> Desktop (create shortcut)”.
For gamers, this method is very useful for creating shortcuts to portable games that don’t need an installer. Just browse to the game installation folder, find the main executable (usually game.exe), then create a shortcut. You can also add parameters like -windowed or -novid by editing the shortcut’s properties.
Additionally, technicians can create shortcuts to diagnostic tools such as Event Viewer, Device Manager, or Command Prompt as administrator. The process is the same: locate eventvwr.msc or devmgmt.msc in C:\Windows\System32, then send to desktop.
Method 3: Shortcuts for Microsoft Store Apps and Modern Apps
Apps installed via Microsoft Store (e.g., Netflix, Spotify, or Xbox Game Pass games) do not appear in regular File Explorer locations. However, you can still create shortcuts using this trick. This is part of how to easily create shortcuts on desktop in Windows 11 for modern applications.
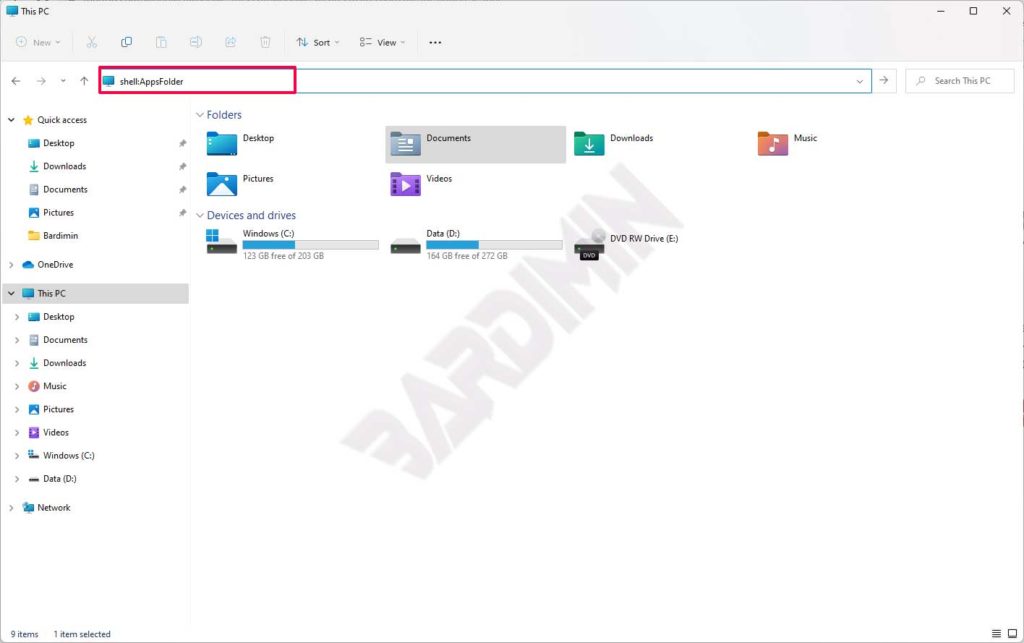
- Press Win + R to open the Run dialog.
- Type
shell:AppsFolderand press Enter. A special folder containing all modern apps opens. - Find the desired app (e.g., Spotify or Minecraft).
- Right-click the app icon, then select “Create shortcut”. Windows shows a notification that the shortcut will be placed on the desktop. Click “Yes” or “OK”.
This method also works for built-in Windows apps like Paint 3D, the new Calculator, or Your Phone. The resulting shortcuts behave just like regular ones.
Additional Tips for Professionals and Technicians
Beyond the three methods above, here are some advanced techniques to boost productivity.
- Change shortcut icon: Right-click the shortcut, select Properties, then the Shortcut tab, click “Change Icon”. You can pick icons from .exe or .dll files. This helps organize shortcuts by project.
- Add a hotkey: In the shortcut properties, fill in the “Shortcut key” field (e.g., Ctrl + Alt + N). Press that combination anytime to launch the program.
- Run as administrator: On the Shortcut tab, click “Advanced”, then check “Run as administrator”. This is important for system tools or certain games needing elevated rights.
- Network folder shortcut: Open File Explorer, browse to the network folder (e.g.,
\\server\data), then drag while holding the right mouse button and select “Create shortcuts here”.
For gamers, shortcuts with special parameters can trigger high-performance mode or skip game intros. Example: add +fps_max 144 to a Source Engine game shortcut (CS:GO, Apex Legends) via the Target field.
Shortcuts created from
shell:AppsFoldercannot have their icon or hotkey changed directly via standard properties. Use third-party software like Shortcut Manager for deeper customization.
Troubleshooting Non-Working Shortcuts
Sometimes a shortcut stops working. Common cause: the original file location was moved or deleted. Solutions:
- Right-click the shortcut, select Properties. Check the “Target” field. If the address is red or invalid, click “Find Target” to locate the file again.
- If the program was moved, redirect the target to the new location.
- For Microsoft Store apps, go to Settings > Apps > Installed apps, select the app, then click “Advanced options” and use “Reset” or “Repair”.
Also, ensure your desktop is not in “Tablet mode” or “Folder view” that hides shortcuts. Press F5 to refresh the desktop after creating new shorcuts (typo – should be “shortcuts”).
With this guide, you have mastered how to easily create shortcuts on desktop in Windows 11. From regular apps, document files, to games and system tools, everything can be accessed in two clicks. Practice these three methods as needed.