Windows Sandbox WSB configuration empowers technicians and gamers to build a highly isolated, secure, and customizable testing environment using simple XML files, enabling the safe execution of suspicious applications without risking the primary operating system.
In contemporary cybersecurity workflows and software quality assurance, the demand for a disposable execution space is non-negotiable. Running an untrusted binary directly on a production machine is an invitation for disaster. Microsoft addresses this gap with Windows Sandbox, a lightweight desktop environment that operates as a temporary, isolated replica of your current Windows installation. Unlike traditional virtual machines that rely on heavy VHDX disk images, Windows Sandbox leverages hardware-based virtualization and a dynamic snapshot of the host OS. This architecture guarantees a clean slate every time the window is closed. This article details the hardware prerequisites, the precise installation methodology, and the advanced Windows Sandbox WSB configuration tactics required to tailor the environment for professional malware triage, software debugging, or browsing sessions that demand zero forensic footprint.
Minimum and Optimal Hardware Requirements for Windows Sandbox
The performance and stability of Windows Sandbox hinge entirely on hardware compatibility and the correct Windows edition. Many users encounter launch failures due to overlooked nuances in these baseline requirements. Before diving into any Windows Sandbox WSB configuration files, verify that the host machine meets the following specifications.
- Operating System Edition: Windows 10/11 Pro, Enterprise, or Education. Windows Sandbox is strictly unavailable on Home or Single Language editions.
- Processor Architecture: AMD64 (x64) or ARM64 (supported on Windows 11 Build 22483 and later).
- Hardware Virtualization: Intel VT-x or AMD-V technology must be explicitly enabled within the UEFI/BIOS firmware settings.
- Memory (RAM): A minimum of 4 GB is required, though performance will be severely constrained. 8 GB or more is strongly advised to prevent disk thrashing and lag.
- Storage Space: At least 1 GB of free space. An SSD, preferably NVMe, is highly recommended due to the intense read/write operations occurring during Sandbox initialization.
- CPU Cores: Minimum of 2 cores. A quad-core processor with hyper-threading ensures a responsive and usable virtual environment.
Installation and Activation Procedure for Windows Sandbox
The deployment process involves two critical phases: confirming virtualization status and enabling the optional Windows feature. Execute the following steps in sequence to ensure a successful setup before proceeding with any Windows Sandbox WSB configuration.
1. Verifying Hardware Virtualization Support
This step is a mandatory prerequisite. Consumer-grade motherboards often disable virtualization extensions by default in the firmware, rendering the Sandbox feature non-operational.
- Launch Task Manager using the Ctrl + Shift + Esc keyboard shortcut.
- Navigate to the Performance tab and select the CPU section.
- Locate the entry labeled Virtualization at the bottom of the graph area. The status must display Enabled.
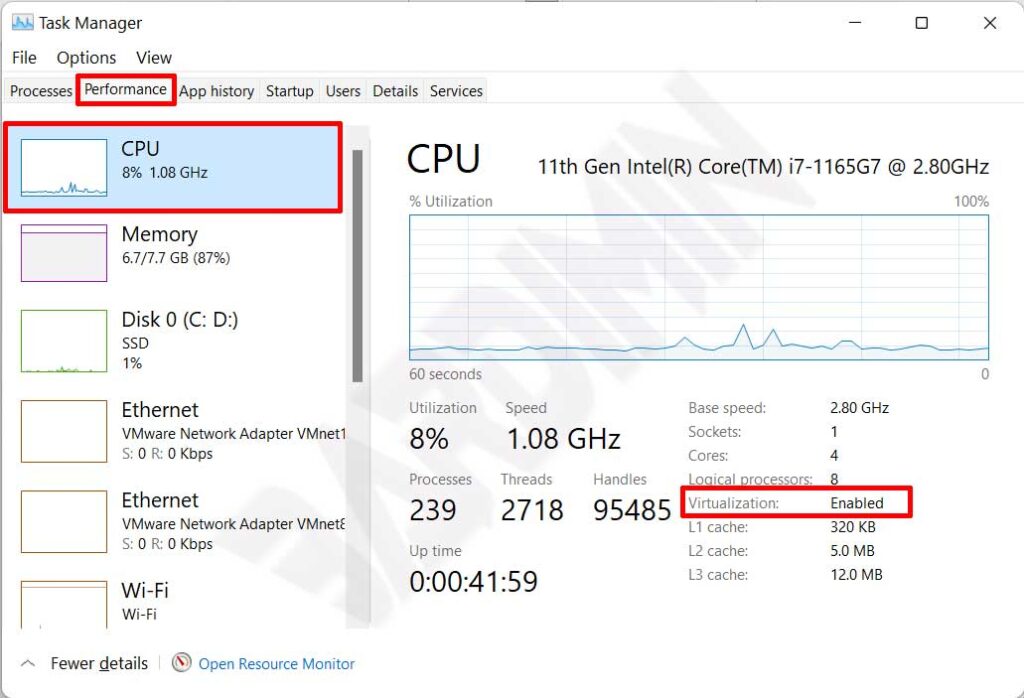
Critical Note: Should virtualization be disabled, restart the computer and access the UEFI menu (commonly by pressing Del, F2, or F10 during boot). Search for settings labeled Intel Virtualization Technology, VT-x, or SVM Mode and set the value to Enabled. Save the changes and exit the firmware.
2. Adding the Windows Sandbox Feature
Once virtualization is active, the feature can be added via the graphical interface or Windows PowerShell. The GUI method is straightforward and accessible for most technicians.
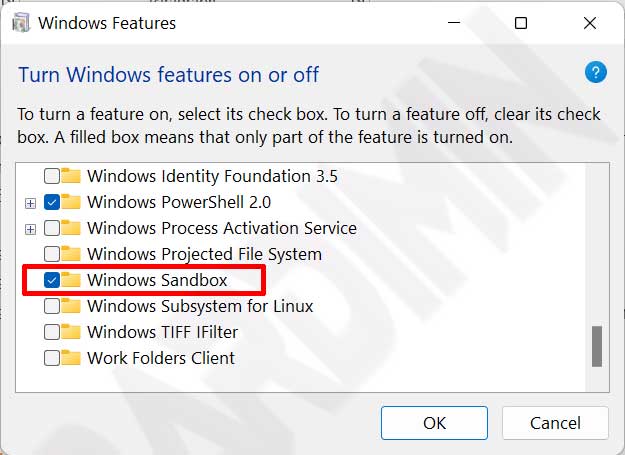
- Open the classic Control Panel and navigate to Programs > Turn Windows features on or off.
- In the Windows Features dialog, scroll through the list to locate Windows Sandbox.
- Check the box adjacent to Windows Sandbox. Dependent components such as Hyper-V and Windows Hypervisor Platform will be selected automatically.
- Click OK and allow Windows to download and integrate the necessary binary files.
- Restart the machine to complete the kernel-level integration process.
Alternative Method via PowerShell (Run as Administrator): For command-line aficionados, execute the following elevated command in PowerShell. A system reboot is mandatory after execution.Enable-WindowsOptionalFeature -FeatureName "Containers-DisposableClientVM" -Online -All
Basic Operational Guide for Windows Sandbox
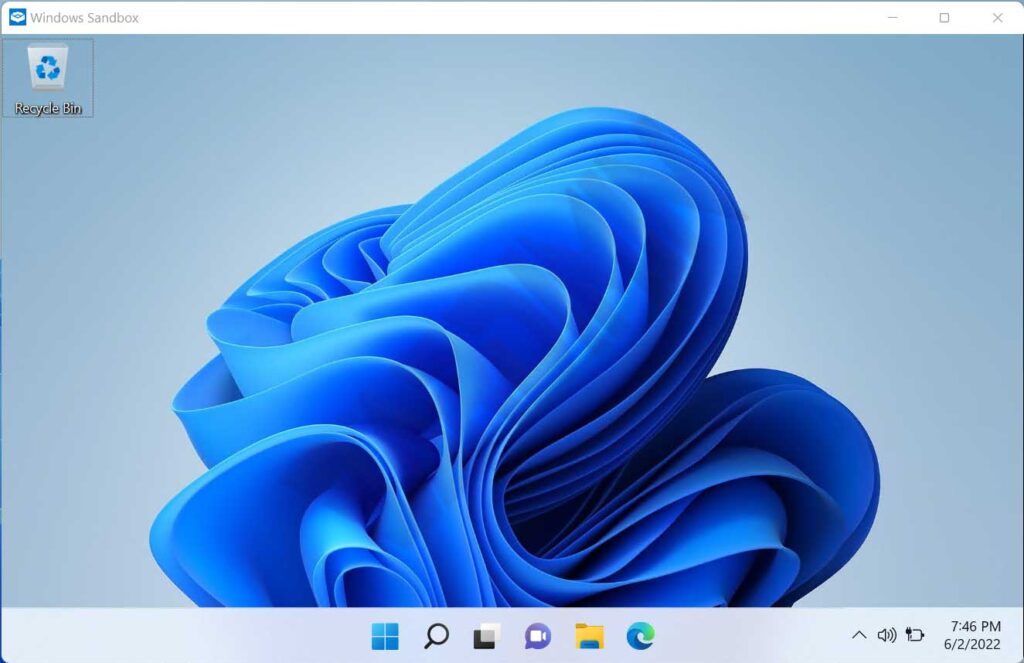
Following a successful installation, locate “Windows Sandbox” via the Start Menu and launch it with administrative privileges. The operational paradigm is elegantly simple yet remarkably effective for containment.
- Transferring Test Files: Copy a suspicious installer or executable from the host machine and paste it directly onto the Windows Sandbox desktop. The clipboard integration between host and guest is seamless by default.
- Execution and Observation: Run the application. Monitor its network connections, registry modifications, or file system changes without any concern for permanent damage.
- Session Termination: Once the analysis concludes, simply close the Windows Sandbox window by clicking the ‘X’ button. A warning dialog will appear stating, “All contents will be discarded and permanently deleted.” Confirm the action to annihilate the virtual environment completely.
Optimization and Customization via Windows Sandbox WSB Configuration
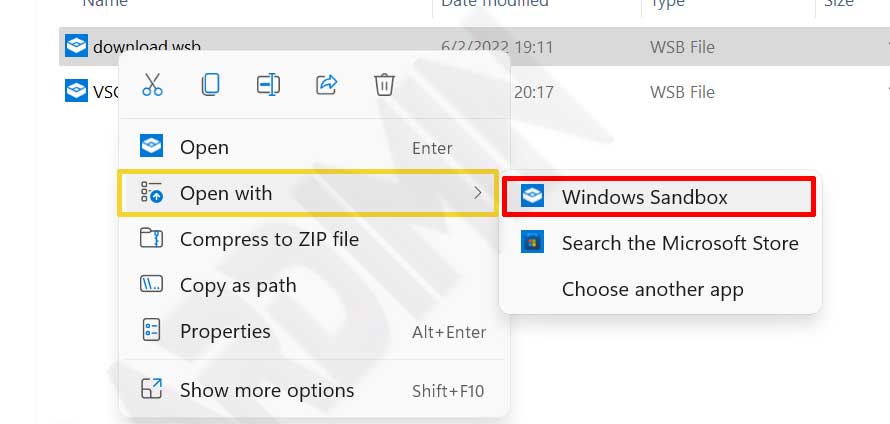
The default instance of Windows Sandbox is intentionally spartan. It retains no state and blocks host folder access by design. For professionals aiming to streamline their workflow, creating a configuration file with the .wsb extension is essential. These files are written in a straightforward XML schema and form the cornerstone of any advanced Windows Sandbox WSB configuration.
Utilizing a WSB file allows you to define memory allocation caps, toggle virtual GPU support, and even execute automated scripts upon Sandbox launch. To utilize a configuration, save the XML markup as a text file with the .wsb extension and open it via Open with > Windows Sandbox.
The following parameters represent the primary modifiable entities within the XML schema used for a robust Windows Sandbox WSB configuration.
- vGPU (Virtual GPU): Accepts values of
EnableorDisable. Enable this if the sandboxed application requires DirectX hardware acceleration. - Networking: Accepts values of
EnableorDisable. Disabling this is a best practice when analyzing malware that may attempt to beacon out to a Command and Control server. - Mapped Folders: Projects host directories into the Sandbox with read-only permissions (
true) or full read/write access (false). - MemoryInMB: Specifies a fixed RAM allocation. Example:
<MemoryInMB>4096</MemoryInMB>restricts the guest to 4 GB of memory. - LogonCommand: Executes a specified PowerShell script, Command Prompt instruction, or Explorer window upon user logon.
- ProtectedClient: Enforces stricter security measures on the internal RDP connection bridging the host and guest.
- ClipboardRedirection & PrinterRedirection: Governs the sharing of host peripherals and I/O streams with the isolated environment.
Use Case: Windows Sandbox WSB Configuration for Malware Analysis
A common scenario involves a technician needing to inspect a sample stored in D:\MalwareSamples without granting the malicious code any permission to write back to the host drive. The following malware-test.wsb file demonstrates a secure Windows Sandbox WSB configuration for this exact purpose.
<Configuration>
  <VGpu>Disable</VGpu>
  <Networking>Disable</Networking>
  <MemoryInMB>2048</MemoryInMB>
  <MappedFolders>
    <MappedFolder>
      <HostFolder>D:\MalwareSamples</HostFolder>
      <SandboxFolder>C:\Users\WDAGUtilityAccount\Desktop\Samples</SandboxFolder>
      <ReadOnly>true</ReadOnly>
    </MappedFolder>
  </MappedFolders>
  <LogonCommand>
    <Command>C:\Windows\System32\WindowsPowerShell\v1.0\powershell.exe -Command "Start-Sleep -Seconds 2; explorer C:\Users\WDAGUtilityAccount\Desktop\Samples"</Command>
  </LogonCommand>
</Configuration>
The configuration outlined above disables networking to mitigate lateral movement risks, maps the host folder as a read-only resource on the guest desktop, and automatically launches File Explorer to the sample directory upon startup.
Troubleshooting Windows Sandbox Failures
In certain edge cases, Windows Sandbox may stubbornly refuse to initialize. This is typically rooted in service conflicts or Group Policy restrictions. The following diagnostic steps can help identify the bottleneck.
- Error 0x80070002 / File Not Found: Ensure the Windows Sandbox feature is not stuck in a “Pending” state. Run
DISM /Online /Cleanup-Image /RestoreHealthfrom an elevated prompt and attempt a reinstallation. - Error 0x80072746 / Connection Aborted: Often triggered by third-party VPN clients or overly aggressive firewall rules. Temporarily disable security software to isolate the cause.
- Hypervisor Initialization Failure: Verify that the Virtual Machine Platform optional feature is also enabled. As a nuclear option, disable Windows Sandbox, reboot, re-enable the feature, and reboot again.
Windows Sandbox vs. Traditional Hypervisors
It is vital to understand that Windows Sandbox does not aim to replace full-stack virtualization platforms like VMware Workstation or VirtualBox. Sandbox does not support persistent snapshots, cannot host non-Windows guest operating systems, and is tightly coupled with the host kernel. However, its sub-five-second boot time makes it unparalleled for rapid, iterative testing of Windows-native applications.
By mastering the nuances of the Windows Sandbox WSB configuration XML schema and adhering to system requirements, this utility evolves from a hidden checkbox in Windows Features into a portable, high-efficiency security laboratory. Whether you are a gamer vetting a third-party mod or an IT technician performing incident response triage, integrating Sandbox into your workflow provides an essential layer of hardware and data protection against the unexpected.
Incorporating this native isolation technology into your daily testing regimen is a prudent step toward safeguarding both your digital assets and peace of mind.