Do you want to split partition C in Windows 11 without formatting? If yes, then you are in the right place. In this article, Bardimin will show you an easy way to do just that by using Disk Management and EaseUS Partition Master. Both tools can help you manage your hard disk partitions easily and safely.
Why Do You Need to Split Partition C in Windows 11?
Partition C is the system partition that contains important Windows 11 files, such as boot, registry, and installed programs. Partition C usually has a large size, because Windows 11 needs enough space to run smoothly. However, there are several reasons for split partition C in Windows 11, such as:
- Improve system performance. If partition C is too full, then the system will become slow and prone to errors. By dividing partition C, you can allocate enough space to the system and frequently used programs, improving system performance.
- Organize data better. If you store all your data in partition C, then it is difficult to search and organize your data. By splitting partition C, you can create other partitions to store your data according to categories, such as documents, photos, videos, and music. This will make it easier for you to access and manage your data.
- Prevent data loss. If partition C suffers damage or failure, then you will lose all your data stored in partition C. By splitting partition C, you can back up your system partition in another partition so that you can easily restore your system in case of problems.
How to Split Partition C in Windows 11 with Disk Management
Disk Management is a built-in tool of Windows 11 that you can use to create, delete, resize, and format your hard disk partitions. Here are the steps to split partition C in Windows 11 with Disk Management:
- Open Disk Management by right-clicking on Start Menu and selecting Disk Management.
- In the Disk Management window, right-click on partition C and select Shrink Volume.
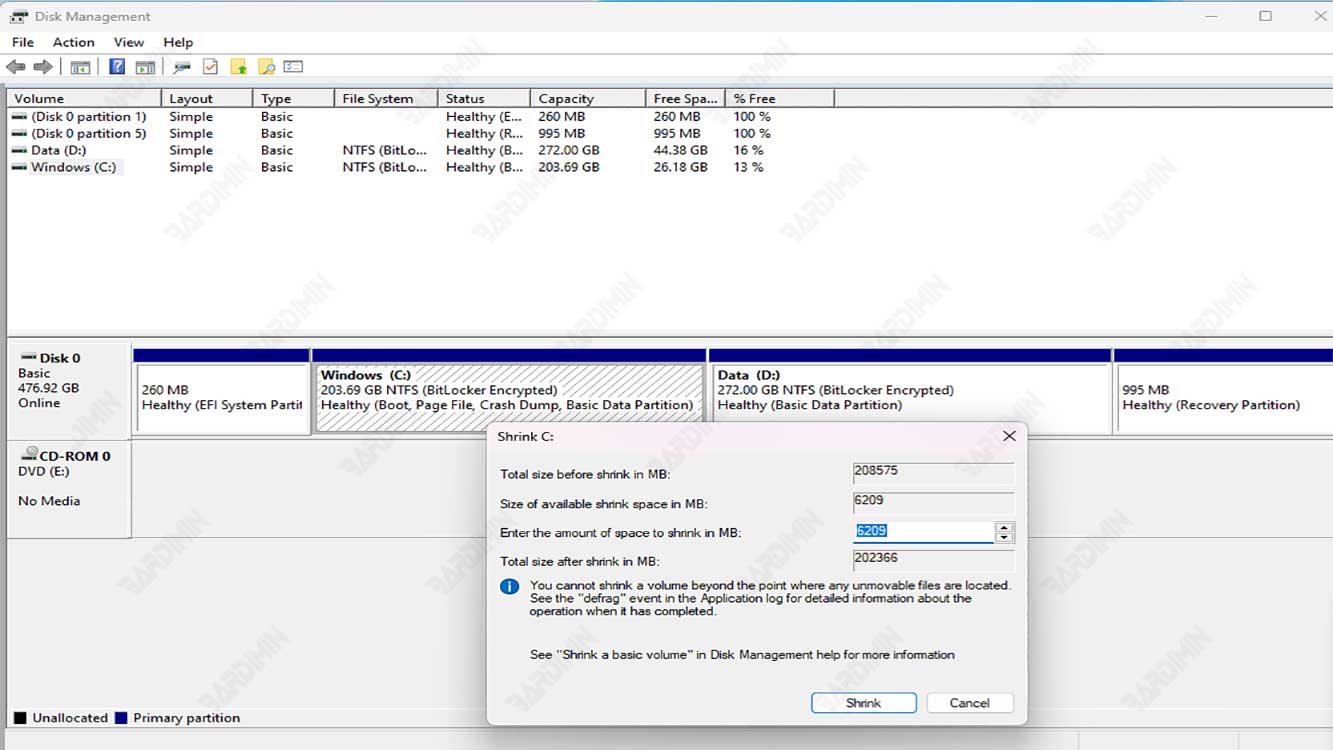
- In the Shrink Volume window, enter the amount of space you want to subtract from partition C in the column Enter the amount of space to shrink in MB. Make sure you leave enough space for partition C for the system to run smoothly. Then click Shrink.
- After the shrink process is complete, you will see a new free space to the right of partition C. Right-click on the free space and select New Simple Volume.
- In the New Simple Volume Wizard window, click Next.
- In the Specify Volume Size window, enter the volume size you want in the Simple volume size in MB field. You can use the entire available free space or leave a portion to create another partition. Then click Next.
- In the Assign Drive Letter or Path window, select the drive letter you want for your new partition. You can choose any letter that other partitions haven’t used yet. Then click Next.
- In the Format Partition window, select the file system, allocation unit size, and volume label you want for your new partition. You can also choose to do Quick Format or not. Then click Next.
- In the Completing the New Simple Volume Wizard window, review the information you entered and click Finish.
- Wait until the new partition creation process is complete. Then you can view your new partition in the Disk Management window and File Explorer.
