The purpose of a graphics card is to render visuals. Your computer can’t display any information, only most of it is working fine, no graphics card. Simply put, the GPU receives input from the CPU and works with the software to determine where the pixels on the screen should be placed.
Graphics cards produce high-quality visual output by processing and executing graphic data using advanced graphics techniques, features, and capabilities. Graphics adapter, graphics controller, graphics accelerator card, or graphics board are all names for graphics cards.
Graphics cards have several technical specifications that affect their performance. If you are considering buying a graphics card, it is very important to consider important specifications such as GPU, RAM, and power requirements.
How to Check Graphic Card (GPU) Specifications
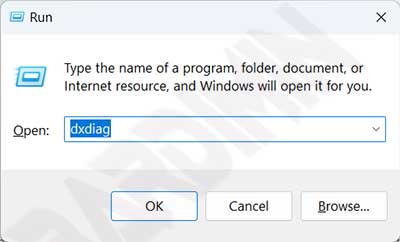
- Open “DirectX Diagnostic Tool”. To open it, press the keyboard key (WIN + R), then type ” dxdiag ” and click the OK button.

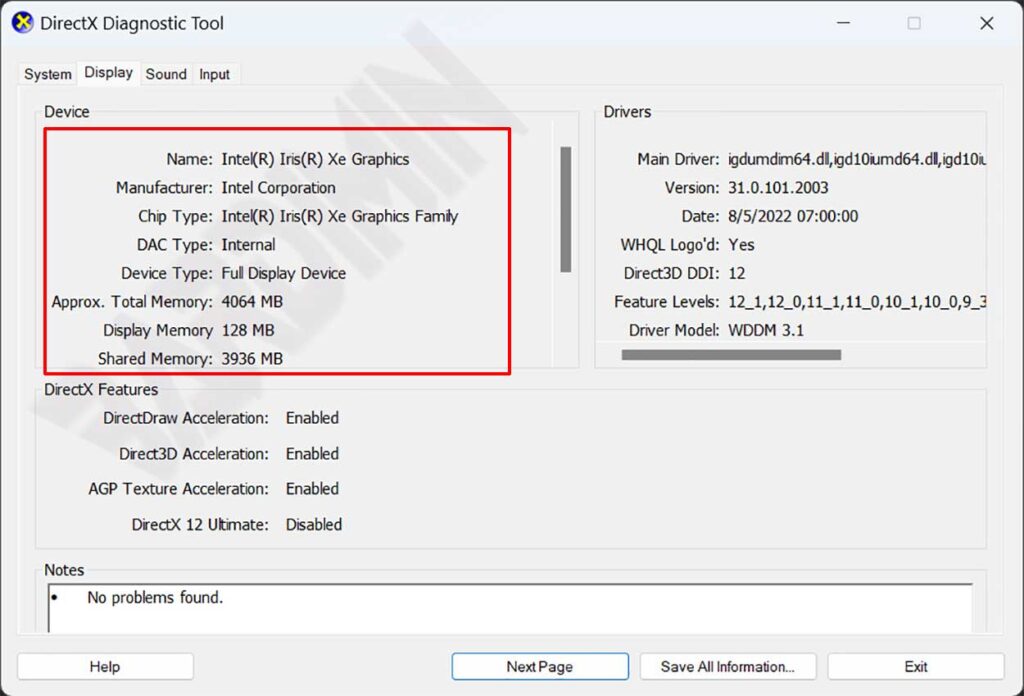
- Then select the “Display” tab. In the Device section, you will get the key information of the graphics card, such as the GPU name, amount of memory, the chipset used, and others.

How to Check Graphic Card (GPU) Specifications with GPU-Z
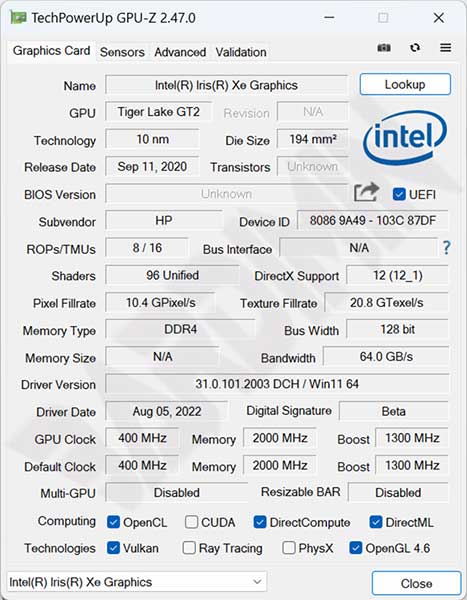
GPU-Z is an application for checking the GPU that displays much more detailed information than the DirectX Diagnostic Tool.

- Download GPU-Z.
- Run the downloaded GPU-Z application.
- In the application, you will get information: Graphics Card Name, Fake GPU Detection, GPU Internal Code Name, Technology Process, Chip Die Size, Transistor Count, Support for DirectX / Pixel Shader, Memory Type, Video Memory Amount, Memory Bandwidth, Bus Type, Bus Width, GPU Frequency (default/overclock), Memory Clock, Driver Version, BIOS Version, Sensor, GPU Core Clock, GPU Memory Clock. Low GPU, Fan speed, SLI/Crossfire.


