Using one printer for multiple computers, known as printer sharing, is a practical and cost-effective solution for both offices and homes. This method eliminates the need for a printer at every desk. The main requirement is that all devices must be connected to the same network, either via LAN cable or Wi-Fi.
This article will guide you step-by-step on how to set up printer sharing using two main methods: via USB connection and directly through the network (LAN/Wi-Fi). By following this guide, you can optimize device usage and improve work efficiency.
Printer Types Based on Network Connection
Before you begin, identify your printer type. The connection type determines the configuration method.
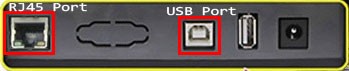
- USB Printer: The most common model. The printer connects directly to one computer via a USB cable, then that computer “shares” access to the network. Examples: Epson L Series, Canon PIXMA.
- Network Printer (LAN/RJ45): Mid-to-high-end printers with an Ethernet (RJ45) port. These printers can connect directly to a router/switch without depending on a single computer. Examples: HP LaserJet Pro series.
- Wi-Fi Printer: Printers that can connect to a wireless network. Initial setup is usually via USB or the control panel, then they can be accessed from all devices on the same Wi-Fi network. Examples: Epson L3150, Canon G series.
Besides these three types, there are other connections like Bluetooth or Parallel Port (LPT), but their use is rare in modern printer sharing contexts.
How to Share a USB Printer on Windows
This method is suitable if your printer only has a USB port. One computer will act as the “server” and must remain on for other clients to use the printer.

1. Install Drivers on the Server Computer
- Connect the printer to the server computer as per the manual instructions. Do not turn on the printer yet.
- Install the latest drivers from the manufacturer’s official website or use the included CD. Ensure the drivers are compatible with the server’s operating system (Windows 10/11).
- Turn on the printer when prompted during installation.
Important note:
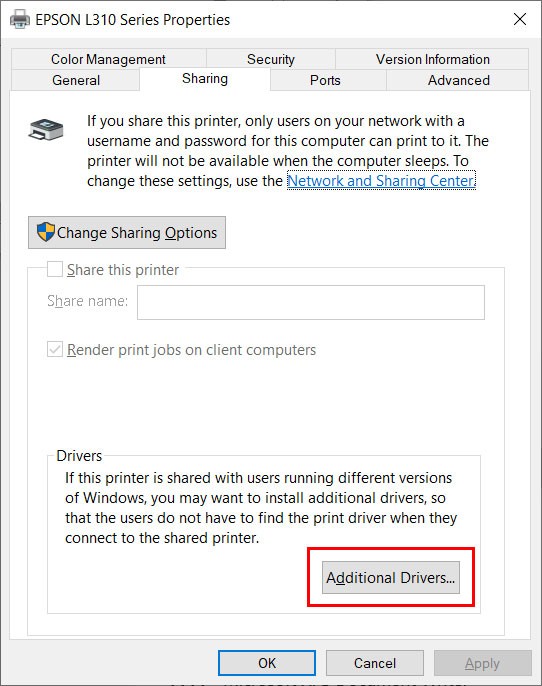
If there are client computers on the network with a different system architecture (x64 or x86) than the server, you need to add additional drivers on the server. Go to Printer Properties > Sharing > Additional Drivers. Without this, clients will not be able to connect.
2. Enable Sharing Features on the Server
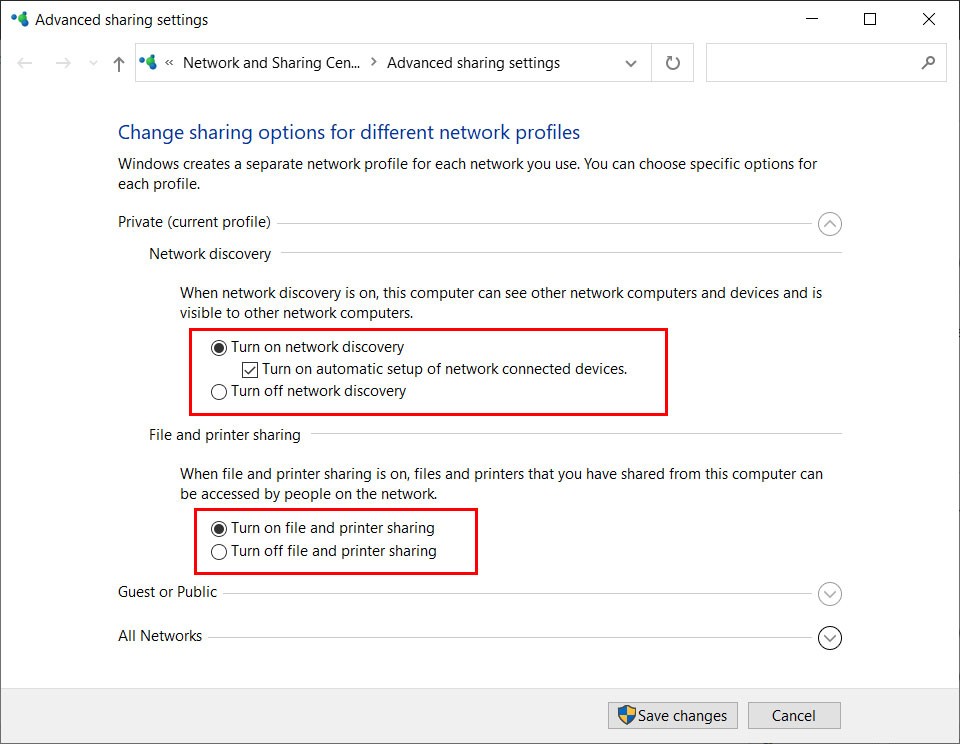
- Open Control Panel > Network and Sharing Center > Advanced sharing settings.
- Enable the options Turn on network discovery and Turn on file and printer sharing.
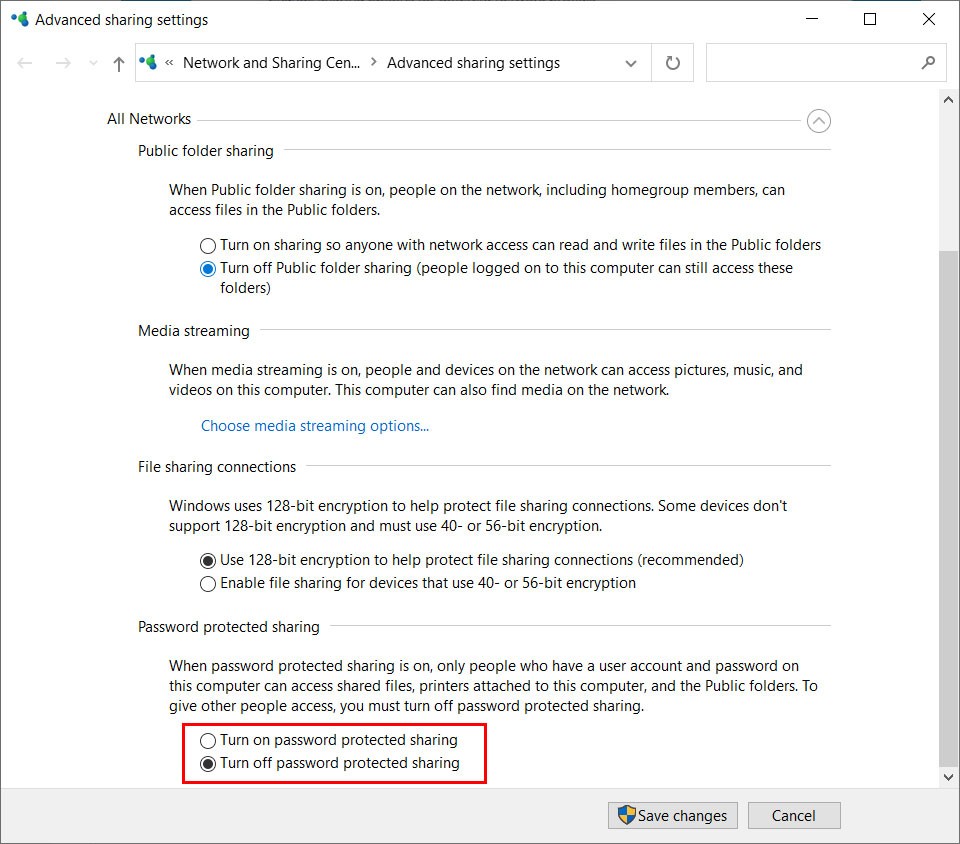
- Under the All Networks section, disable the Password protected sharing option for easier initial connection. You can re-enable it later for security.
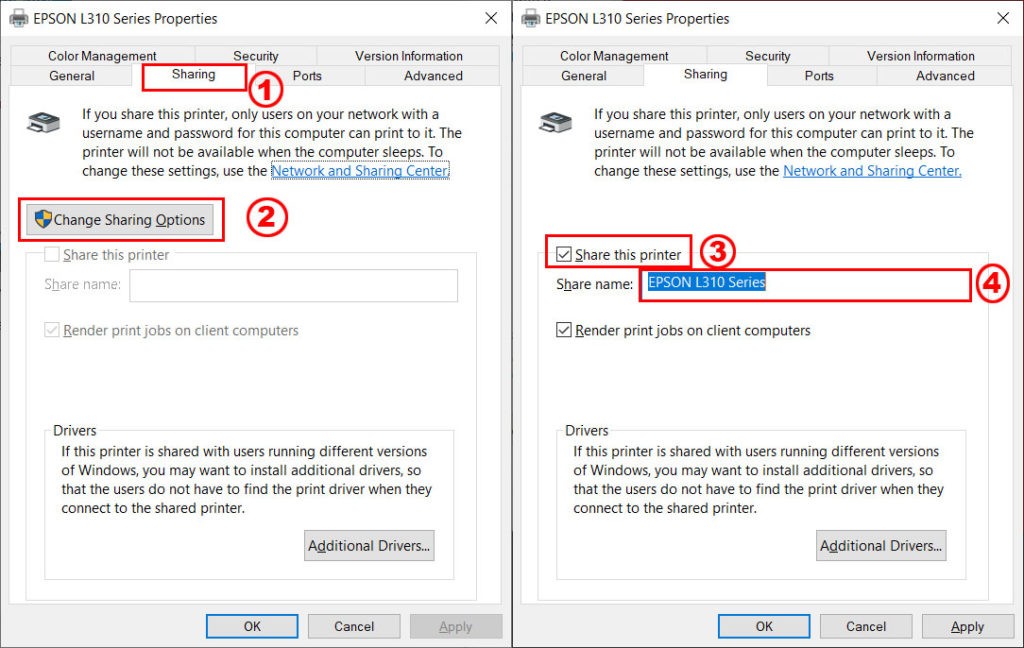
- Return to Control Panel > Devices and Printers. Right-click on the target printer and select Printer properties.
- Go to the Sharing tab, check Share this printer, and assign an easy-to-remember name (optional). Click OK.
3. Connect Client Computers to the Printer
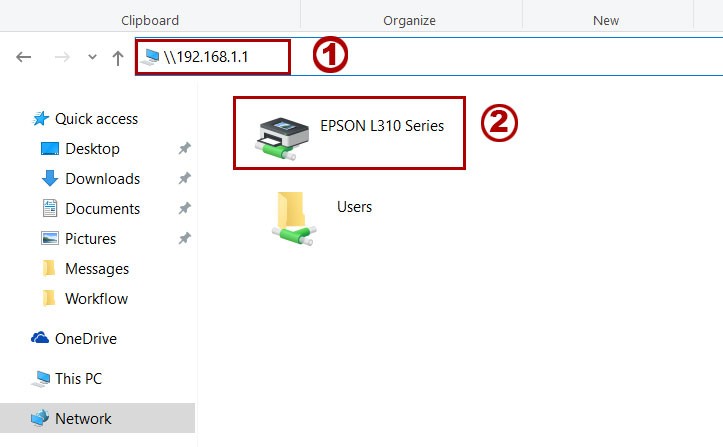
- On the client computer, open File Explorer. In the address bar, type
\\[SERVER_NAME_OR_IP]. For example:\\SERVER-PCor\\192.168.1.10. - You will see the icon of the shared printer. Double-click it and follow the driver installation process on the client. The system will usually download the driver automatically from the server.
Once completed, the printer will appear in the client’s device list and is ready to use. The drawback of this method is that the server computer must always be on. If the server is turned off, printer sharing access will be lost for all clients.
How to Share a Printer via LAN or Wi-Fi Network
For printers with built-in network features (LAN/Wi-Fi), the process is simpler because the printer is independent. Each computer can connect directly without relying on a main PC.

- Ensure the printer is connected to the network and has obtained an IP address. You can check this from the printer’s menu or via the router’s configuration page.
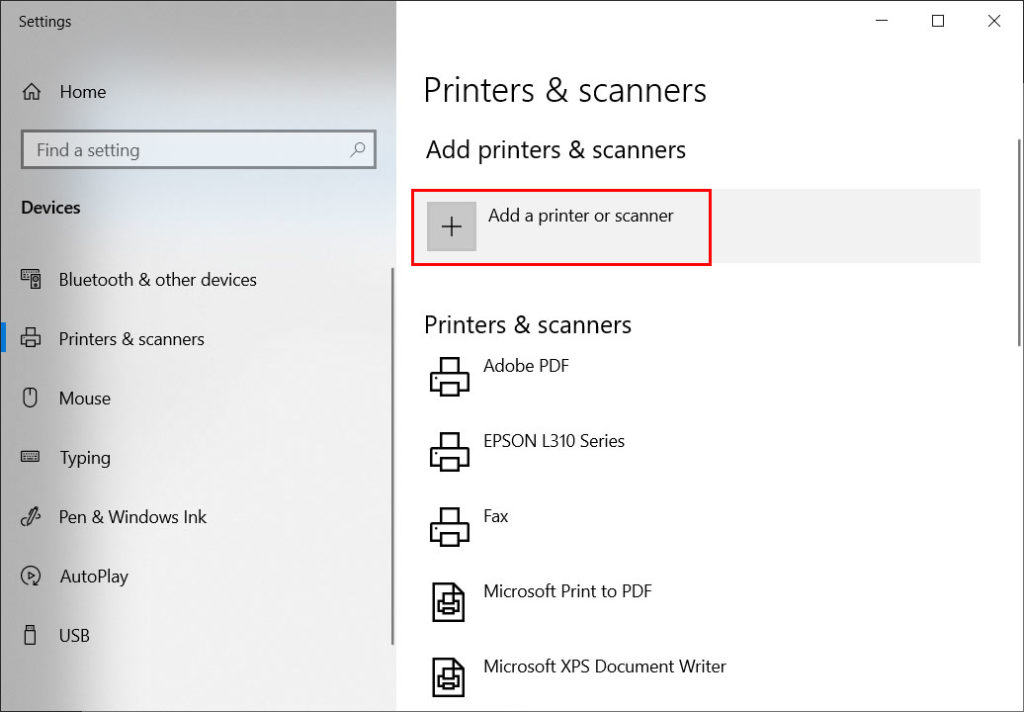
- On the client computer (Windows 10/11), go to Settings > Devices > Printers & scanners. Click Add a printer or scanner.
- Windows will scan. If the printer appears, select it and click Add device.
If the printer does not appear, click the option “The printer that I want isn’t listed”.
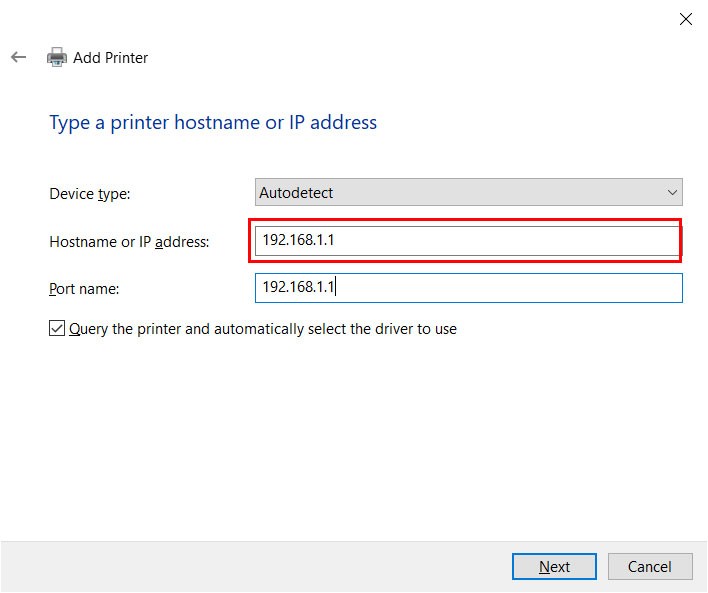
- In the new window, select “Add a printer using a TCP/IP address or hostname” and click Next.
- Choose device type “TCP/IP Device”. Enter the printer’s IP address you noted earlier. Leave the port automatic. Click Next.
- The system will detect the printer. Select the appropriate driver (Windows may already have it, or you can choose “Have Disk” to install a driver manually). Follow the subsequent steps to completion.
With this method, each computer connects directly to the printer. Therefore, even if one computer is turned off, others can still print. This is a more stable printer sharing solution and is recommended for work environments.
Latest Tips (2024): For Windows 11 users, ensure the SMB 1.0/CIFS File Sharing Support feature (especially the Client component) in Turn Windows features on or off is enabled if you encounter connection issues with older server computers. Also, always download the latest drivers from the manufacturer’s website for optimal compatibility with Windows updates. Source: Microsoft Support.
By mastering both these printer sharing techniques, you can choose the best solution according to your infrastructure and team needs. If you encounter issues, ensure the firewall is not blocking the connection and that all devices are on the same network.