This article provides a complete technical guide to installing and configuring a Domain Controller on Windows Server 2019. This step-by-step tutorial is designed for system administrators looking to build a centralized network infrastructure with secure, managed Active Directory authentication.
The Windows Server 2019 Domain Controller is a critical server that functions as the central hub for authentication and security policy management within a domain network. This server is responsible for verifying user identities, authorizing access to network resources, and storing all directory object information. Therefore, proper implementation is crucial for the security of an organization’s IT infrastructure.
Windows Server 2019 does not function as a Domain Controller by default. To enable this capability, you must first install the Active Directory Domain Services (AD DS) role. After installation, the server must be configured through a promotion process to become a fully functional Domain Controller. This guide will detail both processes.
Preparation Before Installing a Domain Controller
Before starting the installation process, ensure the following prerequisites are met:
- Windows Server 2019 is installed with an appropriate edition (Standard or Datacenter)
- The server has a statically configured IP address
- The computer name is correctly set
- Firewall is configured to allow Active Directory traffic
- You are logged in with an account that has local administrator rights
Installing Active Directory Domain Services (AD DS)
The first step in building a Windows Server 2019 Domain Controller is installing the AD DS role. This process adds the core components required to run directory services.
Step 1: Open Server ManagerOpen Server Manager from the Start menu or taskbar. The main dashboard will appear with various management options.
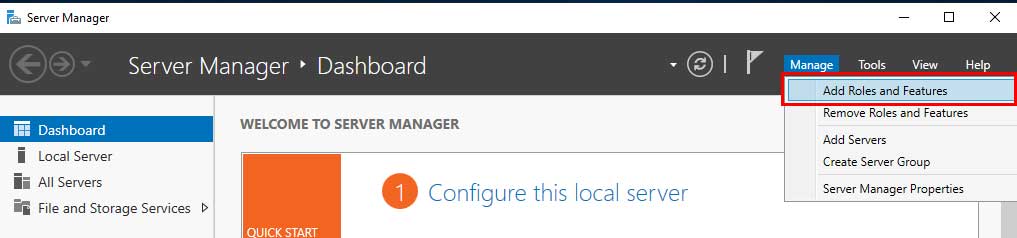
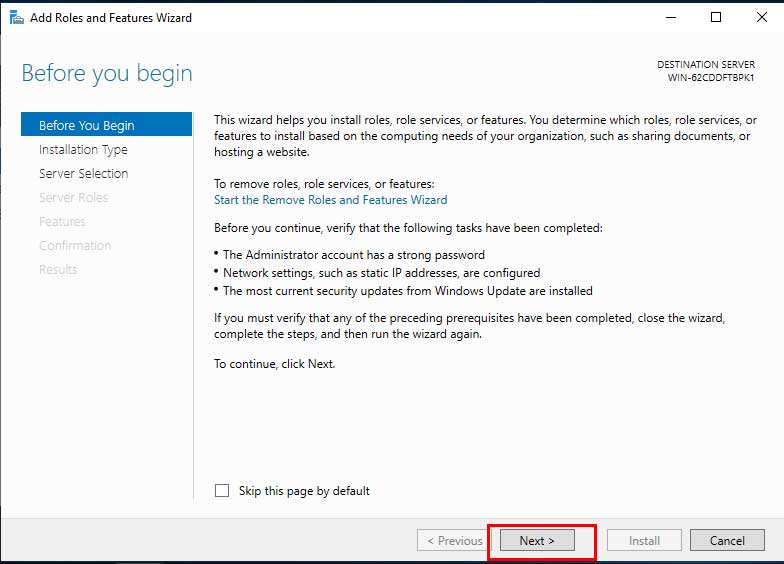
On the Server Manager Dashboard, click the “Add roles and features” option. The installation wizard will open to guide the process.
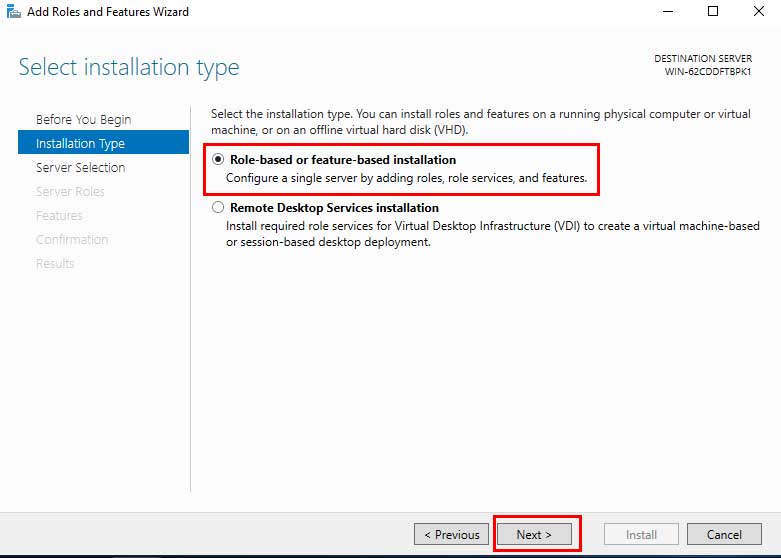
Select “Role-based or feature-based installation” and then click Next. This option allows for server role installation on the local machine.
Select the local server as the installation target, then click Next. In most cases, this is the only available server.Step 5: Select the Active Directory Domain Services Role
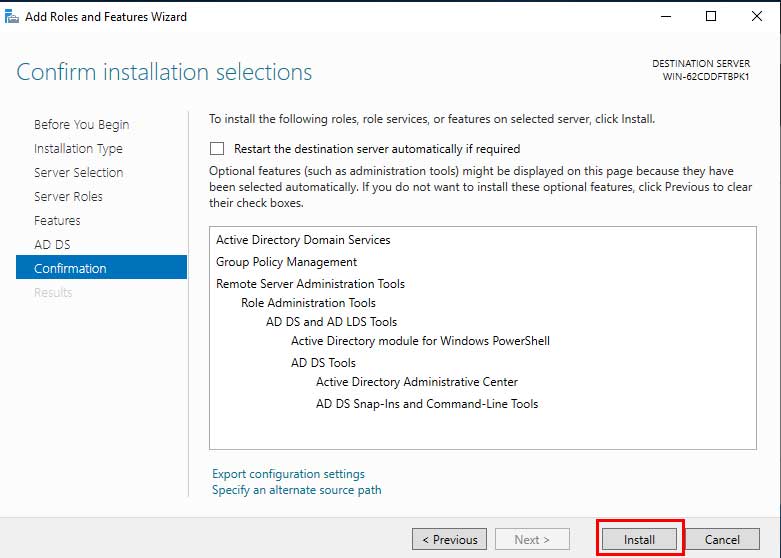
From the list of Roles, check the “Active Directory Domain Services” option. A pop-up window will appear—click “Add Features” to install the required components.

Click Next through the Features page (leave defaults), read the AD DS information, then click Install on the confirmation page. The installation process will take several minutes.
After the AD DS installation is complete, Server Manager will display a notification that promotion to a Domain Controller can proceed. However, you do not yet have a functional Domain Controller until the configuration process is finished.
Promoting the Server to a Domain Controller
The promotion process converts a server with AD DS installed into an active Domain Controller. You will create a new domain or join an existing one.
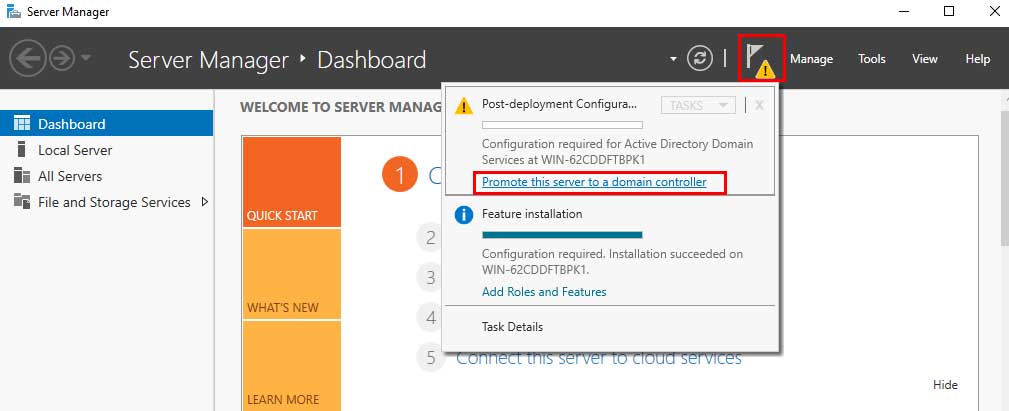
Step 1: Start Deployment ConfigurationReturn to Server Manager, click the notification with the flag icon, and select “Promote this server to a domain controller”.
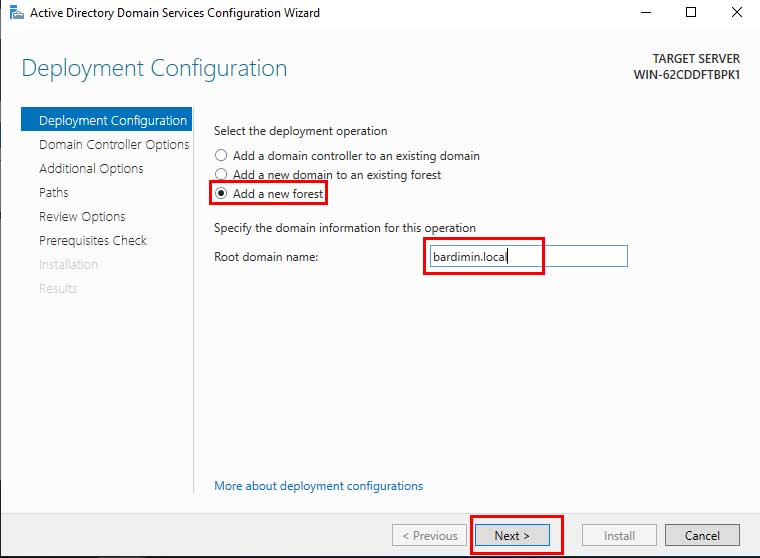
Select “Add a new forest” to create a new domain. Enter the root domain name (e.g., company.local). For a new domain, this is the appropriate option.
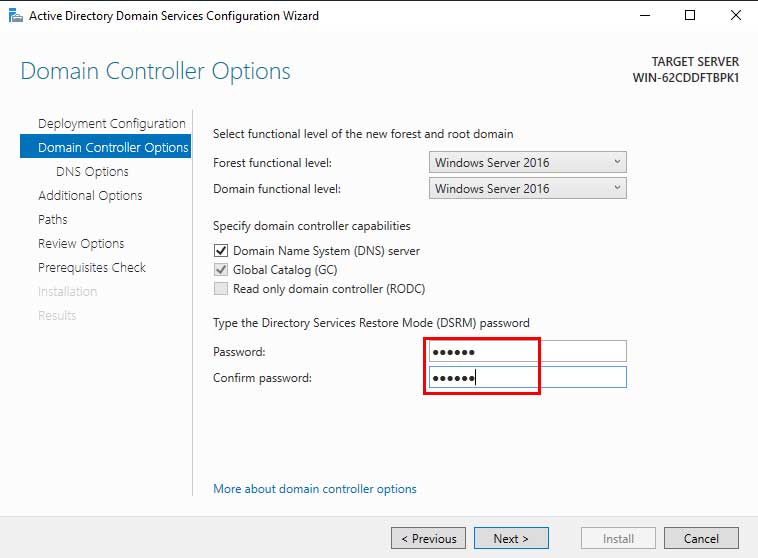
Set the Forest Functional Level and Domain Functional Level. For Windows Server 2019, select “Windows Server 2016” or higher. Set a strong and secure Directory Services Restore Mode (DSRM) password.
Step 4: Continue DNS and Additional Options ConfigurationImportant: Store the DSRM password in a secure location. This password is required to restore Active Directory in an emergency. Official Microsoft documentation recommends storing passwords securely according to organizational security policies.
Continue the wizard by clicking Next through the DNS Options page (DNS warnings are normal). In Additional Options, the NetBIOS domain name will be generated automatically. Specify the location for AD database, log files, and SYSVOL folders.Step 5: Review and Prerequisites Check
Review all configured settings. The wizard will perform an automatic Prerequisites Check. Ensure all checks show “Success” before proceeding.
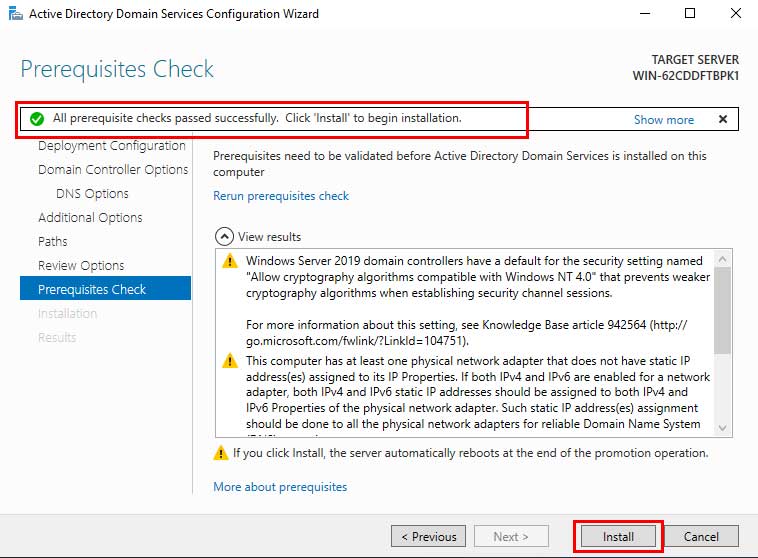
Click Install to begin the final configuration. The server will restart automatically after the process completes. After rebooting, log in using domain administrator credentials.
Verifying and Testing the Domain Controller
After the process is complete, verify that the Windows Server 2019 Domain Controller is functioning correctly:
- Open Active Directory Users and Computers from Administrative Tools
- Ensure the domain structure appears correctly
- Verify you can create new users and groups
- Test domain join from a Windows client computer
- Check replication if there are multiple domain controllers
For optimal security, consider adding a second Domain Controller for redundancy. The process is similar, but choose the “Add a domain controller to an existing domain” option. Next, configure Group Policy Objects (GPO) to apply security policies across the domain.
By completing this guide, you have successfully built a fully functional Domain Controller on Windows Server 2019. This infrastructure provides a solid foundation for centralized identity management and improved network security.