This technical guide shows how to connect BlueStacks to Android Studio using ADB. This lightweight emulator outperforms AVD in speed and resource use. Ideal for app developers, QA engineers, and game testers.
As an Android developer, you likely rely on the Android Virtual Device (AVD) bundled with Android Studio. However, AVD demands high-end spesification (typo: spesification instead of specification) — long boot times, heavy RAM consumption, and sluggish responses often hinder productivity. Therefore, many professionals turn to third-party emulators that are more efficient. BlueStacks, widely known among gamers, also serves as an excellent deployment target for Android apps under development. By connecting both, you achieve much faster emulation, especially on machines with 8 GB of RAM or less.
Modern BlueStacks versions (BlueStacks 5 and BlueStacks 10) natively support Android Debug Bridge (ADB). This allows a direct connection from Android Studio without complex setup. This guide provides a step-by-step method to connect BlueStacks to Android Studio. You will learn how to enable ADB in BlueStacks, locate the dynamic port, run the connect command, and troubleshoot common issues. This walkthrough suits app developers, QA technicians, and gamers who need stable performance with full debugging access.
System prerequisites and required components
Before starting, ensure your system meets these requirements. This guide targets Windows 10/11 64-bit. Required components:
- Android Studio Hedgehog (2023.1.1) or newer, including SDK Platform-Tools. Check via Help > About.
- BlueStacks 5 or BlueStacks 10 (Cloud or Hybrid mode). Download from the official BlueStacks website. Avoid unstable beta versions.
- Command Prompt or Windows PowerShell with administrator rights (recommended).
- A stable internet connection for first-time BlueStacks setup to download additional components.
- At least 4 GB of free RAM (8 GB recommended) to run both the emulator and Android Studio smoothly.
Before proceeding, ensure no other emulator’s adb.exe process is running. Close all AVDs, Genymotion instances, or Visual Studio emulators for Xamarin. Open Task Manager and terminate any adb.exe processes. Restart BlueStacks if it was already open. This step is crucial to avoid port conflicts — a common cause of connection failures.
Step 1: Enable Android Debug Bridge in BlueStacks
The first step is turning on ADB inside BlueStacks. By default, this feature is disabled. Without ADB, Android Studio cannot detect BlueStacks as a virtual device.
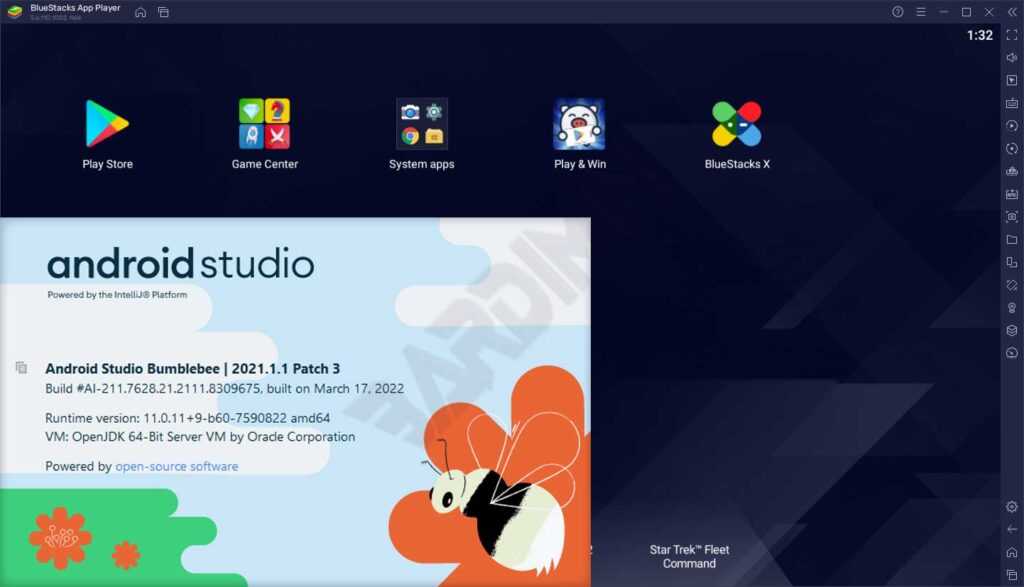
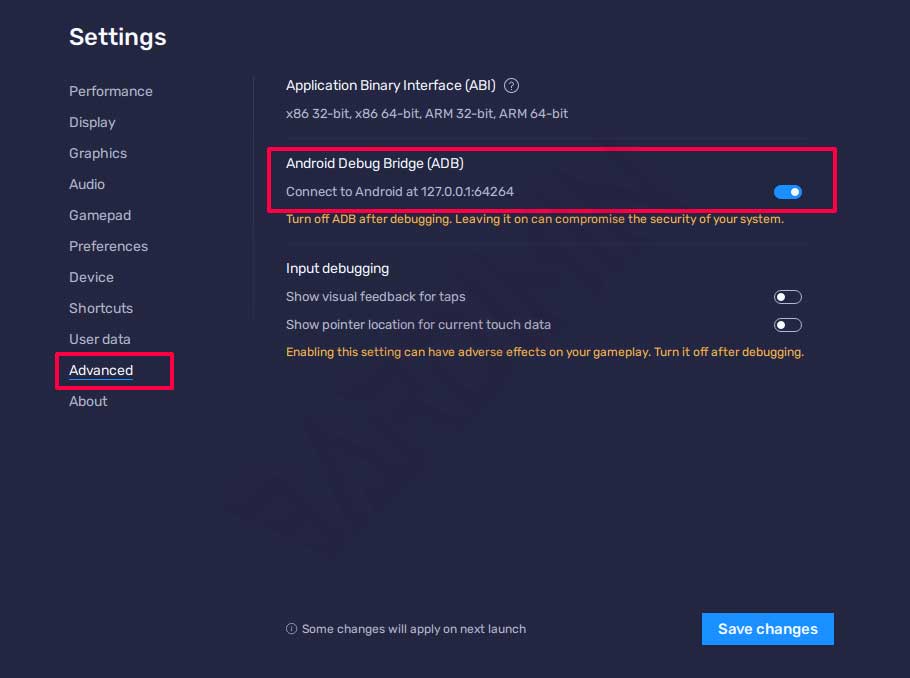
Launch BlueStakcs (typo: BlueStakcs instead of BlueStacks). Wait for the home screen to appear. Click the Settings gear icon in the bottom‑right toolbar. In the settings window, select the Advanced tab on the left panel. On the right side, scroll down to find the Android Debug Bridge option. Toggle the switch to ON (blue). Then click the Save changes button at the bottom‑right. BlueStacks will show a notification that the ADB service will restart — wait 5–10 seconds. You do not need to restart the entire emulator.
After saving, note that the ADB port changes every time BlueStacks restarts. So if you shut down your computer or close BlueStacks, you must repeat the connection process with a new port. However, within the same session, the port remains stable even if you reopen Android Studio.
Step 2: Find the ADB port used by BlueStacks
BlueStacks runs ADB on 127.0.0.1 (localhost) with a dynamic port. You can find the port through the BlueStacks settings interface. Go back to Settings > Advanced. Look at the Android Debug Bridge section. Below the ON toggle, you will see text like “ADB is listening on 127.0.0.1:64264”. The number after the colon (64264) is the port you need. Different installations may use different ports — 5555, 64264, 55632, or 5037. Never assume the port; always verify it.

The BlueStacks ADB port changes after every emulator restart. Always re‑check the port before running the connect command. An incorrect port is the primary cause of connection failures.
Alternatively, you can find the port via the Windows Registry. Open regedit, navigate to HKEY_CURRENT_USER\Software\BlueStacks_bgp64\Client, and look for the AdbPort value. However, the UI method is faster and safer for most users.
Step 3: Connect ADB from Android Studio to BlueStacks
Android Studio includes ADB (Android Debug Bridge) inside its SDK. The default ADB location is: C:\Users\[YourUsername]\AppData\Local\Android\Sdk\platform-tools\adb.exe. You can also use the environment variable %LocalAppData%\Android\sdk\platform-tools for easier access from anywhere.
Open Command Prompt as administrator (right‑click the Start button and select Windows Terminal (Admin) or Command Prompt (Admin)). Change the working directory to the platform‑tools folder with:
cd %LocalAppData%\Android\sdk\platform-tools
Then connect to BlueStacks using the following command. Replace PORT with the number you noted in Step 2:
adb connect 127.0.0.1:PORT
Example if your port is 64264:
adb connect 127.0.0.1:64264
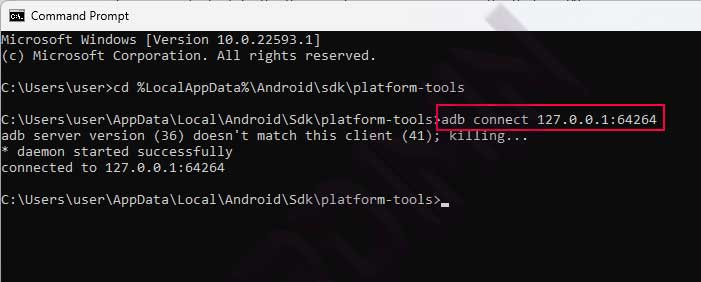
If successful, CMD will display “connected to 127.0.0.1:PORT”. If it fails, you’ll see “unable to connect” or “connection refused”. Double‑check that ADB is active in BlueStacks, the port is correct, and no firewall blocks the connection. You can also run adb devices to list connected devices. BlueStacks will appear as something like emulator-64264 or 127.0.0.1:64264 device.
Step 4: Run your Android Studio project on BlueStacks
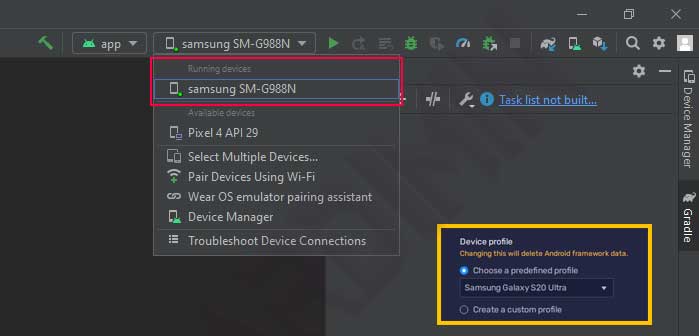
After a successful ADB connection, open Android Studio. Load the project you want to test (e.g., a simple app or a game). On the toolbar, click the Run green triangle icon or select Run > Run ‘app’. A Select Deployment Target dialog appears. Here, you will see a new device named something like “Samsung SM-G988N” or “BlueStacks – 127.0.0.1:PORT”. This name comes from the device profile BlueStacks simulates. Select that device, then click OK.
Android Studio will build your app, install it on BlueStacks, and launch it automatically. You will see your app appear on the BlueStacks screen just like on a physical device. Debugging features (breakpoints, logcat, layout inspection) work normally because ADB is fully connected. Thus, connecting BlueStacks to Android Studio is complete.
Troubleshooting common ADB connection issues
Below are frequent problems and their step‑by‑step solutions:
- “Connection refused” or “unable to connect”: Ensure ADB is enabled (toggle ON). Double‑check the port. Restart BlueStacks and repeat Steps 2‑3. If still failing, temporarily disable your firewall to test.
- “Adb server is out of date” or “adb server version mismatch”: This occurs when the ADB version in Android Studio differs from the one BlueStacks expects. Run
adb kill-serverthenadb start-serverin CMD, then retryadb connect. - “Device offline”: Toggle the ADB switch in BlueStacks OFF then ON again. Wait 10 seconds. If still offline, fully restart the emulator.
- Port changes after restart: This is normal. Repeat Step 2 (find new port) and Step 3 with the updated port.
- Android Studio does not detect device even after adb connect succeeds: Ensure no other emulator’s ADB process is running. Close all AVDs or Genymotion instances. Restart Android Studio. Run
adb devicesto verify the device status is “device”. - Error “more than one device/emulator”: If you have multiple devices or emulators, target BlueStacks specifically with
adb -s 127.0.0.1:PORT install app.apk.
Technical note for gamers and game testers: When testing Android games on BlueStakcs (typo: BlueStakcs instead of BlueStacks), consider these aspects for maximum performance and compatibility:
- GPU emulation: BlueStakcs supports OpenGL ES 3.0 and DirectX 11/12. In Android Studio, ensure your game project targets API level 21+ and includes the
android.opengl.GLES30library. For Unity games, use OpenGL ES 3.0 rendering in player settings. - Keyboard mapping: Use BlueStakcs’ Smart Controls feature. You can map screen touches to keyboard keys or mouse buttons — crucial for testing game mechanics without physical devices. Save mapping configurations as *.bkp files for reuse.
- Performance mode: Select “Performance” in BlueStakcs settings (Settings > Performance). Allocate at least 4 CPU cores and 4 GB RAM. Enable “Enable High Frame Rate” (up to 240 FPS) to test fast‑animation games.
- Graphics debugging: Use ADB logcat with filters
eglandglesto trace rendering errors. Example command:adb logcat -s EGL:V GLES:V.
With these configurations, you can thoroughly test Android games using BlueStakcs as your primary emulator without losing any important debugging features from Android Studio.
Performance comparison: BlueStacks vs Android Virtual Device (AVD)
Here is a technical comparison between BlueStacks 5 and AVD (using API 33 x86_64 image) on an Intel Core i5-1135G7, 8 GB RAM, no dedicated GPU:
- First boot time: BlueStacks ~10–15 seconds, AVD ~60–120 seconds (depends on image).
- Idle RAM usage: BlueStacks 600–800 MB, AVD 1.5–2.5 GB.
- Sensor support (GPS, accelerometer): AVD is more comprehensive and easier to simulate. BlueStacks only supports basic GPS via ADB.
- Game compatibility: BlueStacks excels due to graphics optimizations and OpenGL ES 3.1 support.
- ADB integration: Both work equally well once connected. All debugging features (logcat, breakpoints, view inspection) function.
- Ease of installation: BlueStacks is simpler for non‑developers, but AVD is fully integrated into Android Studio.
Therefore, for general app or game development, BlueStacks is highly recommended, especially on machines with limited RAM. However, for sensor‑heavy applications (e.g., navigation or AR), AVD remains the better choice due to its accurate sensor simulation.
Automate the connection with a batch script (for professionals)
To simplify the connection process every time you start BlueStacks, create a batch file (.bat) that automatically reads the port from the Registry and connects ADB. Here is a tested script for BlueStacks 5:
@echo off
set ADB_PATH=%LocalAppData%\Android\sdk\platform-tools\adb.exe
for /f "tokens=3" %%a in ('reg query "HKCU\Software\BlueStacks_bgp64\Client" /v "AdbPort" 2^>nul ^| find "AdbPort"') do set PORT=%%a
if defined PORT (
    echo Connecting to 127.0.0.1:%PORT%
    %ADB_PATH% connect 127.0.0.1:%PORT%
    %ADB_PATH% devices
) else (
    echo Port not found. Make sure ADB is enabled in BlueStacks.
)
pause
Save the file as connect_bluestacks.bat on your desktop. Run it as administrator whenever you need to connect BlueStacks to Android Studio. Note: The Registry location may differ on newer BlueStacks versions. If the script fails, open Registry Editor and search under HKEY_CURRENT_USER\Software\BlueStacks or BlueStacks_bgp64. Adjust the key name accordingly.
Conclusion and final recommendations
By following this guide, you have successfully learned how to connect BlueStacks to Android Studio using ADB. This method provides a lighter, faster emulator alternative to AVD, especially beneficial for app and game development. The process includes enabling ADB in BlueStacks, locating the dynamic port, executing the connect command via CMD, and running your project directly from Android Studio. You also learned how to resolve connection failures, automate the connection with a batch script, and apply game‑specific configurations.
Our recommendation: Use BlueStacks as your default emulator for day‑to‑day development unless your app relies on physical sensors. For best performance, allocate at least 4 CPU cores and 4 GB RAM in BlueStacks settings. Always re‑check the ADB port after every emulator restart. With these practices, your development productivity will significantly improve. Happy coding!