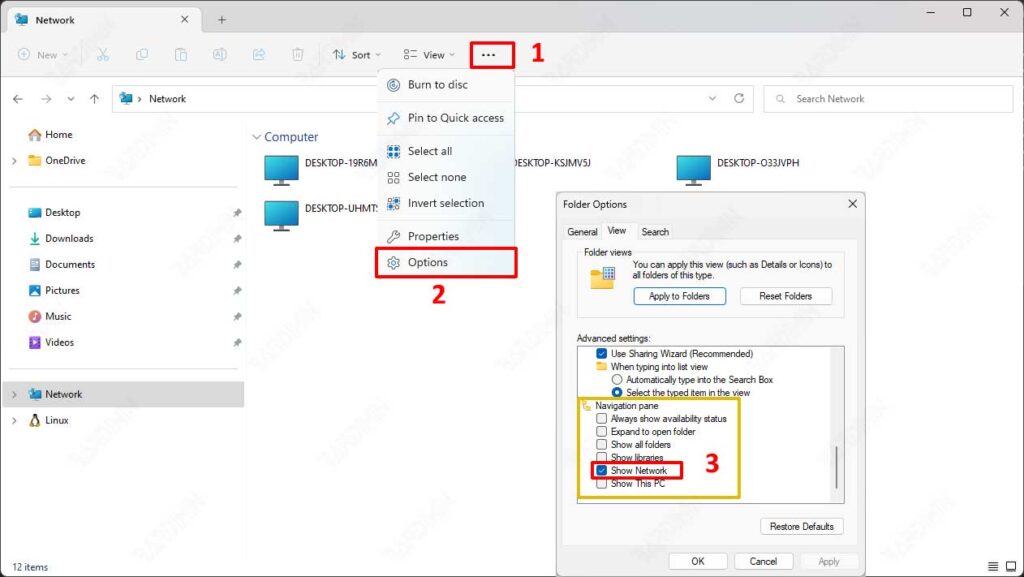
By default, Windows 11 displays the Network shortcut icon in the File Explorer panel. The icon will only be useful if you are connected to a local network.
Not all Windows users are connected to a local network (LAN). If you are not connected to a LAN, the shortcut icon will be useless. Likewise, if you enable “Network Discovery” it will be useless either.
You can remove the Network icon in File Explorer if you find it useless or if you want a simple file explorer view. Then, you can also add back if you need.
The changes you make to File Explorer will not affect the functionality of the Network in general. Add and Remove Networks only removes the appearance of the Network icon in File Explorer.
In this article, Bardimin will provide a guide to adding or removing the Network shortcut icon in Windows 11 File Explorer.
Add and Remove Networks in File Explorer
- Open File Explorer.
- Click the “three dots” icon on the File Explorer menu. Then select “Options“.

- Next will open the “Folder Options” window. Then click the “View” tab. In the “Advanced settings” section, swipe down and find the “Navigation pane“.
- In the “Show Network” item, tick to add the Network shortcut icon and uncheck to remove it.
- Click the “OK” button to apply it.

