Drive letter assignment is assigning an alphabetical identifier to a hard drive volume or partition.
On Windows operating systems, you can identify the drive by a letter and name such as “Windows (C:)“.
The most important part of the identity is the drive letter. The drive letter is unique and you cannot assign the same drive letter on another drive.
Drive letter
The drive letter is a single alphabetic character, A through Z assigned to a physical computer drive or drive partition.
On Windows, the assignment of a drive letter follows the conditions:
- A: Floppy disk drive, 3+1⁄2″ or 5+1⁄4″, and possibly other types of disk drives, if any.
- B: Reserved for a second floppy drive (the one on many PCs).
- C: Partition of the first hard disk.
- D: to Z: Other disk partitions are labeled here, including CD-ROM and USB drives.
When a flash drive, smartphone, or other drive is connected to a computer, it will get a drive letter after the last letter used. If the last letter is “D:”, then when the latest drive is connected, it will get the letter “E:”.
Lost drive letter
What happens if a drive doesn’t have a drive letter? If a drive doesn’t have a drive letter, then it won’t be accessible and won’t appear in File Explorer.
The drive letterless drive is still readable on “Disk Management” and will not damage the data present on it. For the drive to be read and accessible, you must assign a drive letter and you can do it manually.
Change the drive letter
Is it safe to change the drive letter? Changing the drive letter will not damage the data present on it. The problem that may occur is that if any application that has a reference to the drive will have a problem and you can fix it by adjusting the reference to the new drive letter.
Changing the drive letter on a drive that contains only data or an external drive such as a USB drive will not cause any problems.
How to change the drive letter in Windows 11
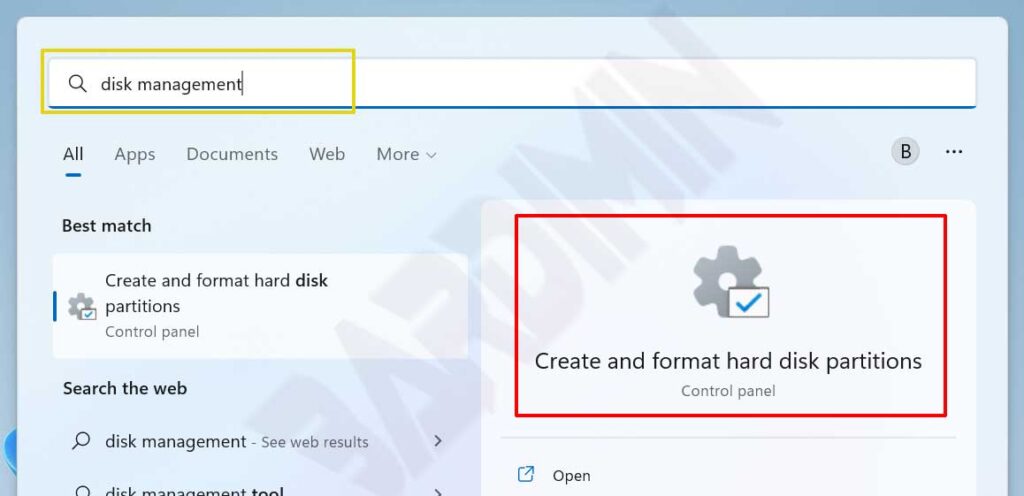
- Open “Disk Management“. You can open it through the search button on the taskbar and type “disk management”. Then click “Create and format hard disk partitions”.

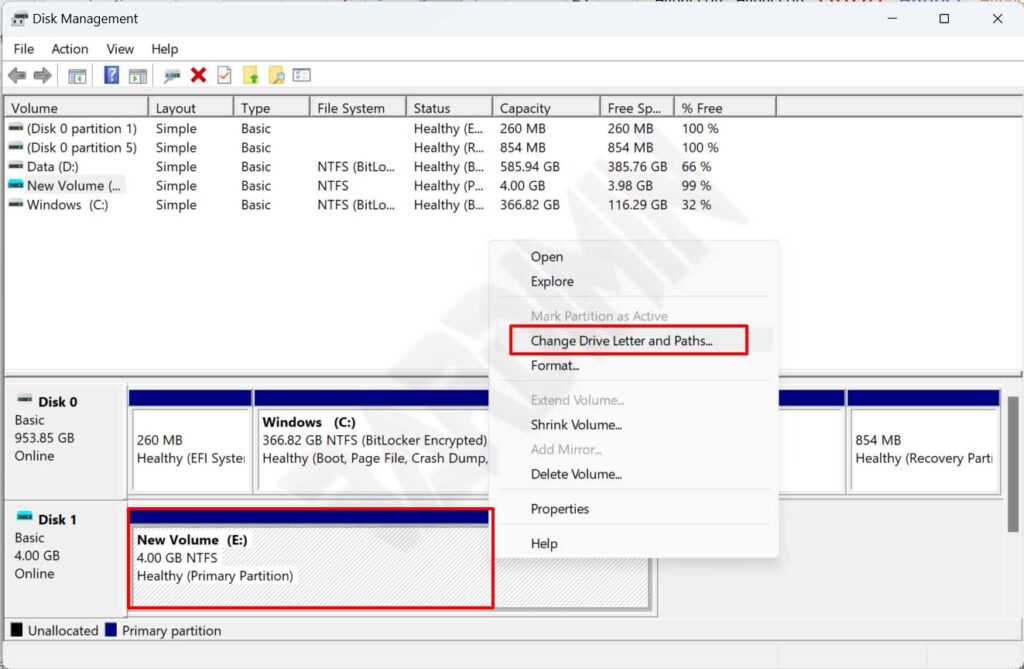
- Next in the Disk Management window, select the drive you want to convert. Then right-click on the drive and select the “Change Drive Letter and Paths” option.

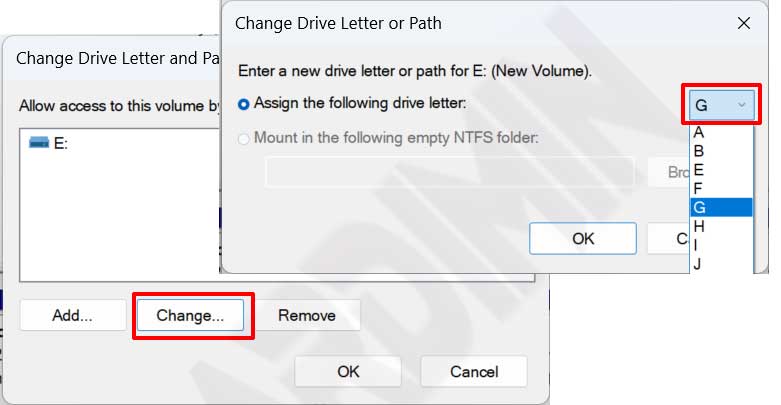
- Next will open the Change Drive Letter and Paths pop-up window and click on the “Change” button.
- Then in the new pop-up window, select “Assign the following drive letter” and on the dropdown button, select the letter.

- Then click the “OK” button to convert it.


