Creating a “Guest Account” is a safe way if you have to share your computer with others.
Guest accounts allow you to share your computer with people while maintaining your privacy. Guest account users can’t see your files and change Windows settings.
How to create a guest account on Windows 11 differs slightly from previous versions of Windows. And in this tutorial, Bardimin will show you how to make it.
Creating a guest account in Windows 11
- Open “Settings“. You can use keyboard shortcuts (WIN + I).
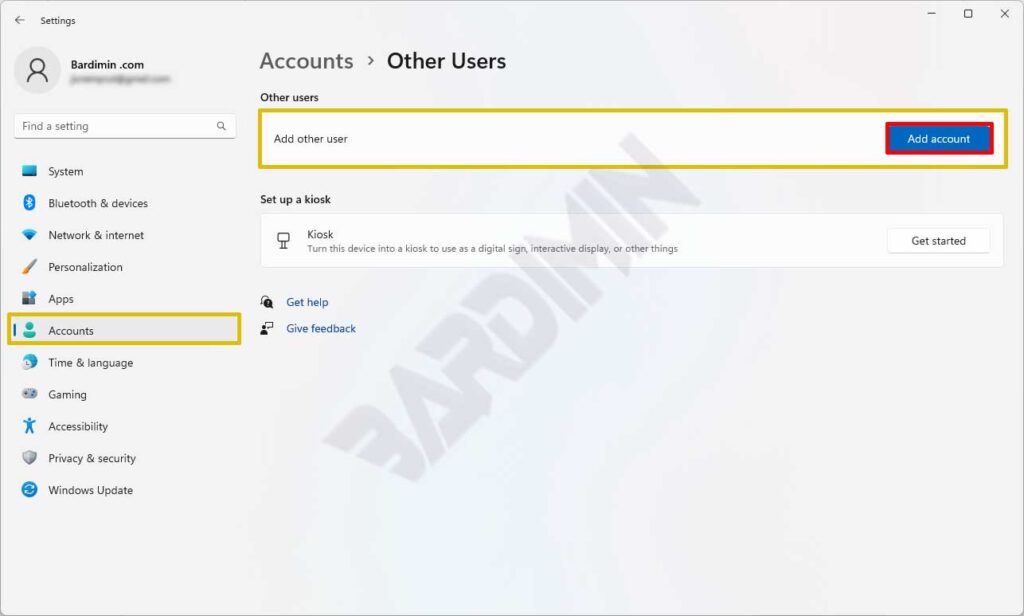
- Navigate to “Accounts > Other users“. Then on “Add other user“, click the “Add account” button.
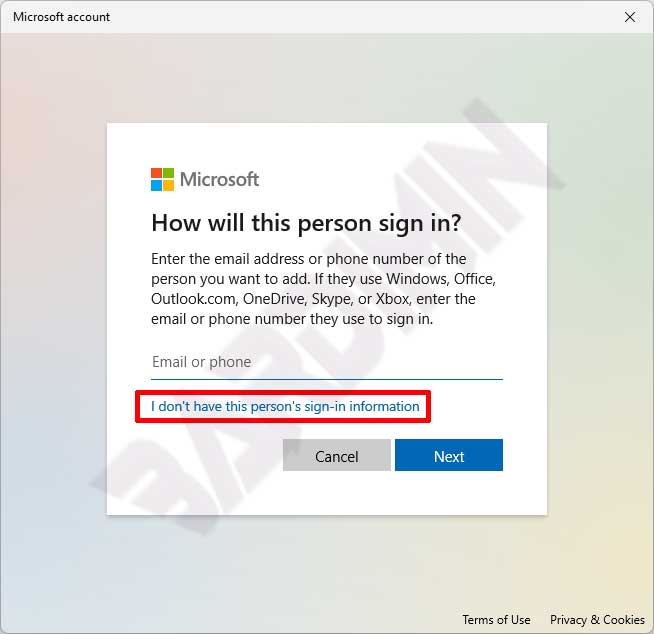
- Next, a pop-up window will appear, click “I don’t have this person’s sign-in information.
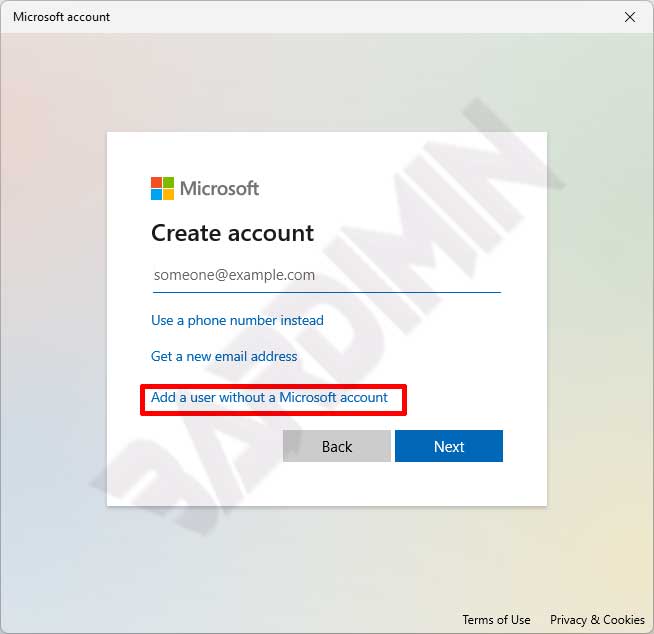
- Then select “Add a user without a Microsoft account.
- After that, enter the “Username” and “Password“. And also complete the security questions to recover the password if you forget it. Click the “Next” button to create the account.
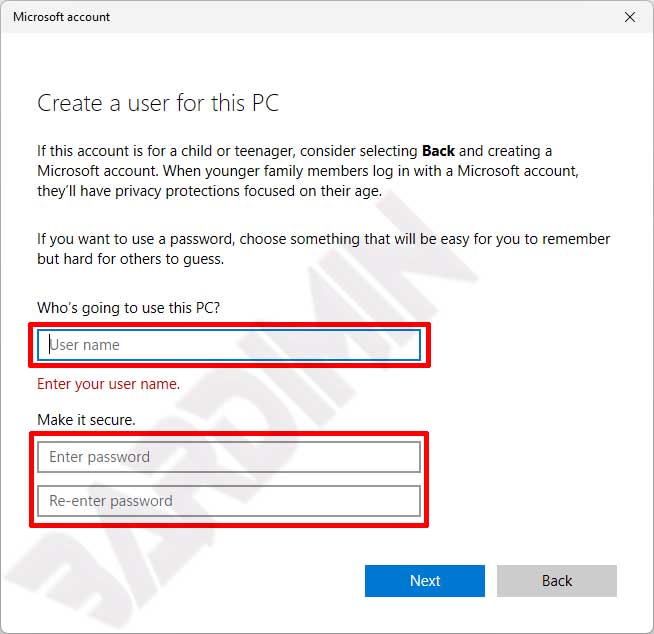
Since you are going to create a Guest Account, creating such an account without a password may be a better option.
- The account is a “Standard User“ account. You need to change it to “Guest“.
Add an account to the “Guest” user group
- Open “Computer Management“. You can open it by using (WIN + R) and typing “compmgmt.msc” and you can also open it by right-clicking the Start button and selecting “Computer Management”.
- Then navigate to “Local Users and Groups > Users“. In the right panel, select the Guest Account you created earlier and click the right. In the options, select “Properties“.
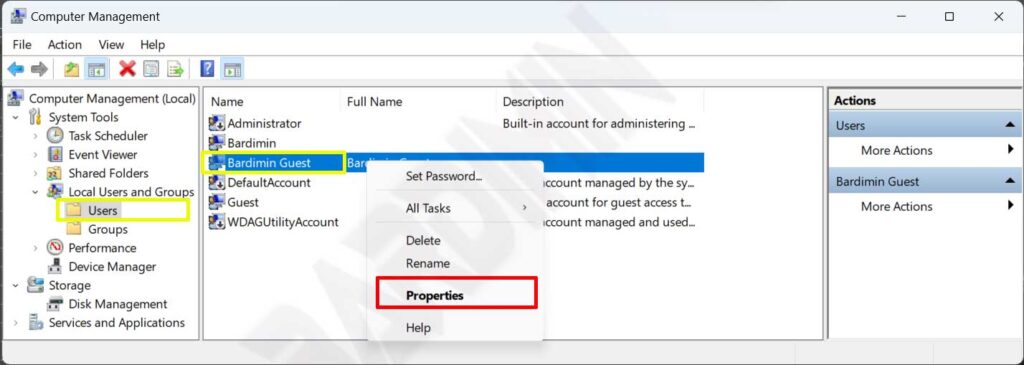
- Next, in the Properties window, select the “Member Of” tab. Then remove the guest account membership from the “Users” group. Select the “Users” group and then click the “Remove” button.
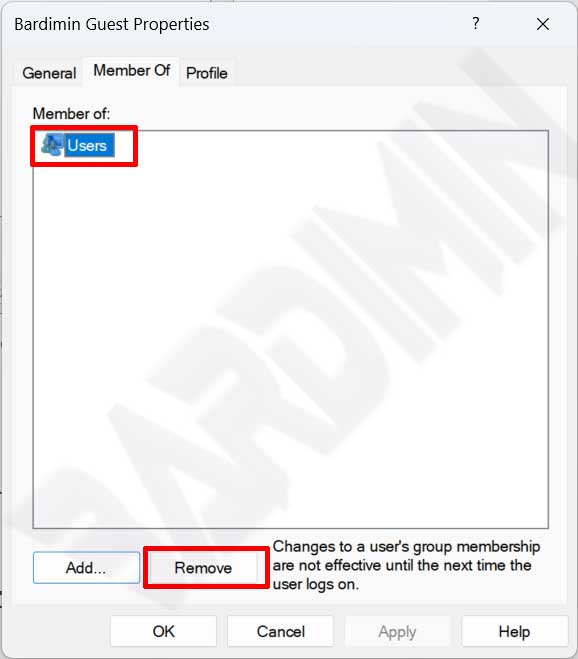
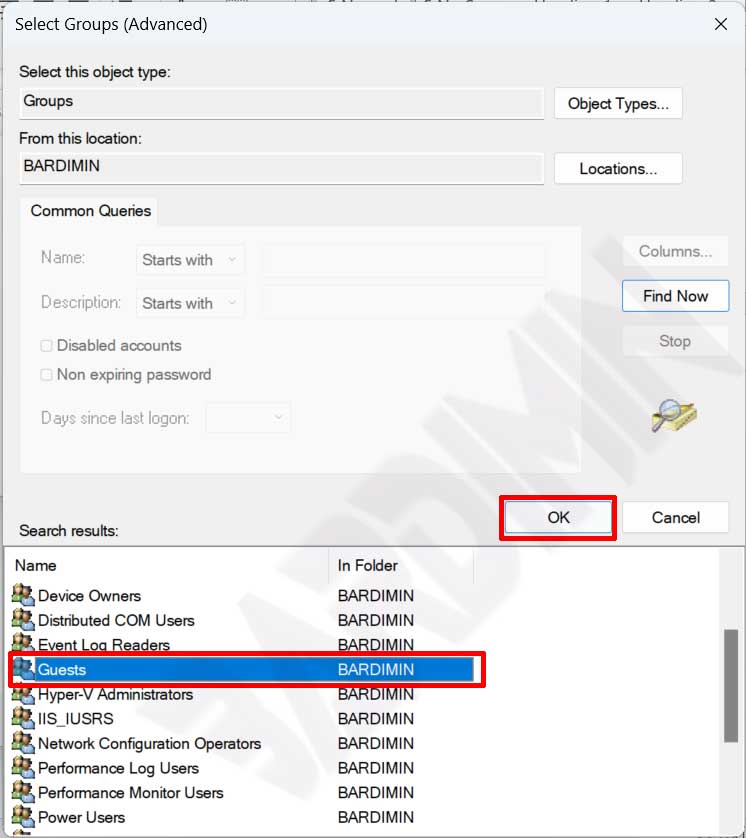
- After that, add the guest account to the “Guest” group. Click the “Add” button, and on the pop-up that appears, click the “Advanced” button.
- Next, click the “Find Now” button to display all groups. Select the “Guest” group, and click the OK button to add.
