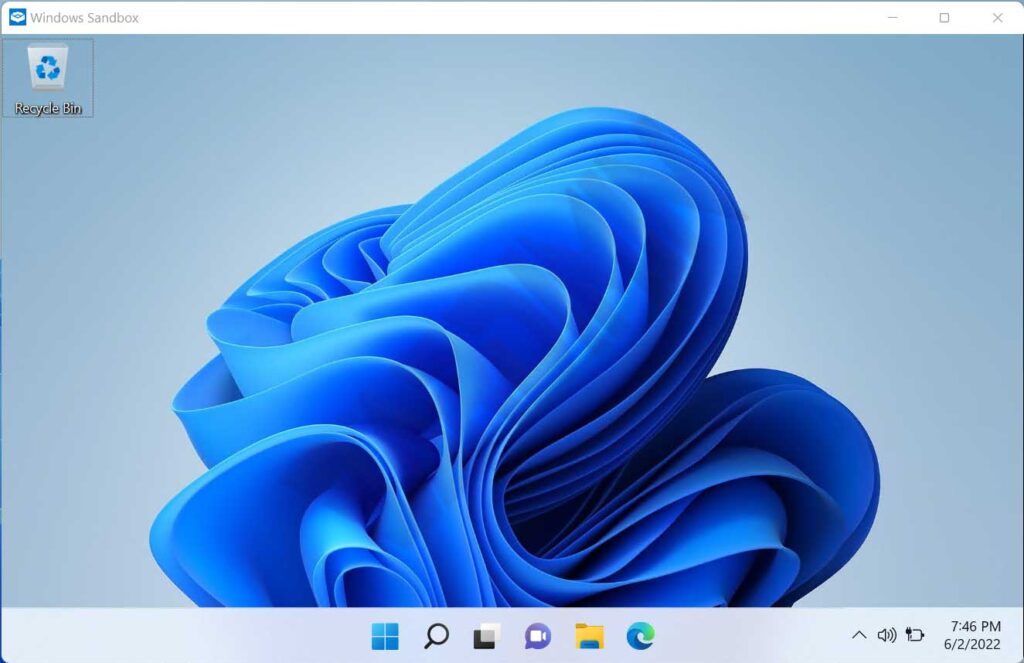
Windows Sandbox provides a lightweight and secure environment for running applications.
Software that you install in the Windows Sandbox environment will run separately from its host.
Windows Sandbox is temporary, all files and applications you install will be deleted when you close it.
Minimal requirements to run Windows Sandbox
- Windows 10 Pro, Enterprise, or Education build 18305 or Windows 11 (Windows Sandbox is not currently supported on Windows Home editions)
- AMD64 or (on Windows 11 Build 22483) ARM64 architecture
- Virtualization capability enabled in BIOS
- At least 4 GB RAM (8 GB recommended)
- At least 1 GB of free disk space (SSD recommended)
- At least two CPU cores (four cores with hyperthreading recommended)

Windows Sandbox Installation
1. Enable Virtualization in BIOS.
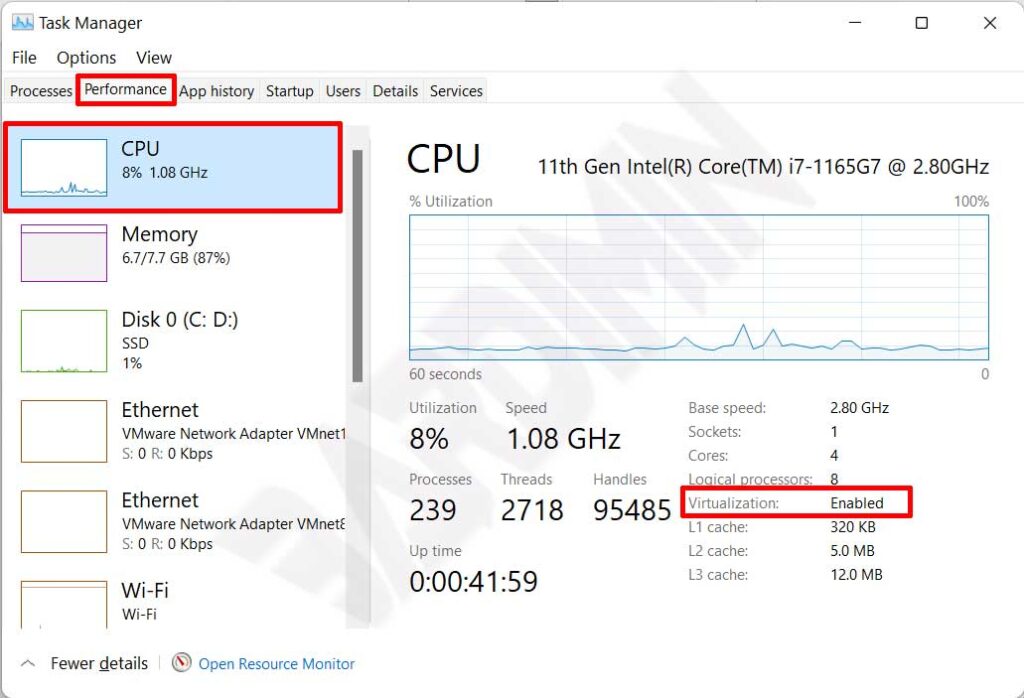
You can check in the Task Manager whether the Virtualization capability is active in the BIOS.
Open “ Performance > CPU ” and see the description at the bottom as in the following image:

2. Install Windows Sandbox
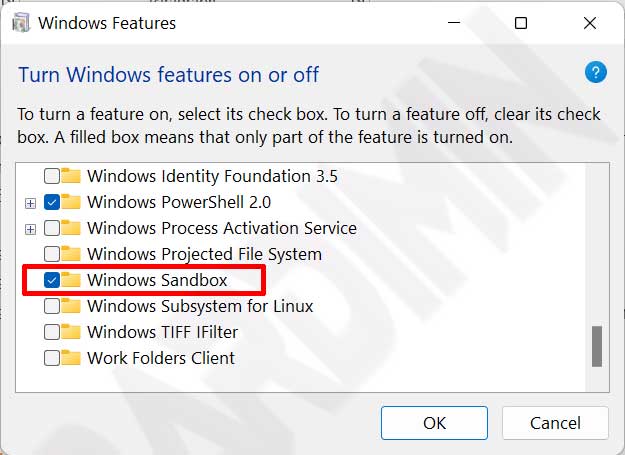
Open “ Turn Windows Features on or off ”, then scroll down and check the “Windows Sandbox” option as follows.

How to Use Windows Sandbox
To use Windows Sandbox as a place to test malicious applications, you can do:
- Copy the file you are going to test to Windows Sandbox.
- Install or run the file to experiment.
- When finished, close Windows Sandbox. You will get a notification that all changes you make will be discarded and permanently deleted.
Configure Windows Sandbox
By default, Windows Sandbox has minimal features. You can add the features you need by creating a configuration file. The Windows Sandbox configuration file is in XML format and is associated with the Sandbox via the .wsb file extension.
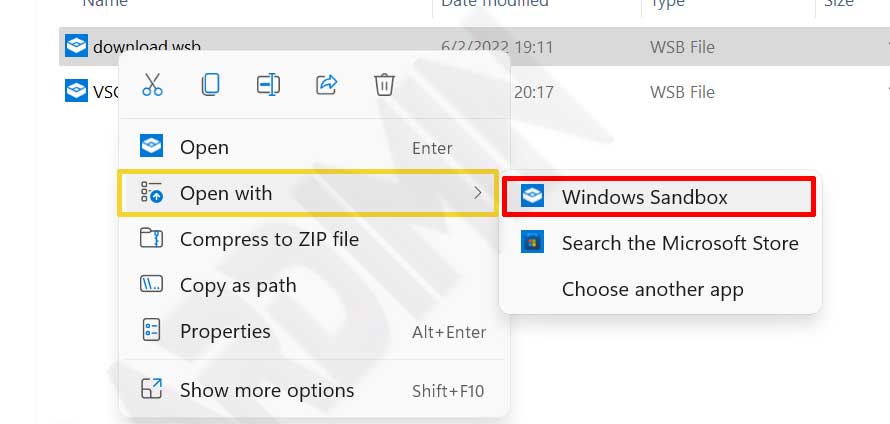
To activate the configuration file, you can do it by right-clicking on the configuration file, then you select ” Open with > Windows Sandbox “.

The configuration you can do in Windows Sandbox
- vGPU (virtual GPU): Enable or disable the virtualized GPU. If vGPU is disabled, the sandbox will use the Windows Advanced Rasterization Platform (WARP).
- Networking: Enable or disable network access in the sandbox.
- Mapped folders: Share folders from hosts with read or write permissions. Note that exposing the hosts’ directory can allow malicious software to affect the system or steal data.
- Logon command: Command that is executed when Windows Sandbox starts.
- Audio input: Shares the host’s microphone input to the sandbox.
- Video input: Shares the host’s webcam input into the sandbox.
- Protected clients: Puts the security-enhanced settings on the RDP session to the sandbox.
- Printer redirection: Share printer from host to sandbox.
- Clipboard redirection: Shares the host’s clipboard with a sandbox so text and files can be pasted back and forth.
- Memory in MB: The amount of memory, in megabytes, to be assigned to the sandbox.
Example Configuration:
Create a configuration file that allows Windows Sandbox to read the download folder from a host with “read-only” access. Copy the following code into Notepad and save it with the name “ downloads.wsb ”.
<Configuration>
  <VGpu>Disable</VGpu>
  <Networking>Disable</Networking>
  <MappedFolders>
    <MappedFolder>
      <HostFolder>C:\Users\Public\Downloads</HostFolder>
      <SandboxFolder>C:\Users\WDAGUtilityAccount\Downloads</SandboxFolder>
      <ReadOnly>true</ReadOnly>
    </MappedFolder>
  </MappedFolders>
  <LogonCommand>
    <Command>explorer.exe C:\users\WDAGUtilityAccount\Downloads</Command>
  </LogonCommand>
</Configuration>

