Imagine having a flashdrive that you can mount and unmount anytime, without buying physical hardware. Virtual USB flashdrive offers this convenience using built-in Windows features. This solution is very useful for professionals testing software, technicians working with multiple environments, or gamers wanting to separate game data.
A virtual USB flashdrive is a simulation of a physical flashdrive that fully functions for data storage. The difference lies in its virtual form, requiring no hardware. You can create, mount, and unmount it just like a regular flashdrive directly from Windows system.
This technology uses Windows Virtual Hard Disk (VHD) feature, available from Windows 7 to the latest versions. Therefore, you can create a virtual USB flashdrive without additional software.
Benefits of Using Virtual USB Flashdrive
This virtual solution offers several practical advantages. First, high flexibility since it can be created anytime with customizable capacity. Second, easy data portability by moving VHD files. Third, better security for sensitive data through encryption capabilities.
Steps to Create Virtual USB Flashdrive in Windows
Access Disk Management
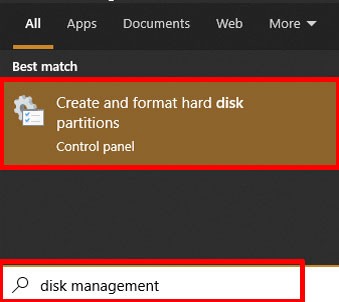
First, open Disk Management via Start Menu. Type “disk management” in search. Select “Create and format hard disk partitions” option.
Create VHD File
In Disk Management window, click Action menu. Select Create VHD. Next, specify the storage location for your VHD file.
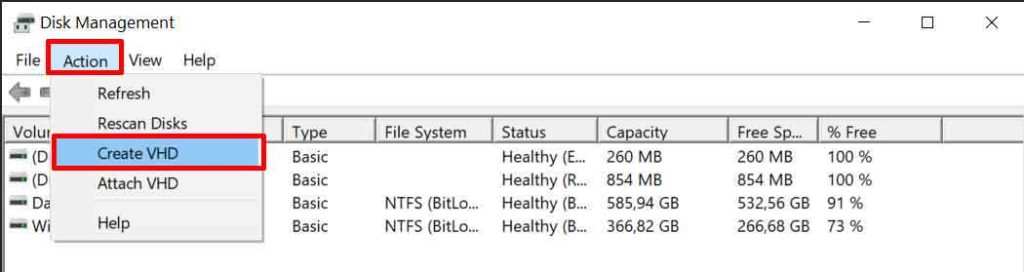
Set virtual drive capacity according to your needs. For file format, choose VHDX as it’s more stable and supports larger capacity. Click OK to continue.

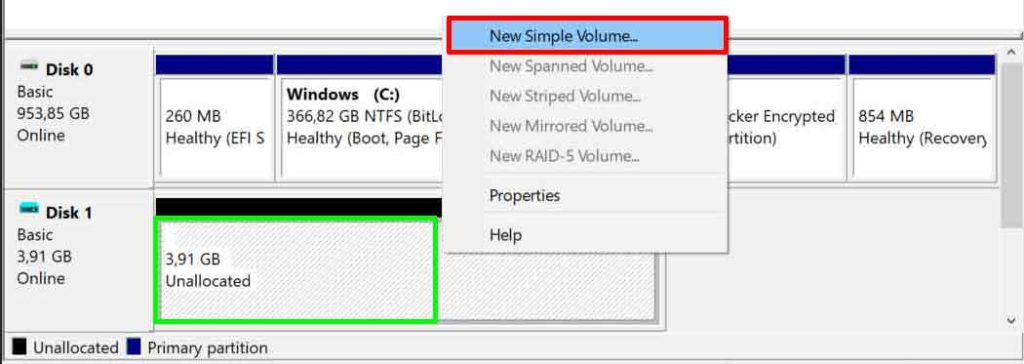
Initialize Virtual Disk
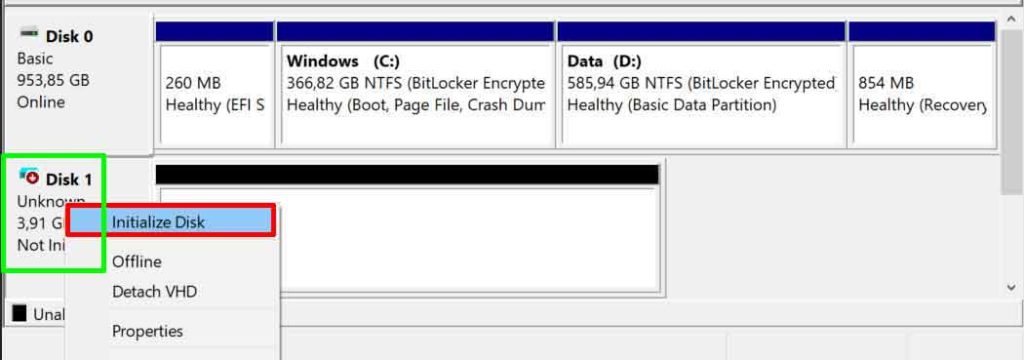
After previous process, new disk will appear with Not Initialized status. Right-click on that disk. Select Initialize Disk.
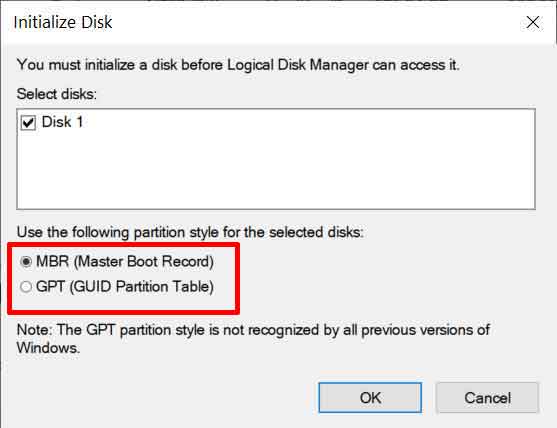
Choose GPT partition table for modern compatibility. Click OK. Next, create partition by right-clicking Unallocated area. Select New Simple Volume.
Follow the appearing wizard. Determine volume size and assign drive letter. Format partition with NTFS file system. This process will make the virtual USB flashdrive ready to use.
How to Use Virtual Drive
After process completes, virtual drive will appear in File Explorer. To unmount drive, right-click and select Eject. To remount, double-click the VHD file.

Tips to Optimize Virtual USB Flashdrive
Use VHDX format for better performance. Also, adjust capacity according to real needs to avoid wasting disk space. Regularly back up VHD files to prevent data loss.
By following this guide, you have successfully created a functional virtual USB flashdrive. This solution is very effective for various daily computing needs. For more information about VHD technology, visit official Microsoft documentation.