Download Adjustment Program Epson L11050
For those of you who need resetter software, here is complete information about downloading the Adjustment-Program Epson L11050:
Link Download
System Requirements
Before installing and using the program, make sure your device meets the following requirements:
- Operating system Windows 32-bit or 64-bit.
- The printer driver Epson L11050 is installed correctly.
- The printer is connected to the computer using a USB cable.
How to Use the Epson L11050 Adjustment Program
Step 1: Extract the Downloaded File and Set Up the Software
- Right-click on the downloaded file -> Select “Extract All…”.
- Select the destination directory to extract the files. It’s better to create a custom folder with a clear name, such as Epson_AdjProg_L11050.
- Once extracted, look for an executable file named AdjProg.exe or similar.
Step 2: Run AdjProg.exe with Run as Administrator
This is an important step to give the software the necessary permissions to communicate with the printer’s firmware.
- Right-click on the AdjProg.exe file.
- From the context menu that appears, select Run as administrator.
- If a User Account Control (UAC) dialog appears, click “Yes” to continue.
Step 3: Select Printer Model → Epson L11050
The main window Adjustment Program will open.
- In the “Select Model” section, click the dropdown menu.
- Scroll through the list and search for the exact right option, i.e., L11050 Series or Epson L11050. Select the option.
- Make sure the USB connection is properly plugged in.
Step 4: Go to the Particular Adjustment Mode Menu
Once the model is selected, the buttons will become active.
- Click on the big button that says Particular Adjustment Mode. It is the gateway to all advanced reset and calibration functions.
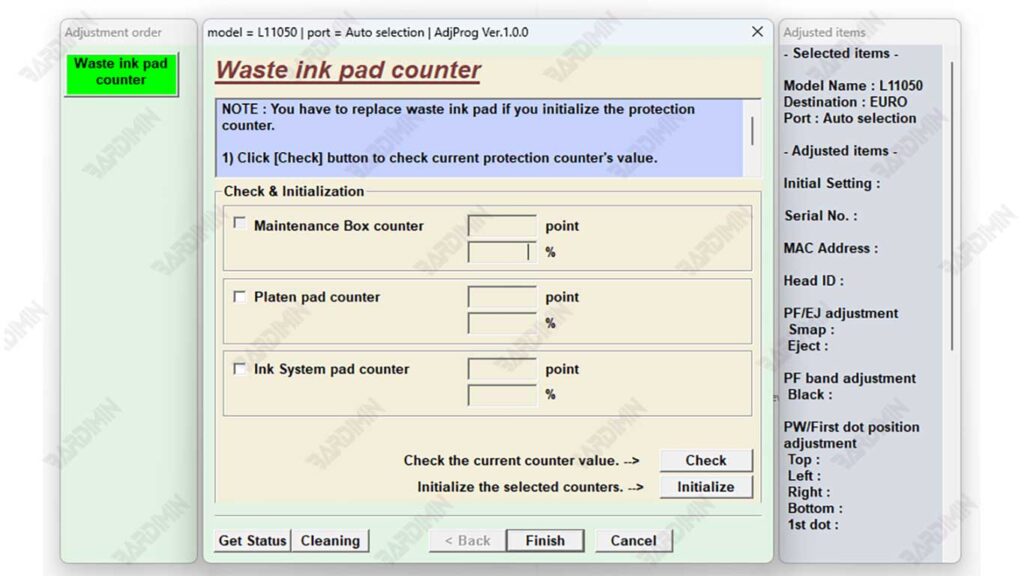
Step 5: Select the Waste Ink Pad Counter and Do a Check
A new window will open, displaying a list of various adjustment functions.
- From the list provided, search for and select (click) the item named Waste Ink Pad Counter.
- Click the Check button. The software will read the counter value of your printer.
- ANALISA HASIL CHECK: The value displayed will indicate what percentage of the counter has been used. If the value is close to or has reached 100%, that’s why the error and reset are needed. If the value is still low, it may not be the source of the problem.
Step 6: Click Initialization to Reset the Printer
If you believe you have replaced the physical waste ink pad and the counter value is full:
- Make sure the printer is ON again and not printing.
- Click the Initialization or Reset button.
- The software will process the reset command. A confirmation dialog will appear that the process has completed successfully.
FINAL STEPS:
CLOSE ALL SOFTWARE AND SHUT DOWN YOUR PRINTER COMPLETELY. Unplug the power printer from the power outlet for at least 30 seconds. This is very important for resetting the printer’s memory completely. After that, turn the printer back on. The error message should have disappeared.
