Nmap is becoming one of the most popular tools for scanning and mapping networks and for finding weak spots.
Nmap (Network Mapper) is a free software for security auditing and network scanning. Many systems and network administrators use it for activities such as network inventory, service update schedule management, and monitoring host or service uptime.
Nmap uses new techniques to detect active hosts on the network, available services (application name and version), operating systems, packet filters/firewalls, and hundreds of other characteristics. The app is designed to quickly scan large networks, but it also works well against a single host.
Main feature
- Flexible: Supports hundreds of complex approaches to mapping a network full of IP filters, firewalls, routers, and other bottlenecks. Many port scanning techniques (both TCP and UDP), OS detection, version detection, ping sweep, and other features are included. Please see the documentation page.
- Powerful: Nmap scans large networks from hundreds of thousands of machines.
- Easy: Nmap offers a rich set of powerful features for power users. You can start as simple as ” nmap -v -A targethost “. Traditional command line and graphical (GUI) versions are available to suit your preferences.
Supported Operating Systems
Linux, Microsoft Windows, FreeBSD, OpenBSD, Solaris, IRIX, Mac OS X, HP-UX, NetBSD, Sun OS, Amiga, and many more.
Install Nmap on Windows 11 with GUI
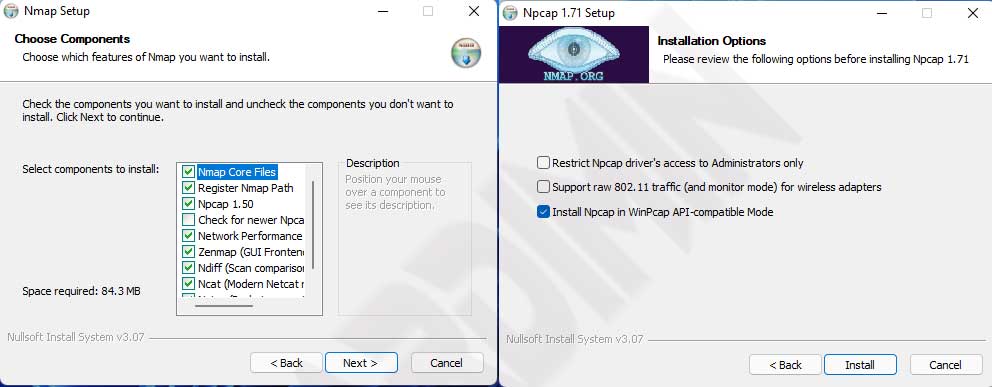
- Download Nmap 7.92.
- Download Npcap 1.71. Nmap 7.92 is still using Npcap 1.50, skip this step if you don’t want to update Npcap.
- Install the downloaded file (Nmap & Npcap ).
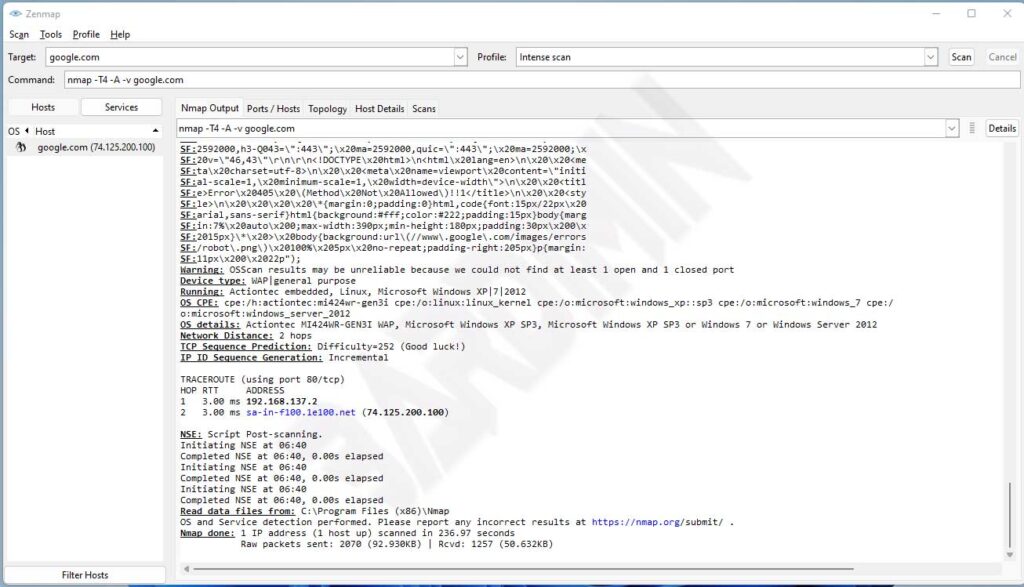
- Once the installation is complete, run “Nmap–Zenmap GUI ”.
- Set “Target” and “Profile”. Click the “Scan” button to scan the target.