In a fast-paced world filled with productivity demands, personalization is key to achieving efficiency. Windows 11 introduces a new paradigm in personalization by providing extensive customization options for the Start Menu, which is at the heart of user interaction with the operating system.
Customization is not just about aesthetics, it is about creating an intuitive and responsive work environment that adapts to the unique needs of each user. The Start menu is the main access point for apps, files, and settings.
By customizing the Start Menu, users can:
- Reduce the time it takes to search and open apps.
- Increase productivity by simplifying access to frequently used tools and resources.
- Creating a more personal and enjoyable user experience.
This customization allows users to optimize their workflow and make daily interactions with their computers more efficient and enjoyable. By taking control of the Start Menu, any user can change the way they interact with Windows 11, making it more than just an operating system—a dynamic and adaptive personal assistant.
Get to know the Windows 11 Start Menu Layout
The Windows 11 Start menu is a portal to the most important applications, documents, and settings for users. With a clean design and efficient use of space, the Start Menu gives you quick and easy access to what you need. Here are some of the key features:
- Pinned Apps: Place your most used app front and center for instant access.
- All Apps: A complete list of installed apps is available with a single click.
- Search Bar: Search for files, apps, or the web directly from the Start Menu.
- Recommended: This section displays recent or frequently used files and documents.
- Power: Quick option to shut down or restart your computer.
The Windows 11 Start menu is designed to increase productivity by simplifying access to the resources you need. By adopting a more intuitive and personalized approach, Windows 11 allows users to customize their computing experience according to their unique work style.
Start Menu Customization Steps
Access Start Menu Layout Settings
To start customizing the Start Menu in Windows 11, you first need to access the layout settings. This can be done with the following steps:
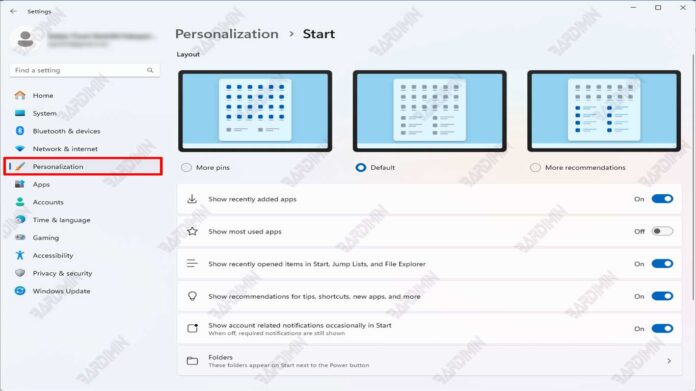
- Click Start or press the Windows key on your keyboard.
- Select Settings (gear icon).
- In the Settings menu, navigate to Personalization.
- Click on Start to see the customization options available.
Step-by-Step Guide to Changing the Layout
Once in the Start settings menu, you can change the layout by:
- Pinning Apps: Right-click on the app you want to pin and select Pin to Start.
- Rearrange Icons: Click and hold an app icon, then drag it to the desired position.
- Deleting Apps: For apps already pinned, right-click and select Unpin from Start.
- Add a Folder: At the bottom of the Start settings menu, click on the Folders to select the folder you want to display in the Start Menu.
Tips for Maximizing Space and Efficiency
- Group Apps By Category: For example, productivity apps like Word, Excel, and PowerPoint can be grouped.
- Use the Appropriate Icon Size: Expand icons for frequently used apps and shrink them for less used ones.
- Take Advantage of the Search Feature: Instead of pinning multiple apps, use the search feature to quickly access apps.
