A TPM (Trusted Platform Module) is a chip that offers cryptographic functions, such as generating and storing encryption keys to enable features like Windows Hello, BitLocker, and others and confirm that the operating system and firmware are on your device are what they should be.
VMware Workstation Pro supports TPM version 2.0. You can add a Virtual Trusted Platform Module (TPM) to an existing virtual machine to provide enhanced security to the guest operating system. Then, you can also delete it from the virtual machine.
Windows 11 requires TPM 2.0 as one of the minimum requirements for its installation. By adding the TPM module to VMWare, you will install Windows 11 on VMWare.
The following article from Bardimin will help you enable TPM on VMWare.
Added TPM 2.0 to VMWare
Before you follow this article, you must have VMware Workstation Pro installed. You can add TPM 2.0 to an existing virtual machine or create a new one.
1. Encrypt Access Control
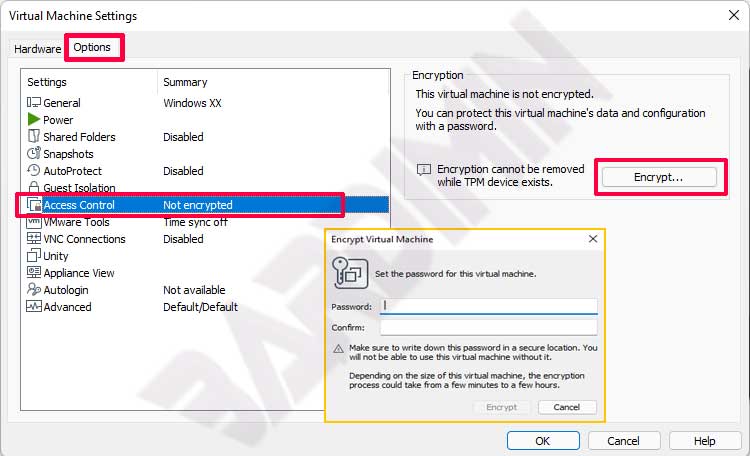
You cannot add a Trusted Platform Module (TPM) before enabling Encrypt Access Control.
To activate Encrypt Access Control :
- Open Virtual Machine Settings (Ctrl + D).
- “Options” tab .
- Select ” Access Control “.
- On the right side of the panel, click the “Encrypt” button and a window will appear to create an encryption password.

2. Added TPM 2.0
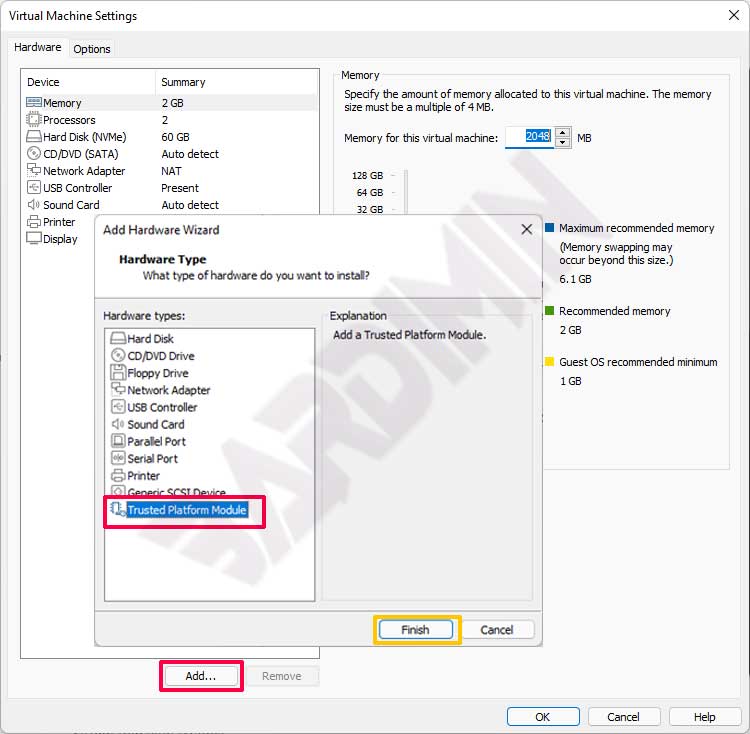
After you enable encryption in Access Control, you can add TPM devices.
- Open Virtual Machine Settings (Ctrl + D).
- Then click the “Add” button on the “Hardware” tab .
- Select “Trusted Platform Module” and then click the “Finish” button .

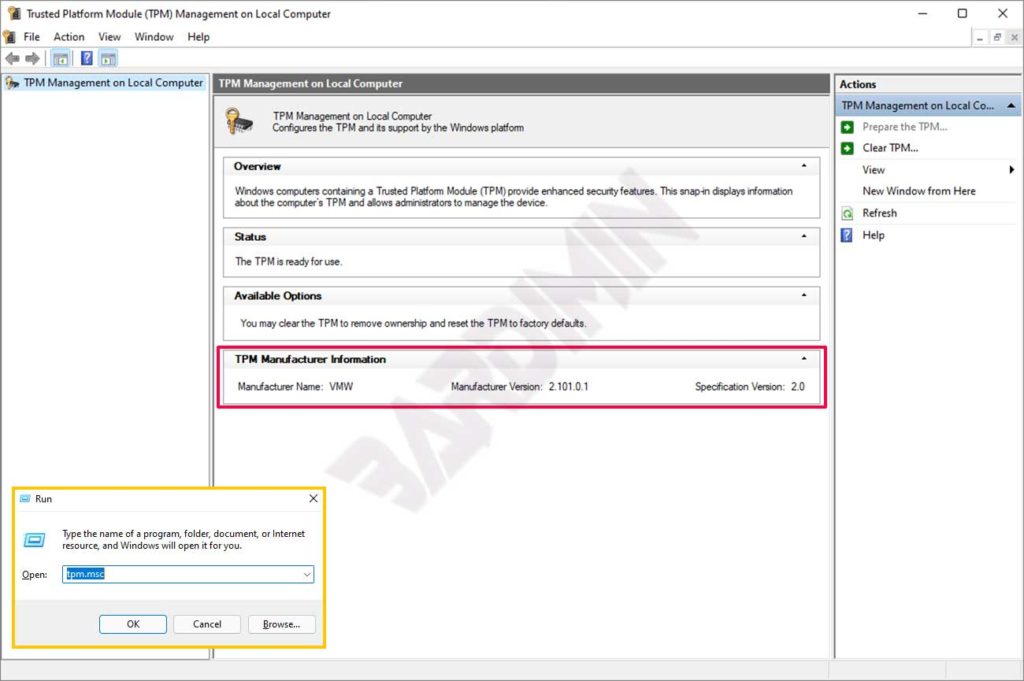
Checking TPM version
To check the TPM version, you can do this by:
- Open Windows Run (Win + R)
- Type “tpm.msc” and click the “OK” button


