Mouse Utilities in Microsoft PowerToys help presenters, technicians, and gamers improve Windows pointer visibility through focus spotlights, click indicators, and adjustable crosshairs. This article explains how to enable and configure Find My Mouse, Mouse Highlighter, and Mouse Pointer Crosshairs to support smooth presentations, remote support sessions, or gaming experiences.
Keeping your audience focused on the pointer during a presentation or technical demo can be challenging. A cluttered screen or fast cursor movements often cause meeting participants to lose track of the mouse position. Microsoft addresses this with Mouse Utilities, a set of features within PowerToys designed to highlight and emphasize pointer movements. These tools add visual effects such as spotlights, click rings, or crosshairs that make tracking effortless.
Microsoft PowerToys is a free, open‑source collection of utilities for Windows 10 and 11. Besides Mouse Utilities, it includes productivity tools like FancyZones, PowerRename, and Keyboard Manager. To install it, visit the official repository at Microsoft documentation or download directly from the Microsoft Store. Once installed, you can access Mouse Utilities settings through the PowerToys Settings interface.
With Mouse Utilities, presenters can ensure their audience always follows the pointer without physically pointing at the screen.
Find My Mouse: Quick Spotlight to Locate the Cursor
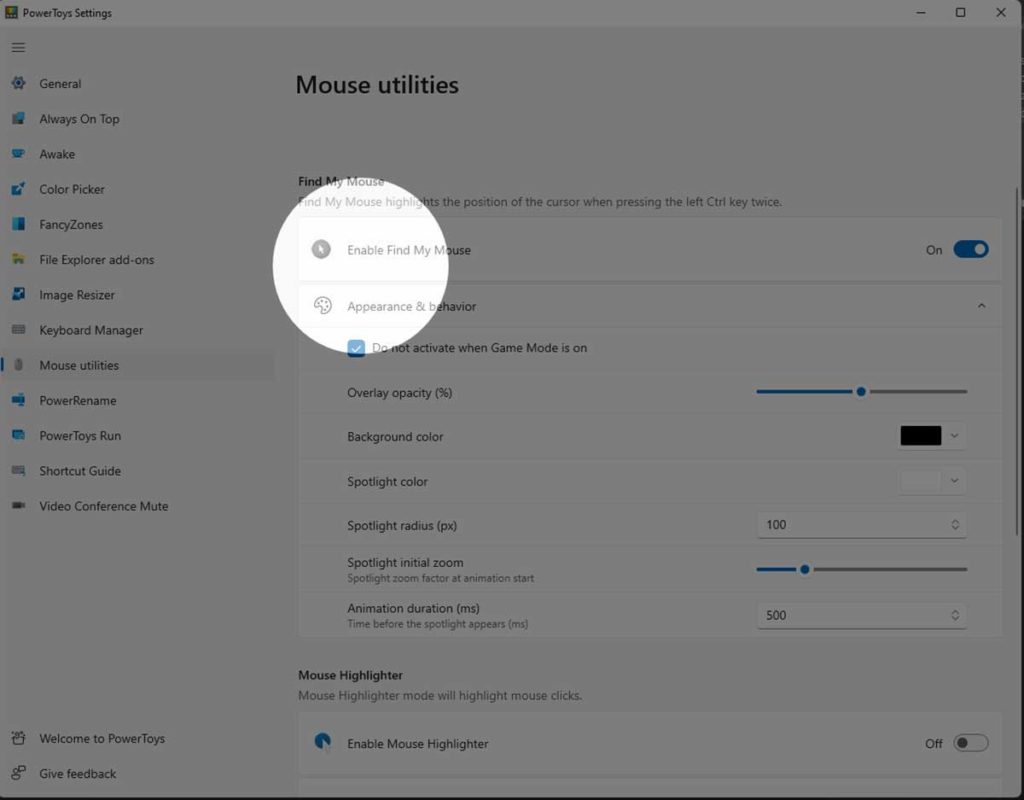
The first highly useful feature is Find My Mouse. It creates a spotlight effect that illuminates the area around your cursor when you press the Ctrl key twice. This is invaluable when the pointer disappears among multiple windows or on high‑resolution displays. To activate it, simply double‑tap both left and right Ctrl keys simultaneously. The spotlight appears while the mouse moves and fades out after a few seconds of inactivity. You can customize its behaviour through the settings below.
| Setting | Description |
| Do not activate when Game Mode is on | Prevents the spotlight from activating during gameplay to avoid performance impact or visual distraction. |
| Overlay opacity | Opacity percentage of the spotlight animation (default: 50%). |
| Background color | Background color of the spotlight (default: #000000). |
| Spotlight color | Color of the circle centered on the cursor (default: #FFFFFF). |
| Spotlight radius | Radius of the circle in pixels (default: 100). |
| Spotlight initial zoom | Zoom factor when the spotlight first appears. Higher values create a more pronounced zoom animation. |
| Animation duration | Time for the spotlight to appear or disappear, measured in milliseconds (default: 500). |
Mouse Highlighter: Visual Feedback for Every Click
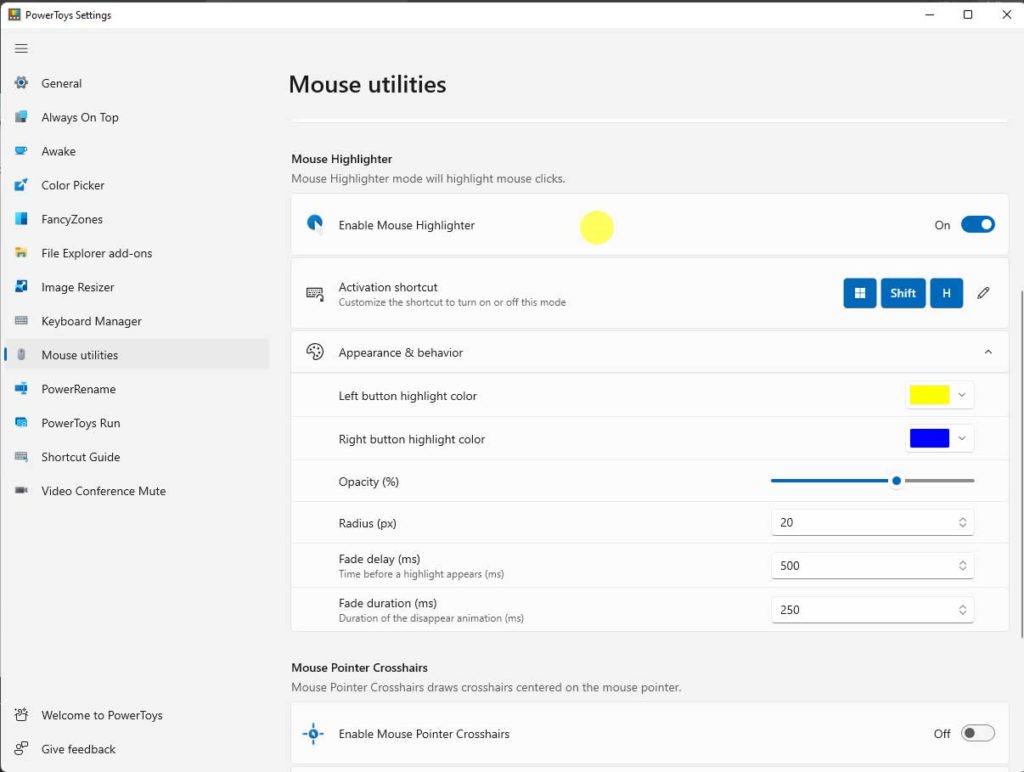
When recording tutorials or presenting, viewers often struggle to see when you perform left or right clicks. Mouse Highlighter displays colored rings each time a mouse button is pressed. By default, you can toggle this feature with ⊞Win + Shift + H. You can assign distinct colors for left and right clicks to make them more informative. The available settings are listed below.
| Setting | Description |
| Activation shortcut | Keyboard combination to enable or disable highlighting (customizable). |
| Left button highlight color | Color of the ring when left‑clicking. |
| Right button highlight color | Color of the ring when right‑clicking. |
| Overlay opacity | Transparency level of the highlight animation. |
| Radius | Radius of the highlight ring in pixels. |
| Fade delay | Time before the highlight begins to fade (milliseconds). |
| Fade duration | Duration of the fade‑out effect (milliseconds). |
Mouse Pointer Crosshairs: Precision Aiming Guides
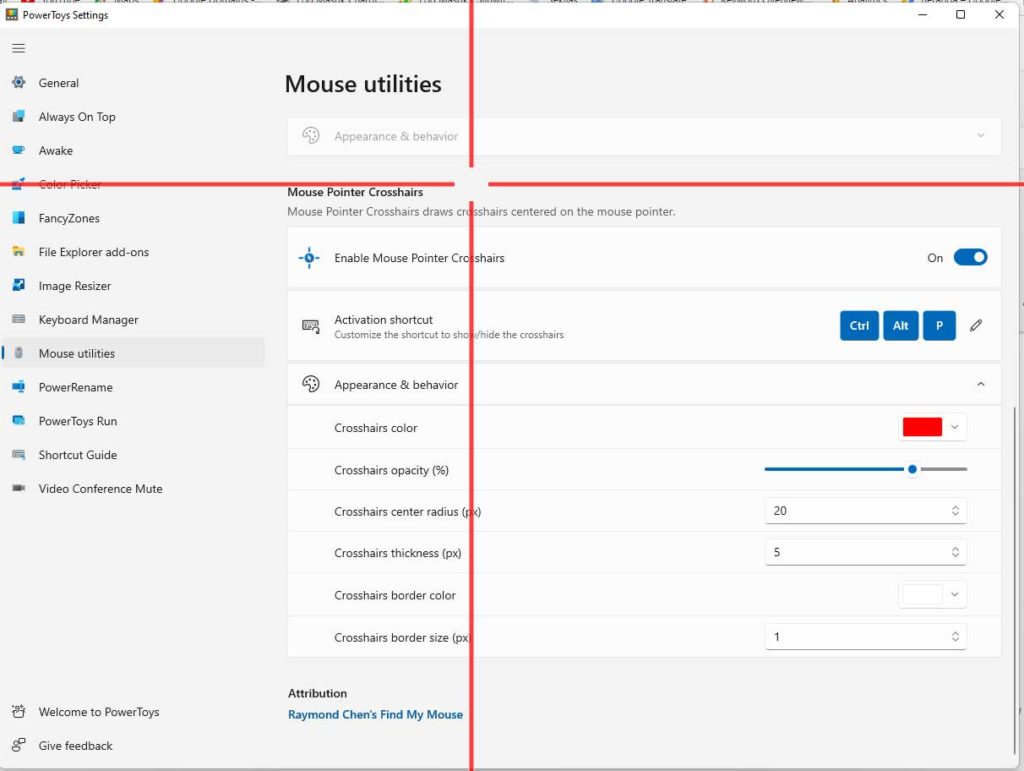
For technicians working with visual data or gamers requiring precise aiming, Mouse Pointer Crosshairs overlays horizontal and vertical lines centered on the cursor. Activate it with the shortcut Ctrl + Alt + P. You can adjust the color, line thickness, and center circle radius. These crosshairs prove invaluable when analyzing charts, aligning design elements, or aiming in first‑person shooters.
| Setting | Description |
| Activation shortcut | Keyboard shortcut to toggle crosshairs (customizable). |
| Color | Color of the crosshair lines. |
| Opacity | Transparency level of the lines. |
| Thickness | Line thickness in pixels. |
| Center radius | Radius of the empty circle at the crosshair intersection. |
| Auto hide | Hides crosshairs after a few seconds of mouse inactivity. |
Optimizing Usage by Profession
Each Mouse Utilities feature can be fine‑tuned for specific professional needs. Below are common scenarios.
- Presenters and trainers: Enable Find My Mouse with a large radius and high‑contrast colors so meeting participants never lose the pointer. Combine it with Mouse Highlighter to explicitly show clicks. Slowing down the animation duration can make the effect more noticeable.
- Remote support technicians: Use Mouse Highlighter with distinct colors for left and right clicks. This helps users understand your actions during remote sessions. Extend the fade delay to keep indicators visible longer.
- Gamers: Employ Crosshairs with a bright color and moderate thickness. Ensure “Do not activate when Game Mode is on” is unchecked so the feature remains active during gameplay. A small center radius prevents obstruction of your aim.
Advanced Tuning via Configuration Files
Beyond the graphical interface, PowerToys stores all settings in a JSON file located at %LocalAppData%\Microsoft\PowerToys\. Advanced users can modify this file to set values outside the slider ranges—for example, a spotlight radius of 500 pixels or animation durations beyond the default limits. However, proceed with caution; syntax errors may prevent the utilities from working correctly.
Mouse Utilities can also be integrated with PowerToys Run to trigger shortcuts without memorizing key combinations. Simply open PowerToys Run (Alt+Space), type “Mouse”, and select the desired feature. This is handy when you forget the hotkey.
Comparison with Third‑Party Utilities
Applications like PointerFocus or Cursor Highlight offer similar functionality, but Mouse Utilities stands out because it’s built directly into the system, lightweight, and free—no ads or background processes that burden the CPU. Regular updates from Microsoft ensure compatibility with the latest Windows versions.
For users needing more advanced features—such as click logging or movement analysis—combining Mouse Utilities with AutoHotkey can be a powerful solution. For instance, an AutoHotkey script could periodically trigger Find My Mouse to assist users with visual impairments.
Mouse Utilities are more than just visual aids; they enhance on‑screen communication effectiveness. With flexible customization, these features deserve activation by anyone who frequently shares their screen.
In summary, integrating Mouse Utilities into PowerToys delivers significant value for Windows users. Features like Find My Mouse, Mouse Highlighter, and Mouse Pointer Crosshairs offer detailed customization options, making them adaptable for everything from formal presentations to casual gaming. If you haven’t tried them yet, install PowerToys and enable these tools to experience teh difference firsthand.