3. Hardware Connection: Original USB Cable and Excellent Port
This is the most critical factor that often fails. Use an original, high-quality USB data cable. Many cheap USB cables can only charge, but cannot transfer data.
Plug the USB cable directly into the port on the back of the CPU (motherboard) or the main port on the laptop. Avoid using an external USB hub or port on the front of the CPU case, as it often lacks power and stabilization.
WiFi/Bluetooth connections are not supported for this process. The connection must be physical via USB.
4. Download Software
5. Disable Antivirus Temporarily
This Resetter Adjustment Program software is often categorized as “False Positive” by antivirus programs such as Windows Defender, Avast, or McAfee. This means that the software is not dangerous but is considered suspicious because of the way it works that accesses the printer’s firmware.
Sec. 6. Power Stability: Don’t Let the Power Shut Down in the Middle of the Process!
The reset process is to write data to the printer’s chip. If the power goes out or the cable is unplugged during the process, it can cause irreversible firmware damage (bricking).
Make sure the electrical voltage is stable. For laptops, make sure they are plugged into a charger and the battery is properly charged. Don’t rely on batteries alone.
Steps to Use the Epson L15150 Resetter Adjustment Program
Once all the preparations are complete, follow these instructions to perform a reset on the Epson L15150 printer:
Step 1: Extract and Run with Administrator Rights
- Once you’ve downloaded it, locate the ZIP/RAR file. Right-click on the file, then select “Extract Here” or “Extract to [folder name]”.
- Go to the extraction results folder. Search for the main file with the name AdjProg.exe.
- VERY IMPORTANT: Right-click on AdjProg.exe and select “Run as Administrator”. This gives the software full access to communicate with the printer driver.
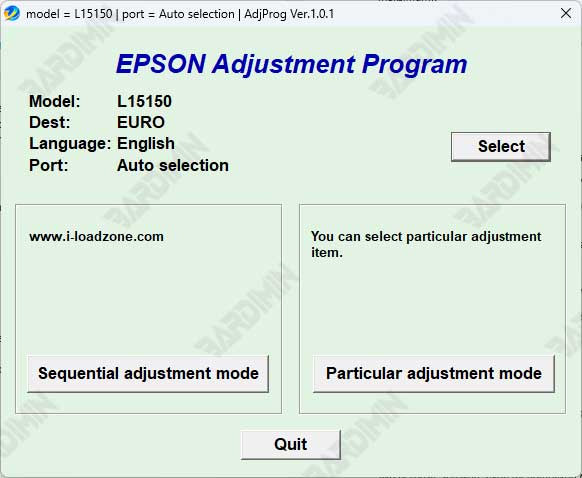
Step 2: Choose the Right Printer Model
- Once the software window opens, the first step is to select a model.
- Click the button “Select”.
- From the list that appears, search for and select “L15150”. Don’t be mistaken, because choosing the wrong model can be fatal.
- Click “OK” to confirm.
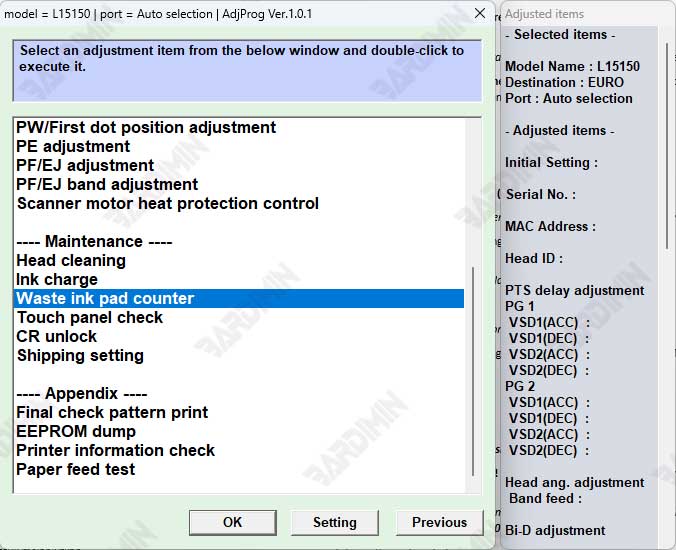
Step 3: Enter the Special Adjustment Mode
- In the main window of the software, you will see several buttons. To perform a reset, you need to enter a special mode.
- Click the button “Particular Adjustment Mode”. This is a gateway to make adjustments to the counter.
Step 4: Select the Option to Reset
A new window will appear with many options. This is a list of various counters that can be reset.
- Scroll through the list and look for the “Waste Ink Pad Counter” option.
- Select the option by clicking on it once, then click “OK” to continue.
Step 5: Read the Counter Status and Check the Box
- Check the checkbox next to the counter.
- Once checked, click the button “Check”. The software will read the current counter value of your printer. The read value will be displayed.
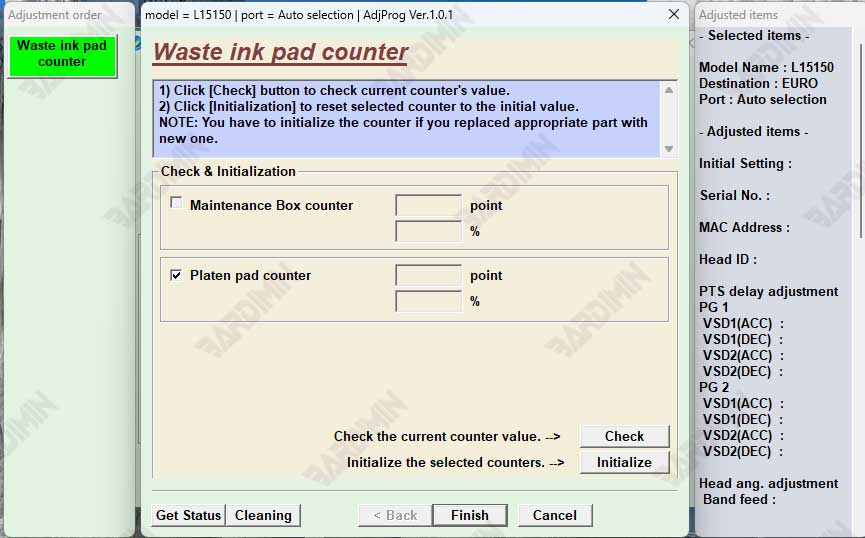
Step 6: Initialization
- This is the core step. After confirming the readable value, click the “Initialization” button.
- The software will display a warning that this process will reset the counter. Read carefully.
- Click “Yes” or “OK” to start the reset process.
Step 7: Wait and Confirm Success
- Be quiet and don’t touch anything! Let the software work. This process only takes a few seconds.
- If successful, the software will display the message “Completed successfully”, “Finished”, or similar, accompanied by the “0x00000000” code (meaning there are no errors).
- Close the software.
