Restricting file sharing access by whitelisting trusted IP addresses is an essential strategy to fortify network defenses against ransomware, malware, and unauthorized intrusion in professional and gaming LAN environments.
File sharing via the SMB (Server Message Block) protocol simplifies data collaboration across local networks. Yet this convenience introduces a critical security gap. Any device within the same subnet can potentially view, modify, or encrypt the folders you share. Windows 11 enables shared access once network discovery is turned on. Hence, strict network‑level access filtering is mandatory. An IP whitelisting technique through Windows Defender Firewall restricts file sharing access exclusively to trusted addresses. This approach replaces reliance on easily compromised passwords with hard‑to‑spoof network identities.
System Prerequisites and Network Preparation
Before you begin, ensure all computers reside within a single local subnet. Static IP addresses are strongly recommended for both the server and client machines. While DHCP offers convenience, it may sever connectivity when address leases expire and devices receive new assignations. You also need administrator privileges on the PC that will act as the file server. Verify that Windows Defender Firewall is active and not overridden by third‑party security software. The Server and Workstation services must also run normally for the SMB protocol to function. These prerequisits establish a reliable baseline.
Key Point: Disabling guest access and limiting connections solely to specific IP addresses dramatically shrinks the attack surface compared to standard password‑only protection.
SMB Operation and Security Risks
The SMB protocol operates at the application layer and commonly uses TCP port 445 for direct communication. This path frequently becomes a vector for cyberattacks. The WannaCry worm, for instance, propagated through SMBv1 vulnerabilities. Even though Windows 11 disables SMBv1 by default, enabling file sharing without IP filtering remains dangerous. Brute‑force attacks or ransomware spread from an already compromised internal device are still viable threats. By employing IP whitelisting, you create a micro‑security perimeter. Only data packets from registered addresses can reach the file service port. This technique excels at isolating access between departments or game directories during a LAN party.
Step 1: Enabling the File Sharing Feature
Initial configuration requires activating the sharing service on the operating system. Follow this procedure to build the foundation before adding the security layer:
- Open Settings by pressing the (WIN + I) key combination.
- Navigate to Network & internet, then select Advanced network settings.
- Under More settings, click Advanced sharing settings.
- In the Private network segment, toggle the Network discovery and File and printer sharing switches to the on position.
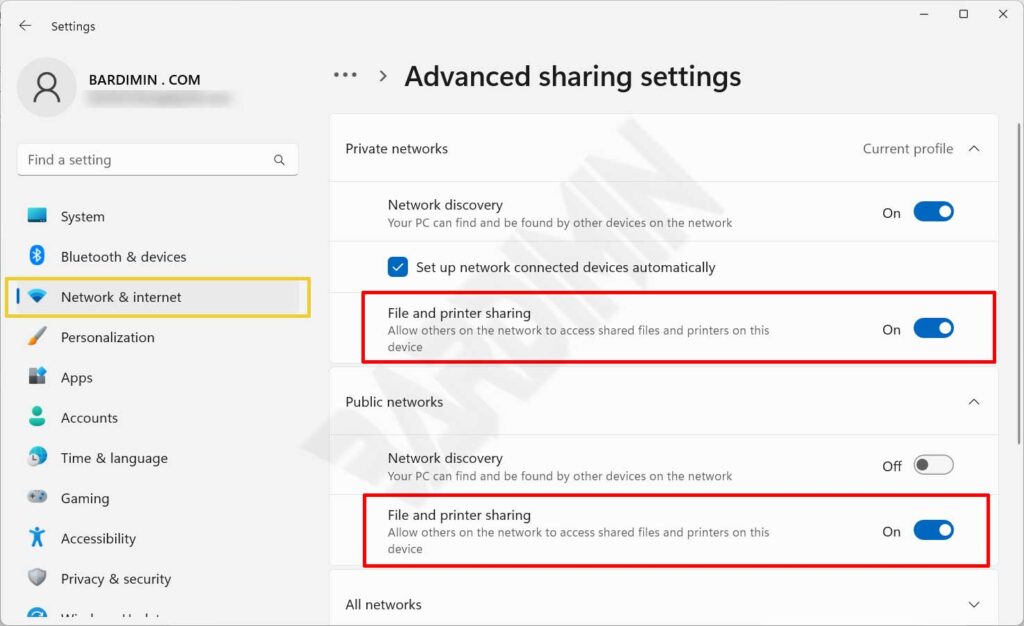
Next, turn off password‑protected sharing to simplify testing. This way filtering relies purely on network identity without credential interference.
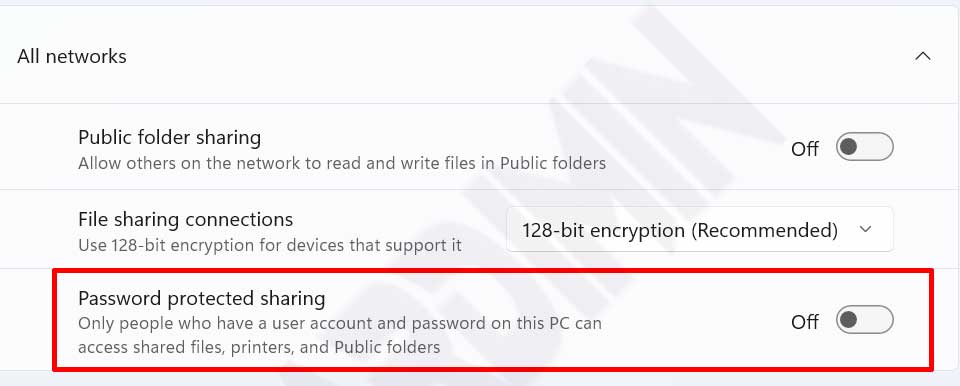
- Scroll down to the All Networks section and select Turn off password protected sharing.
- Click Save changes to apply the configuration.
Step 2: Sharing a Specific Folder
Once the service is active, choose the local directory you intend to expose. This step combines NTFS file‑system permissions with Share Permissions for full compatibility.
- Launch File Explorer and locate the target folder.
- Right‑click the folder and select Properties from the context menu.
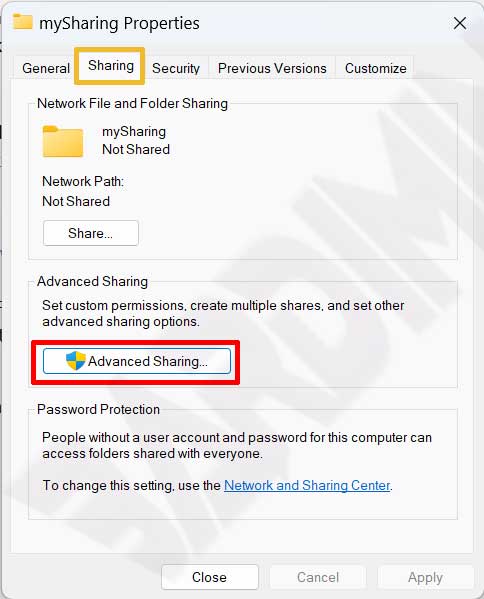
- Switch to the Sharing tab and click the Advanced Sharing button.
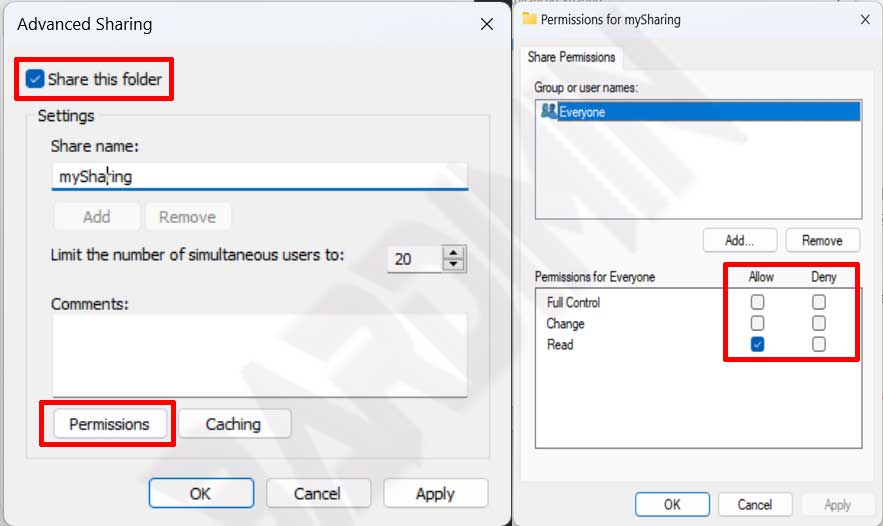
- Check the Share this folder box. You may customize the Share name for easier identification.
- Click Permissions to manage network‑level access rights.
Inside the Permissions window, grant Full Control or at least Read permission to the Everyone group. The objective is to avoid double blocking. The firewall will later filter the traffic, so these permissions merely ensure that clients which pass the filter are not hindered by file‑system level denials.
Step 3: Testing Initial Connectivity
Before applying any filters, validate that the folder is accessible from another client. Use a second computer on the network and type the UNC path into the File Explorer address bar.
\\192.168.1.100
Replace the example IP with the local address of your server PC. If the shared folder appears, the basic setup has succeeded. Note the IP addresses of client machines that you intend to grant exclusive access before advancing to the security stage.

Core Configuration: Restricting File Sharing Access with Firewall
The core of this security strategy is blocking all inbound SMB traffic globally, then crafting precise exceptions for trusted IP addresses. This method guarantees that any port 445 scan from an unknown device is silently dropped.
1. Blocking the Default File and Printer Sharing Rules
The first action is to disable the overly permissive built‑in rules that the operating system applies automatically.
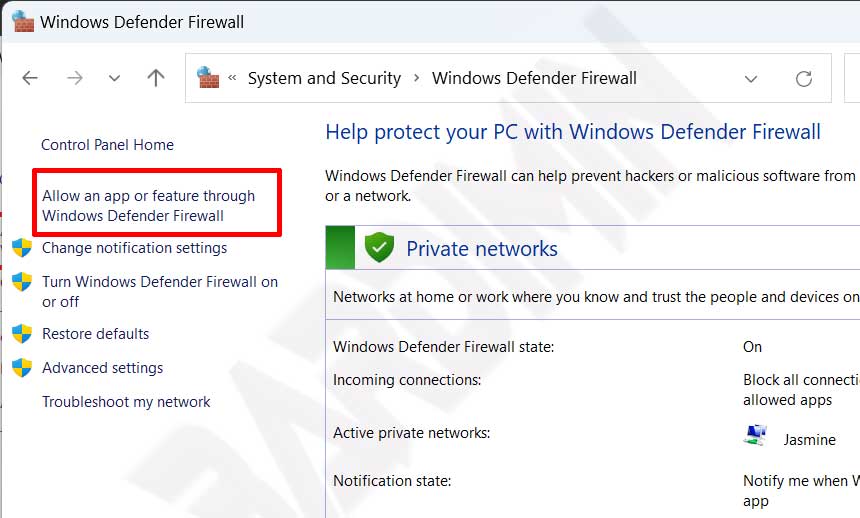
- Open Control Panel and navigate to System and Security > Windows Defender Firewall.
- Click Allow an app or feature through Windows Defender Firewall on the left pane.
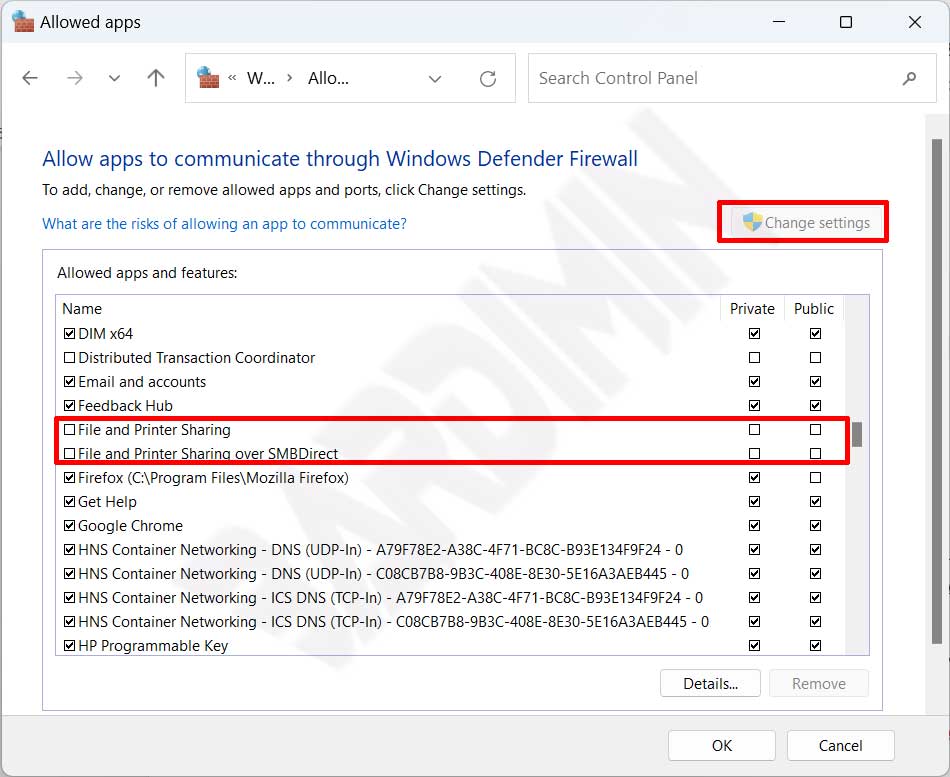
- Select the Change settings button to enable editing. Administrator privileges are needed.
- Scroll through the list and uncheck every box associated with File and Printer Sharing and File and Printer Sharing over SMBDirect. This severs all inbound connections to shared resources.
2. Creating a Custom IP Whitelist Rule (Inbound Rule)
After the global block is in place, we build a “secret door” that only designated addresses may pass. This is done through Windows Defender Firewall with Advanced Security.
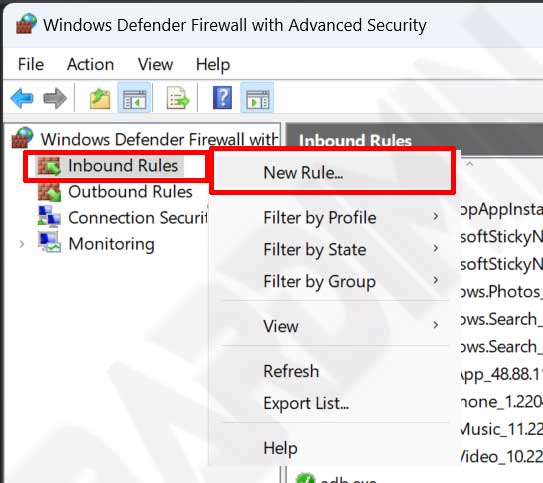
- On the main Windows Defender Firewall page, choose Advanced settings from the left pane.
- Right‑click the Inbound Rules node and select New Rule.
- On the Rule Type screen, choose Custom for full packet control. Click Next.
- Under Program, select All programs. Click Next.
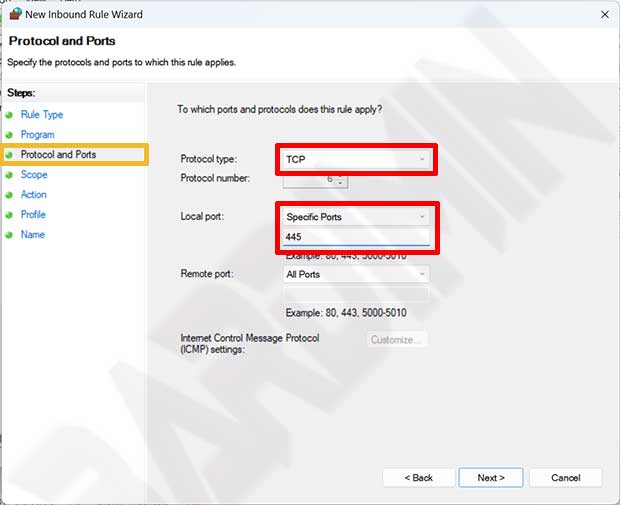
- At the Protocol and Ports step, configure:
- Protocol type: TCP
- Local port: Specific Ports and enter 445.
Click Next.
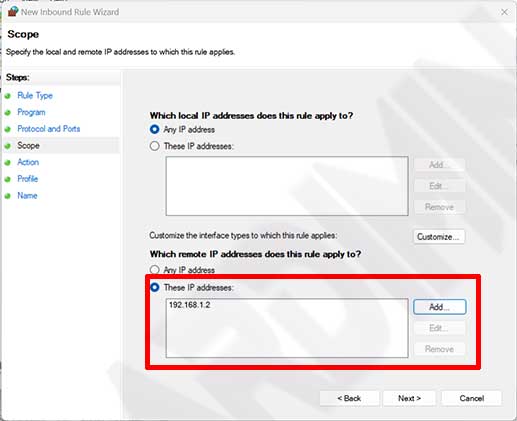
The most critical phase is defining the whitelist on the Scope page. Precision when entering IP addresses is essential.
- In the Scope step, locate Which remote IP addresses does this rule apply to?.
- Choose These IP addresses and click the Add button.
- Enter the specific IP addresses of the PCs or servers you wish to authorize. You may add a single IP or a whole subnet using CIDR notation.
- Click Next on the Action step and keep Allow the connection selected.
- On the Profile step, leave all profiles (Domain, Private, Public) checked, then click Next.
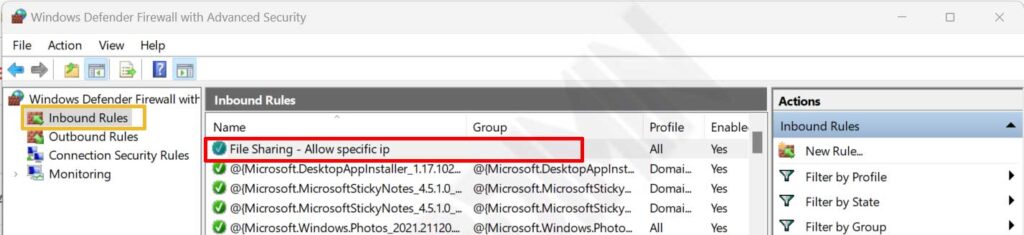
- Give the rule a descriptive name, such as Allow_SMB_Trusted_IPs. Click Finish.
Rule Priority: Make certain the newly created Allow rule sits at the top of the Inbound Rules list. Windows processes rules hierarchically, so a block rule can override an allow rule if positioned higher.
Post‑Configuration Verification and Troubleshooting
After the rule is created, testing from both sides is mandatory. Access the shared folder from a client whose IP is listed in the whitelist. The connection should proceed without issues. Then, attempt access from a device that is not listed. The system must display a failure message such as “Windows cannot access…” or a credential prompt that ultimately fails.
If connections still stumble, flush the DNS cache via ipconfig /flushdns in a Command Prompt. Check for conflicting block rules that might interfere. For deeper security, combine this IP filtering with SMBv3 encryption to protect data in transit. Many administrators also beleive in enabling audit logging to track any illicit access attempts.
Professional Use Cases and Implementation
In professional settings, IP whitelisting proves invaluable. A development team only needs to share a build folder with a CI/CD machine that has a fixed address. Similarly, game server admins can prevent regular players from touching configuration files that are vulnerable to manipulation. This method forms part of a defense‑in‑depth strategy. No administrator should rely solely on IP filters; always activate Windows audit logs to monitor unauthorized attempts. Explore official documentation for deeper insight: Microsoft SMB Overview and the Windows Firewall Configuration Guide.
In summary, restricting file sharing access through IP‑based firewall rules is a precise technical countermeasure. It replaces reliance on leakable passwords with a hard network identity, substantially elevating your data security posture.