Securing your website with SSL is a crucial step in today’s digital era. This article guides you through the process of configuring Let’s Encrypt SSL on Windows using an Apache server, providing a practical tutorial to obtain a valid free SSL certificate.
Secure Sockets Layer (SSL) or its successor, Transport Layer Security (TLS), is a vital cryptographic protocol. It is designed to secure data communication between a user’s browser and a website server. By enabling SSL, you create an encrypted pathway that protects sensitive information from eavesdropping.
The benefits of using SSL extend beyond just security. This certificate also builds visitor trust. Modern browsers display a padlock icon and the HTTPS prefix in the address bar for secure sites. Furthermore, SSL is a positive ranking factor for search engines like Google.
Below is a complete guide to configuring a Let’s Encrypt SSL on Windows with the Apache web server, using the popular client called win-acme.
Configuration Prerequisites
- A computer running Windows or Windows Server OS.
- Apache 2.4 (e.g., from an XAMPP package) is installed. This guide assumes an installation path of
C:\xampp\apache. - A domain or subdomain already pointed (via a DNS A record) to your web server’s IP address.
- Access to run Command Prompt (CMD) as an Administrator.
Step 1: Download the Win-ACME Client
We will use the official client, win-acme (formerly letsencrypt-win-simple), which supports the ACMEv2 protocol to obtain certificates from Let’s Encrypt. Visit the win-acme releases page on GitHub. Download the latest stable version (e.g., win-acme.v2.x.x.x64.pluggable.zip).
Once downloaded, extract the ZIP file contents to a folder, for example, C:\win-acme.
Step 2: Run Win-ACME
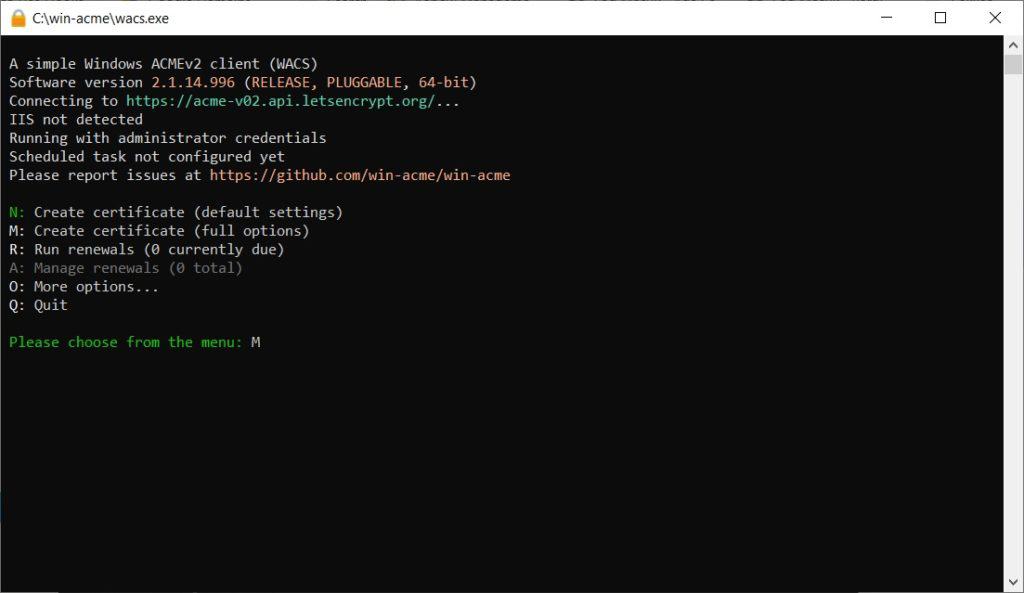
Open the C:\win-acme folder. Then, run the wacs.exe file by right-clicking and selecting Run as administrator“. The win-acme command-line interface will open.

Step 3: Create a New Let’s Encrypt SSL Certificate
In the main win-acme window, type the letter M and press Enter to start the new certificate creation process (Create new certificate).
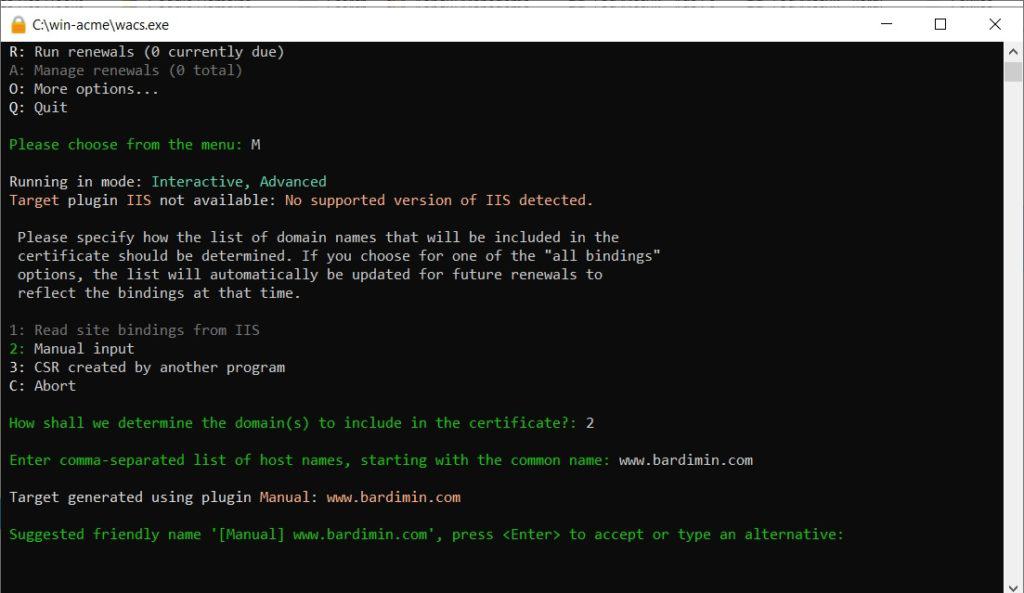
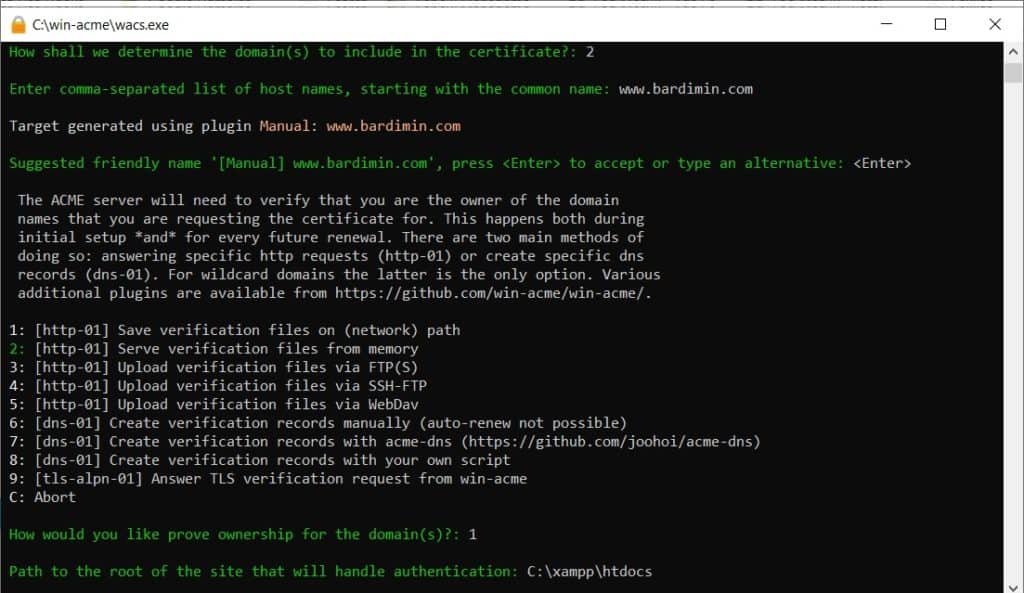
Next, you will be prompted to choose an input type. Select option 2 for “Manual input“. This option is suitable if you want to specify the domain name directly.
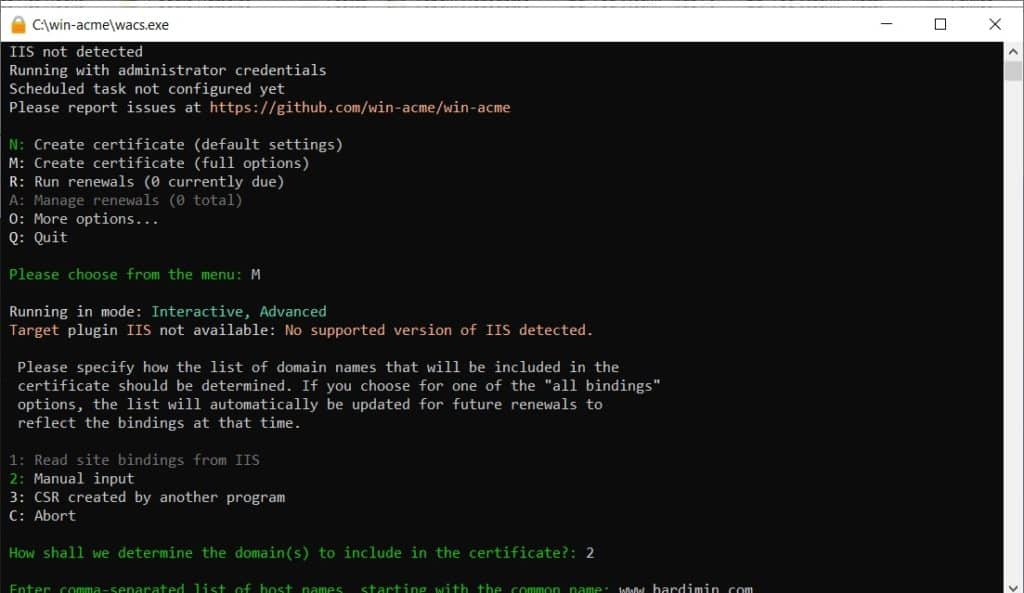
Enter your full domain name (example: bardimin.com) and press Enter. If you need a certificate for a subdomain (like www.bardimin.com), you can add it at this step by separating names with a comma.
Then, choose the validation method. For a local Apache web server, select option 1: [http-01] Serve verification files on (network) path.
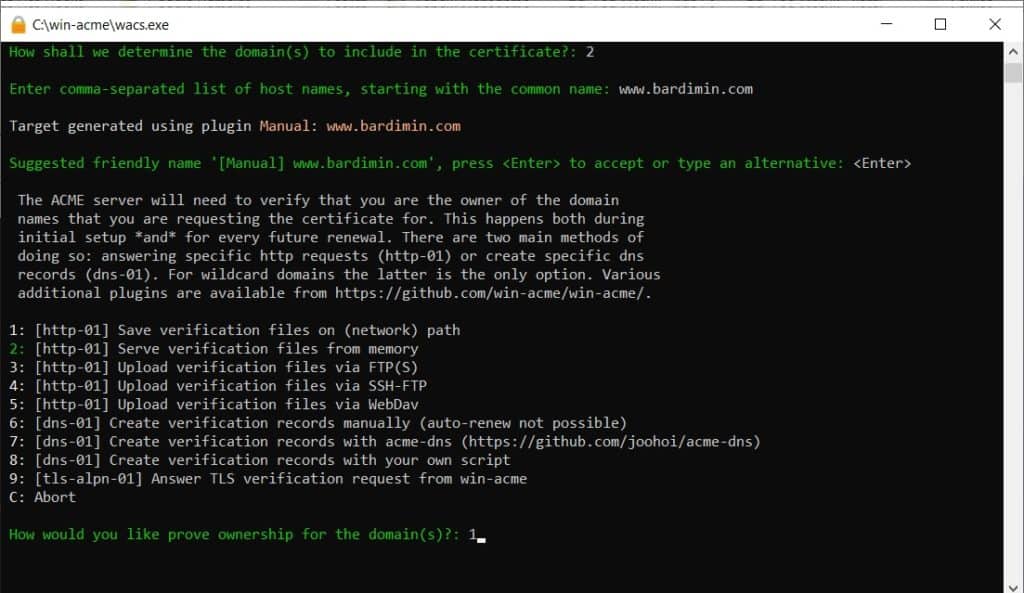
You will be asked to enter the path to your website’s root directory. If using XAMPP, the path is typically C:\xampp\htdocs\.well-known\acme-challenge\. However, you can simply enter C:\xampp\htdocs. Win-acme will automatically create the necessary subdirectories.
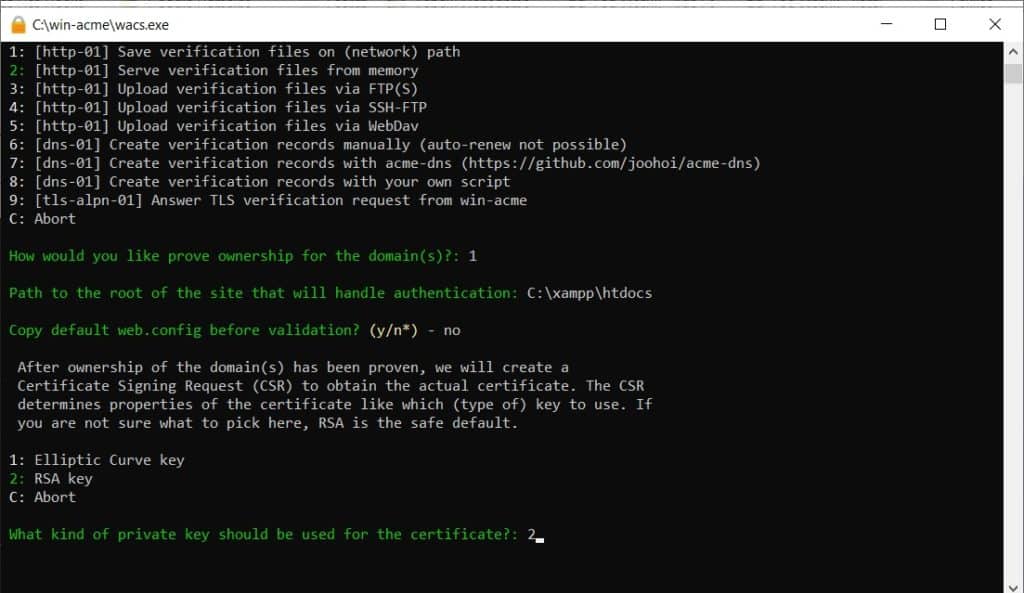
If prompted to copy a web.config file, choose N (No). Next, select the private key type. The current recommendation is 2 (RSA key) with a size of 2048 or 4096 bits.
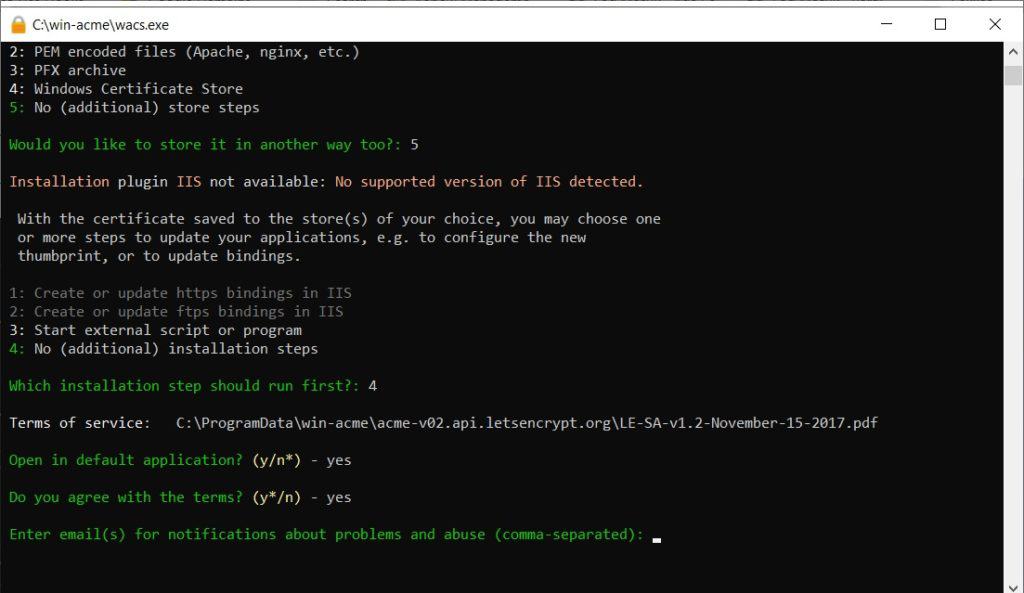
For the storage format, select option 2: PEM encoded files (Apache, nginx, etc.). This format is compatible with Apache on Windows.
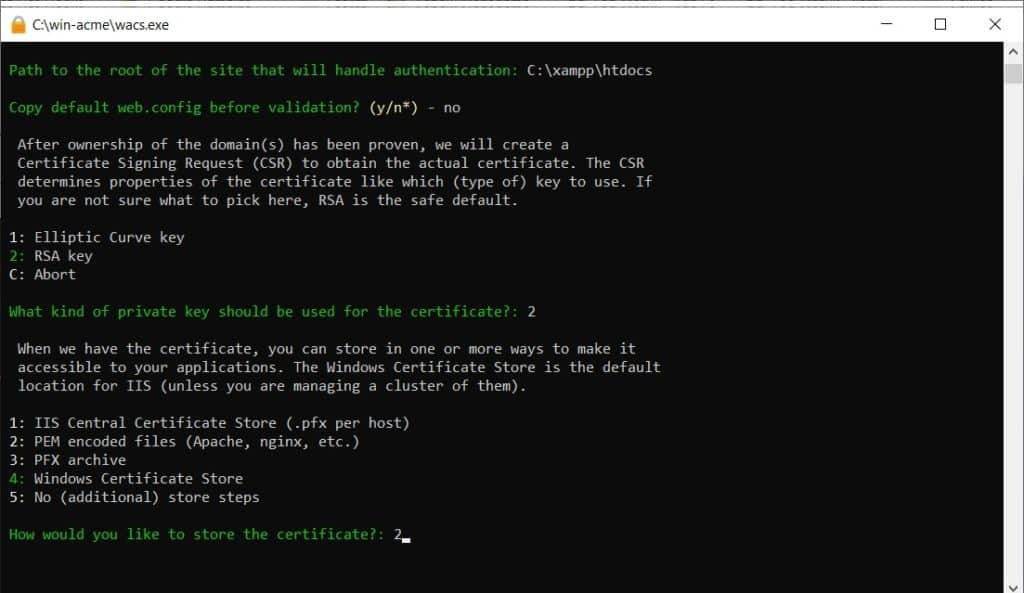
Specify the folder to store the certificate files. It is recommended to store them within the Apache configuration folder, for example, C:\xampp\apache\conf\ssl\. Create the ssl folder first if it doesn’t exist. Alternatively, you can use C:\xampp\apache\conf.

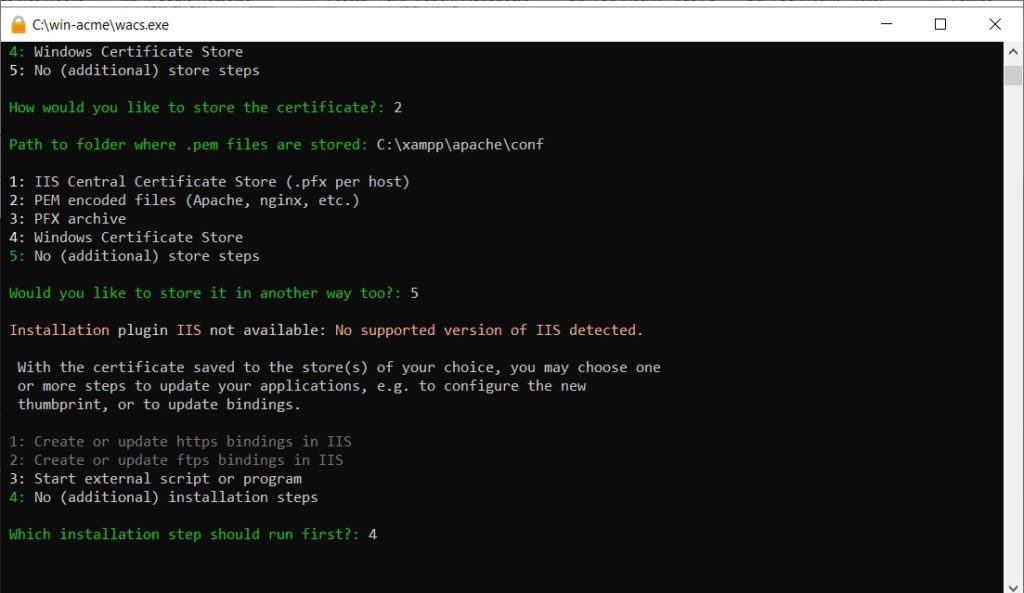
For additional store steps, select 5: No (additional) store steps. Similarly, for installation steps, select 5: No (additional) installation steps. We will configure Apache manually.
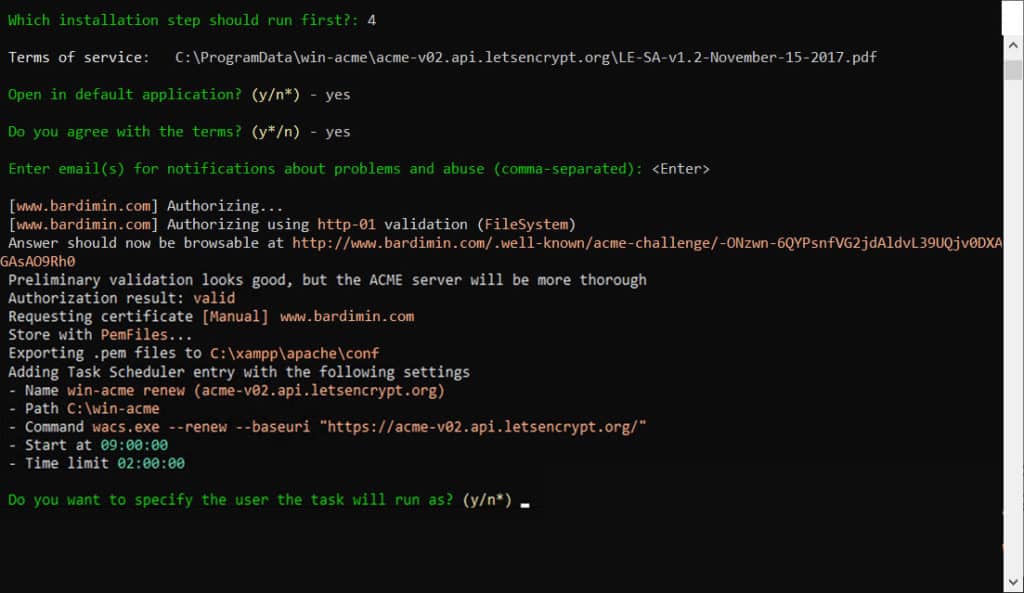
The next process is agreeing to the Let’s Encrypt Terms of Service. You will be asked to open the Terms of Service document (choose Y or N) and then agree to them (must choose Y). For the notification email, you can leave it blank by pressing Enter.
Win-acme will now execute the certificate request and validation process. If successful, you will see a success message and the location of the certificate files. Typically, two main files are created: bardimin.com-chain.pem (the combined certificate) and bardimin.com-key.pem (the private key).
Step 4: Configure Apache to Use the SSL Certificate
After the certificate is created, you need to configure the Apache virtual host for HTTPS port (443). Open the httpd-ssl.conf file or your main virtual host configuration file (usually located in C:\xampp\apache\conf\extra\httpd-ssl.conf or C:\xampp\apache\conf\httpd.conf).
Add or edit the VirtualHost configuration block for port 443. Ensure the paths to the certificate and private key files match your storage location.
<VirtualHost *:443>
    ServerName bardimin.com
    DocumentRoot "C:/xampp/htdocs/bardimin.com"

    SSLEngine on
    SSLCertificateFile "conf/ssl/bardimin.com-chain.pem"
    SSLCertificateKeyFile "conf/ssl/bardimin.com-key.pem"

    <Directory "C:/xampp/htdocs/bardimin.com">
        Options Indexes FollowSymLinks
        AllowOverride All
        Require all granted
    </Directory>
</VirtualHost>
Save the configuration changes. Then, restart the Apache service via the XAMPP Control Panel or Command Prompt.
Step 5: Verify Successful SSL Installation
Open a browser and access your website using HTTPS, for example, https://bardimin.com. If the configuration is successful, you will see a padlock icon to the left of the address bar. Click the padlock icon to view certificate details, including the issuer “Let’s Encrypt” and the validity period.
Important: Let’s Encrypt certificates are only valid for 90 days. However, win-acme is typically scheduled automatically as a Windows Task Scheduler job to renew the certificate before it expires. You can verify this in the Windows “Task Scheduler” application.
By following the steps above, your website is now protected by a valid Let’s Encrypt SSL certificate. This process not only enhances security but also boosts your site’s credibility in the eyes of users and search engines. Congratulations!