Your Canon printer suddenly freezes. It’s a small, usually friendly screen now displays only a menacing set of letters and numbers: Error 5B00. Here’s a little “rebellion” in the world of home printing. For loyal users of Canon G1000, G2000, G3000, E400, MP287, and the like, these error codes are a nightmare that too often comes true.
Then, what exactly is Error 5B00?
At its core, Error 5B00 is a cry for help from your printer. This is a Waste Ink Counter that reaches its maximum limit. Each time your printer performs an automatic printhead cleaning, a small amount of residual ink is flowed into a special absorbent sponge called a Waste Ink Absorber.
Over time, these sponges will be full. The printer, which has been programmed to prevent ink from overflowing and damaging the electronic components inside, will automatically lock itself and display Error 5B00. This is a security feature; it doesn’t mean your printer is completely broken.
However, the impact can be fatal if left unchecked:
- Printer Crash Completely: You can’t print at all, not even a single page.
- Pending Jobs: Stacked deadlines, important paperwork on hold, and unnecessary stress.
- Risk of Permanent Damage: If the full Waste Ink Absorber continues to be forced, the ink can overflow and damage the printer’s mainboard, which can mean very expensive servicing costs or even having to buy a new printer.
Getting to Know Canon Service Tool
Any Canon printer user will know that when Error 5B00 appears, the print job immediately stops completely. But not many people understand that behind the quick fix to these errors, there is a professional software designed directly for the needs of Canon technicians: the Canon Service Tool.
What Is a Canon Service Tool and How Does It Work?
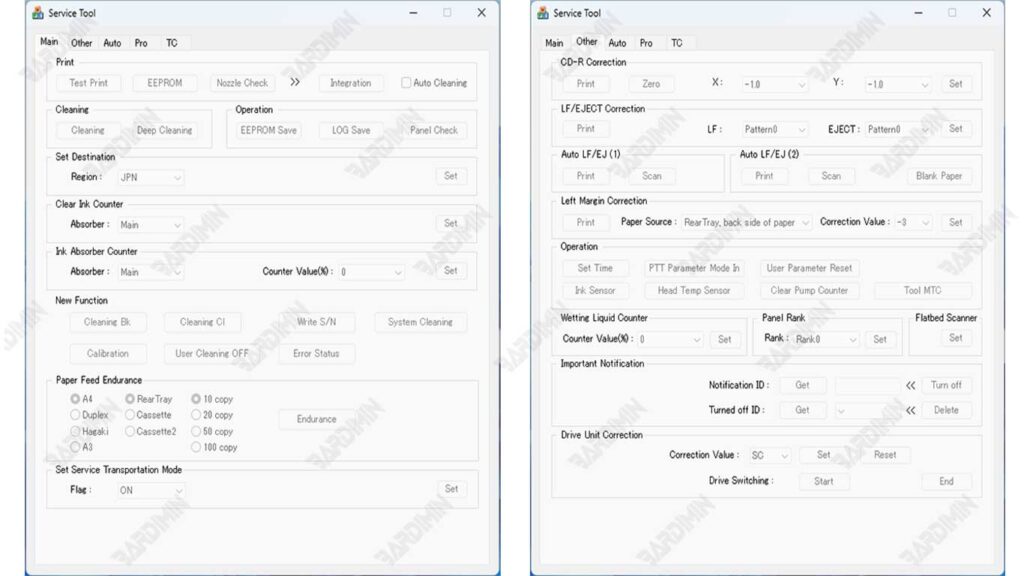
Canon Service Tool is an official utility application from Canon that is used to perform internal printer maintenance, repairs, and resets. Its function is similar to that of the “digital service panel,” which can only be accessed through a printer-specific mode, namely Service Mode.
When the printer is in this mode, the software has full access to the internal system to:
- Reset the waste ink counter.
- Resetting EEPROM data.
- Initialize a specific component to return the printer to its original factory state.
In simple terms, the Canon Service Tool works by sending commands directly to the printer’s firmware to delete the ink discharge logs stored in the internal memory. Once the command is executed, the printer will return to normal function without a 5B00 error or similar.
This software is widely used by professional printer technicians because of its fast, lightweight, and non-Internet connection capabilities. You can simply run it from a portable file (.exe), connect the printer via a USB cable, and the entire reset function is ready to go.
Key Features of Canon Service Tool
This software is not just a reset tool, but a multi-functional utility with a variety of essential features that support printer maintenance. Here’s a detailed explanation of each feature:
1. Reset Waste Ink Counter
The main feature used to delete waste ink counter data.
This function allows the printer to re-recognize its absorber as “empty”, so that the Error 5B00 message disappears and the printer can reprint as before.
2. EEPROM Operation
EEPROM (Electrically Erasable Programmable Read-Only Memory) stores all the printer’s internal data, including ink usage information, print count, and hardware configuration.
With this feature, you can read, delete, or rewrite EEPROM data, allowing the printer to be restored to factory settings (factory default).
3. Ink Absorber Counter Initialization
This feature performs a total initialization of the absorber ink counter, not just a temporary reset.
Suitable for printers that have been used for a long time, where the physical absorber has also been cleaned or replaced.
With this initialization, the printer “forgets” the entire history of old ink disposal.
4. Print Head Alignment & Maintenance Mode
Additional functions that technicians often use:
- Align the position of the print head for more precise prints.
- Perform nozzle check and cleaning without having to open the printer driver on the computer.
- Runs Maintenance Mode for in-depth maintenance and diagnostics of printer conditions.
Step-by-Step Guide to Using the Canon Service Tool
One of the biggest advantages of Canon Service Tools is their ease of use. You don’t need to be an experienced technician to do a waste ink reset or fix Error 5B00. Just follow the steps below carefully, and your Canon printer will be back to normal in just a few minutes.
Commemoration:
Before starting the process, make sure that the ink is not leaking, that the absorber is cleaned (if possible), and that the printer is connected using a genuine Canon USB cable. Avoid using hubs or USB extension cables to reduce the risk of communication failures between the printer and the computer.
Step 1: Setting Up the Printer in Service Mode
In order for the Canon Service Tool V6000 to correctly detect the printer, you must first insert the printer into Service Mode.
Service Mode is a special mode that allows the software to communicate directly with the printer’s firmware.
Here’s how to enter Service Mode based on printer type:
For Canon G1000, G2000, G3000 Series
- Turn off the printer first (make sure the power cord is still plugged in).
- Press and hold the Stop/Reset button.
- While holding down the Stop/Reset button, press the Power button and hold both buttons for ±5 seconds.
- Release the Stop/Reset button, then press it 5 times in a row.
- After that, release all the buttons. The printer will light up with a steady green light, meaning it has successfully entered Service Mode.
For Canon MP287, E400, E410 Series
- Unplug the USB cable from the computer first.
- Press and hold the Power button.
- While holding Power, press the Stop/Resume button 2 times.
- Release both buttons at the same time.
- Wait for the green indicator light to illuminate without flashing; this is a sign that the printer is already in Service Mode.
If the printer is not detected in the software later, repeat the Service Mode step above until the computer reads the printer as a new device (USB printing support).
Step 2: Run the Canon Service Tool and Identify the Printer Port
- Run the Canon Service Tool.exe app (no installation required).
- Make sure the printer is connected to the computer via a direct USB cable.
- At the top of the app window, you’ll see a “USB Port” column.
Click the drop-down menu and select the detected Canon printer port (usually listed as USB001 – Canon G2000 series or similar). - If the printer has not appeared, press the Refresh button or repeat the Service Mode process.
Do not proceed to the reset stage before making sure the printer port has been correctly detected in the software.
Step 3: Perform a Reset with the “Play” or “EEPROM” Option
Once the printer is recognized by the Canon Service Tool V6000, you can immediately perform the reset process with two common methods:
Method 1 – “Play” button
- Click the Play button on the main display of the software.
- The printer will process the command for a few seconds.
- If successful, the printer will automatically print a test print containing the words “D=000.0” or “Absorber Counter = 000%”.
This means that the Waste Ink Counter has been successfully reset to zero.
Method 2 – “EEPROM” button
- Click the EEPROM button to perform a deep (deeper) reset.
- The printer will print an EEPROM report containing various system data such as printer ID, print count, and counter status.
- The print results show that the internal initialization and reset process was successful.
For most series, like the Canon G2010 or G3010, just use the Main command. However, for older models such as MP287, you should run EEPROM so that the reset results are completely clean.
Step 4: Wait for the Process to Complete and the Printer Restarts Automatically
- After the reset process is complete, the printer will turn off for a moment and then turn back on automatically.
- Disconnect the USB cable and manually restart the printer if it has not auto-restarted.
- Try to test print to make sure the 5B00 error is gone.
If the results are normal and the printer no longer shows an error message, the reset is completely successful. Now your printer is ready to be used again, like it was fresh out of the factory.
Download Secure Canon Service Tool Latest Version
Common Mistakes When Using Canon Service Tools (And Solutions)
Many users are frustrated because the reset process fails halfway through. After analyzing dozens of cases, we identified a pattern of repeated errors. Here’s a breakdown of why some users fail and smart solutions to overcome them.
Mistake 1: Failed to Enter “Service Mode” Correctly
Why This Happens:
- Fear of pressing the button too hard or for too long
- Improper keystroke rhythm
- Not knowing the specific key combinations for a particular model
Smart Solutions:
- Learn the Right “Rhythm”: It’s not about power, it’s about rhythm. Press the POWER button first, HOLD, and then press STOP/RESUME at clear intervals (about 1 second between presses).
- Visual Confirmation: After successfully entering Service Mode, the indicator light will usually behave differently – it stays on without blinking, or a certain blinking pattern.
- Model-Specific Documentation: For models like the G4010, combinations may differ (e.g.: hold POWER + press CANCEL 5x). Always look for demonstration videos for your specific model.
Error 2: Tool Version Not Compatible
Why This Happens:
- Downloading from untrusted sources
- Corrupt or incomplete files
- Use the V6000 for models that require a V6500 or later
Smart Solutions:
- Checksum Verification: The original Canon Service Tool V6000 file is usually 1.2MB – 1.8MB in size. Files that are too small (less than 500KB) are almost certainly corrupt.
- Test on Other Computers: If possible, try on a different computer to isolate the problem.
- Research Community: Join the Canon Indonesia printer forum – members often share their experiences about version compatibility for specific models.
Mistake 3: Antivirus Blocks Execution
Why This Happens:
- Utility software like this is often flagged as a “potentially unwanted program” (PUP)
- Overly aggressive antivirus heuristics
Smart Solutions:
- Add to Exclusions: Before disabling the antivirus, try adding V6000.exe files to the exclusions list.
- Re-Download from Trusted Sources: Sometimes files that have been modified by the “repacker” are not detected as threats.
- Use Windows Defender Offline: If a third-party antivirus is difficult to disable, boot with Windows Defender Offline to scan without conflicts.
Error 4: USB and Driver Connection Issues
To make this happen:
- USB charge-only cable (for charging only)
- USB 3.0 (blue) port that is sometimes less compatible
- Unoptimized Windows universal drivers
Smart Solutions:
- Test USB Cable: Make sure the cable can transfer data by connecting to another device.
- Use USB 2.0 ports: If applicable, prioritize USB 2.0 ports (usually black).
- Install Official Drivers: Download model-specific drivers from the Canon Indonesia website, relying on Windows Update.