Sysprep is a tool used to prepare your Windows installation for use on other computers with different configurations. Sysprep can remove system-specific information, such as computer name, product ID, and SID (Security Identifier) so that Windows installations can be copied and distributed to other computers without causing conflicts.
Sysprep can also be used to generalize Windows installations, i.e. remove all installed user and application information, so that Windows installations can be used as base images to create custom images.
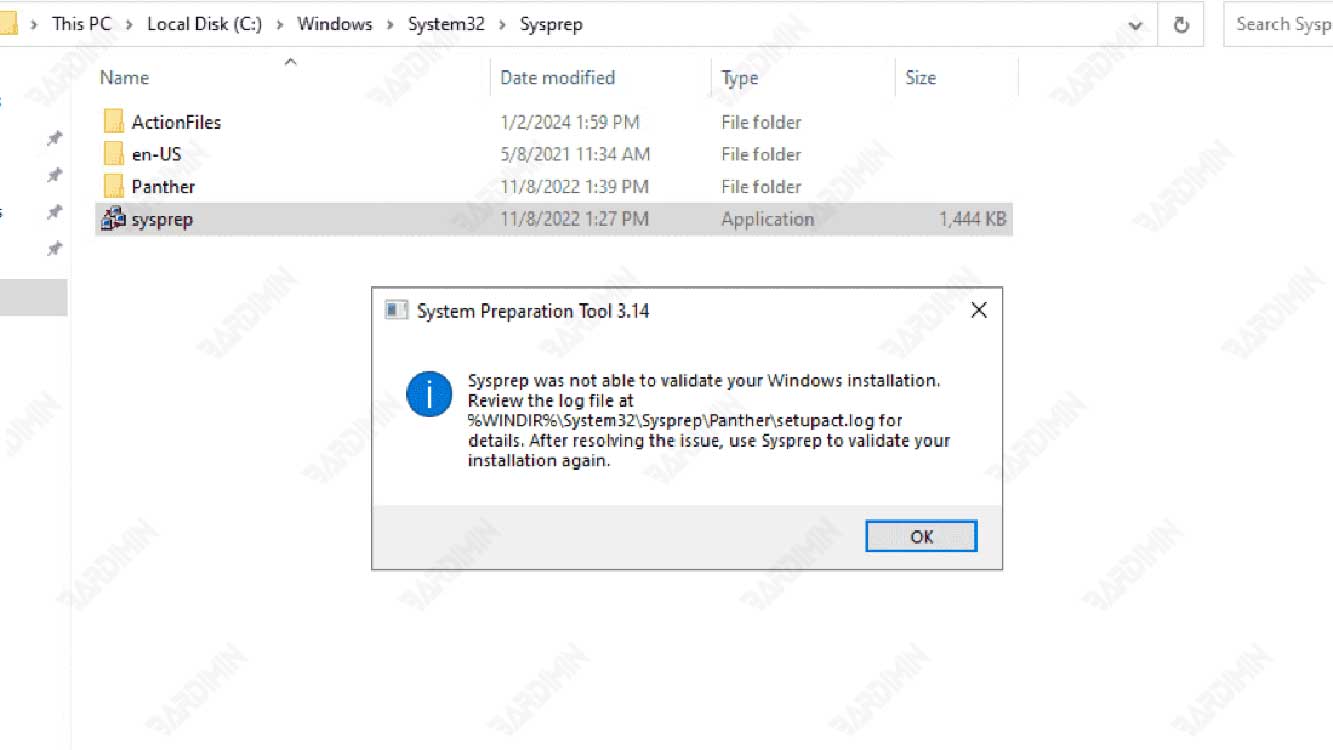
However, Sysprep does not always run smoothly. Many Windows 11 users have reported that they encounter errors when running Sysprep, especially when using the generalize option. Common errors are “Sysprep was not able to validate your Windows installation” or “A fatal error occurred while trying to sysprep the machine”.
This error can hinder the Sysprep process and make the Windows installation unusable on other computers. What causes this error and how can I resolve it? This article will answer the question by providing some solutions that you can try.
Causes of Sysprep Error on Windows 11
Several factors can cause sysprep errors in Windows 11, including:
- There is an application that is not supported by Sysprep. Some apps installed on Windows 11 may not be compatible with Sysprep, especially apps that use Microsoft accounts or cloud services, such as OneDrive, Skype, and the Microsoft Store. This application can interfere with the Sysprep process and cause errors.
- There are changes to the Windows registry. The Windows registry is a database that stores important information about the operating system, settings, and applications. If the Windows registry is damaged or changes are inappropriate, Sysprep can fail to run and display an error.
- There is a limit to the number of Sysprep that can be done. Windows 11 has a limitation that Sysprep can only be done three times on one Windows installation. If you try to run Sysprep more than three times, you’ll get an error.
A solution to Sysprep Error on Windows 11
Here are some solutions you can try to solve sysprep error on Windows 11:
Solution 1: Remove Applications Not Supported by Sysprep
The first step you can take is to remove applications that are not supported by Sysprep, especially applications that use Microsoft accounts or cloud services. You can remove these apps by using Settings or PowerShell. Here’s how:
- Open Settings by pressing Windows + I on the keyboard.
- Select Apps and then select Installed apps.
- Find apps that aren’t supported by Sysprep, such as OneDrive, Skype, and the Microsoft Store, and click Uninstall to remove them. Repeat this step for each app you want to remove.
- If you can’t remove an app by using Settings, you can use PowerShell. Open PowerShell by pressing Windows + X on the keyboard and select Windows PowerShell (Admin).
- Type the following commands to remove applications that are not supported by Sysprep, and press Enter after each command. Replace AppName with the name of the app you want to remove.
Get-AppxPackage *AppName* | Remove-AppxPackage
Get-AppxProvisionedPackage -Online | Where-Object {$_.PackageName -like “*AppName*”} | Remove-AppxProvisionedPackage -Online- After you remove all applications that are not supported by sysprep, try running sysprep again and see if the error still appears.
Solution 2: Restore Windows Registry to Default Settings
The second step you can do is restore the Windows registry to the default Settings, which are Settings that existed during the first Windows installation. This can help fix any damage or inappropriate changes to the Windows registry that can cause sysprep errors. Here’s how:
- Open PowerShell by pressing Windows + X on the keyboard and select Windows PowerShell (Admin).
- Type the following command to restore the Windows registry to its default Settings, and press Enter.
Get-ChildItem HKLM:\SOFTWARE\Microsoft\Windows\CurrentVersion\Setup\Sysprep\SetupCl | Remove-ItemProperty -Name DoNotCleanUpNonPresentDevices
- After the command finishes running, try running sysprep again and see if the error still appears.
Solution 3: Reset the Sysprep Number Limitation
The third step you can do is reset the limit on the number of Sysprep that can be done on a single installation of Windows. This can help you if you’ve run Sysprep more than three times and get errors. Here’s how:
- Open Registry Editor by pressing Windows + R on the keyboard, typing regedit, and pressing Enter.
- Locate the following folder in the left pane:
HKEY_LOCAL_MACHINE\SYSTEM\Setup\Status\SysprepStatus
- Double-click on the CleanupState value on the right pane, and convert the data to 2. Click OK to save your changes.
- Double-click on the GeneralizationState value on the right pane, and change the data to 7. Click OK to save your changes.
- Close Registry Editor and try running sysprep again and see if the error still appears.
Conclusion
Sysprep errors in Windows 11 can be caused by several factors, such as the presence of applications that are not supported by Sysprep, changes to the Windows registry, or a limit on the number of Sysprep that can be done. You can try some of the solutions described above to solve the Sysprep error on Windows 11. Hopefully, this article is useful and can help you in using Sysprep on Windows 11.