Do you feel applications that run slowly on Windows? You can fix this problem by running the application at a higher priority. With a higher priority, the application will run faster.
Windows is a multitasking operating system that has several ways to manage running processes to help make your computer run more smoothly. In addition to Affinity which controls how many processors cores an application can run, there is also a priority on which a process runs. Priority will queue an application when requesting processing time.
Like when you are doing video editing work which is a huge CPU resource and at the same time you are opening a browser. If you change the priority of the video editing app to be higher than the browser, the video editing app will get all the CPU resources and the browser app will get the rest.
Set Priority Via Task Manager
You can change the priority of the application through the Task Manager. In Windows 11 you can do this with the shortcut ( Ctrl + Shift + Esc ). Then select the “ Details ” tab and then select the application that you want to set the priority for. Right-click the application and then select “ Set priority > High ”.
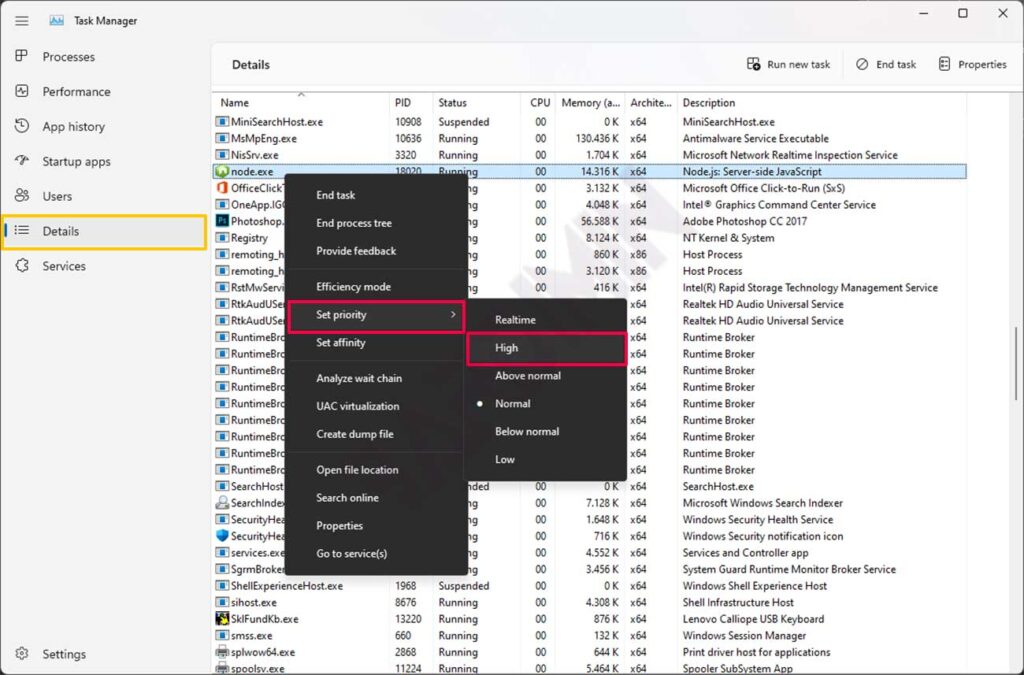
Priority options available:
- LOW: Start the application with the lowest priority class.
- BELOW NORMAL: Starting the application priority class is lower than usual.
- NORMAL: Starting the application in the NORMAL priority class.
- ABOVENORMAL: Starting the application priority class is higher than normal.
- HIGH: Start the application with a high-priority class.
- REALTIME: Starting the app in real-time priority class.
Run apps with priority via CMD
To give the application a high priority you can do it by starting the application via CMD. Open CMD then type the following command
start "title" /high PATH
for example, you will run Firefox with high priority
start "" /high "C:\Program Files\Mozilla Firefox\firefox.exe"
Set app priority permanently
All of the above methods will only change the priority temporarily, if you restart your PC/Laptop, all priority settings will return to normal. To change permanently you can do it via application shortcuts.
Right-click the shortcut and select “ Properties ”. Then in the ” Target ” add at the beginning of the following code:
% windir %\system32\cmd.exe /c start "" /high
Or in full it becomes (for example changing Chrome to high priority)
% windir %\system32\cmd.exe /c start "" /high "C:\Program Files\Google\Chrome\Application\chrome.exe"
Then save the changes and run the application via the shortcut. Then check through the Task Manager whether the priority has changed.