For cybersecurity professionals, pentesters, and IT technicians, having quick access to the right tools is key. Kali Linux is a specialized Linux distribution packed with hundreds of tools for penetration testing, digital forensics, and security auditing. Now, you can run it natively on Windows 10 and 11 without dual-boot, thanks to the Windows Subsystem for Linux (WSL). This guide will walk you through the latest, clear, and efficient steps on how to install Kali Linux on Windows.
WSL, especially WSL 2, has evolved rapidly and offers seamless integration between Windows and the Linux environment. This method is significantly lighter than conventional virtual machines. You get access to Kali Linux’s powerful command line directly from the Windows desktop, which can then be enhanced with a graphical interface using Win-KeX.
Prerequisites Before Installing Kali Linux on Windows
Ensure your system meets the following requirements:
- Windows 10 (Build 19044 or higher) or Windows 11.
- Administrator access.
- A stable internet connection to download packages.
- Recommended minimum of 10 GB free disk space.
Step 1: Enable WSL and the Virtual Machine Platform
The WSL feature is not enabled by default. You can activate it in two easy ways:
Method 1: Via PowerShell (Recommended)
Open PowerShell as Administrator, then run the following command:
wsl --installThis command will automatically activate all required components, including the Virtual Machine Platform. Once done, restart your computer.
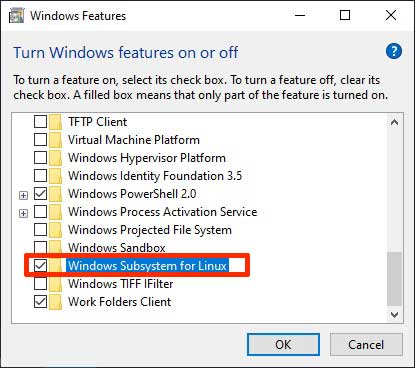
Method 2: Via Turn Windows Features On or Off
Alternatively, open the Run dialog (Win + R), type optionalfeatures. Check the boxes for “Windows Subsystem for Linux” and “Virtual Machine Platform”. Click OK and restart your PC.
Step 2: Set WSL 2 as the Default Version
WSL 2 offers significantly better performance and compatibility. After restarting, open PowerShell as Admin again and run:
wsl --set-default-version 2This command ensures any Linux distribution you install afterwards will use WSL 2.
Step 3: Install Kali Linux from the Microsoft Store
This is the easiest way to install Kali Linux on Windows.
- Open the Microsoft Store from the Start menu.
- Search for “Kali Linux“.
- Click the “Get” or “Install” button on its official app page.
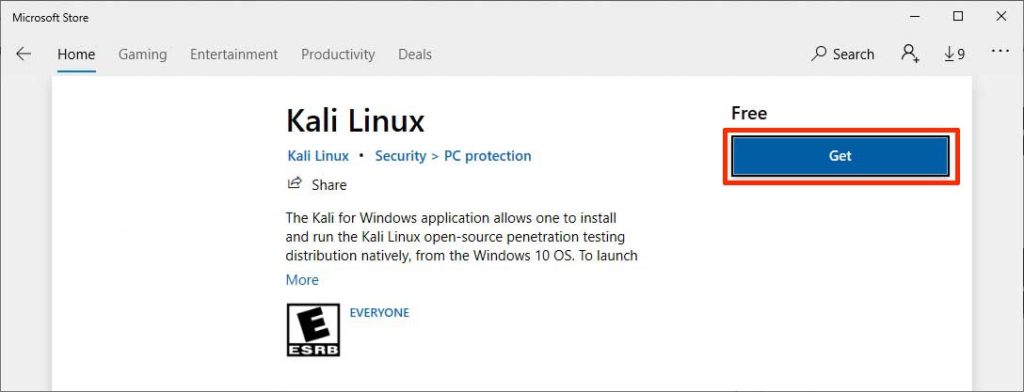
The download and installation process will run automatically. Once finished, you can launch it from the Start menu or by typing “Kali Linux” in the Windows search.
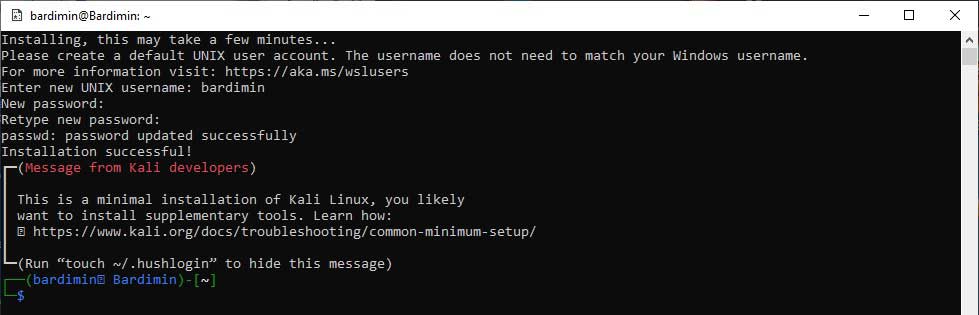
Step 4: Initial Kali Linux Configuration
Upon first launch, the Kali Linux terminal will open. You will be prompted to:
- Create a new username and password for the root account in the Kali environment. The password will not be visible as you type (this is normal).
- This initialization process is performed only once.
Step 5: Install Win-KeX for a Graphical Interface (GUI)
To get the full Kali Linux desktop with graphical menus, install the Win-KeX package. Inside the Kali Linux terminal, run the following commands in sequence:
sudo apt update && sudo apt upgrade -y
sudo apt install -y kali-win-kex
After installation is complete, you can run Kali Linux in windowed, seamless (like a Windows app), or Enhanced Session mode. For basic window mode, run:
kex --win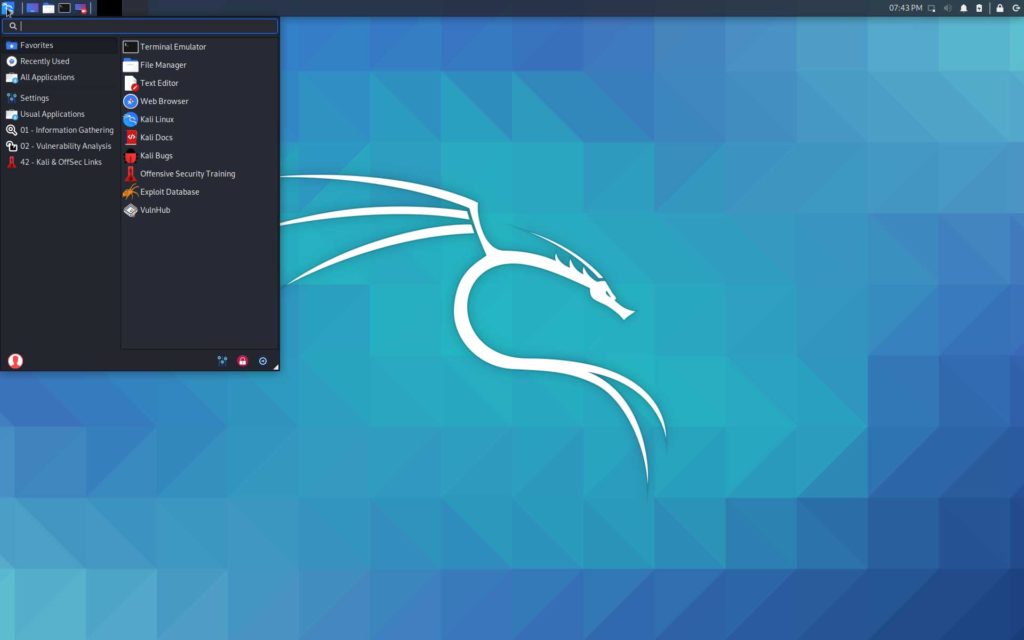
Post-Installation Tips and Tool Updates
The Store installation includes only basic tools. To install a more complete set of tools (e.g., for wireless testing or forensics), use metapackages. Before that, ensure the system is up-to-date:
sudo apt update
sudo apt full-upgrade -y
You can then install a metapackage, such as kali-linux-large. However, consider your needs as this will download many packages.
sudo apt install -y kali-linux-largeImportant Note: Some tools within Kali Linux may be detected as threats by Windows antivirus software. You may need to add an exception for the WSL folder or temporarily disable antivirus while downloading specific tools for legitimate testing.
By following this guide, you have now successfully set up Kali Linux on Windows via WSL. This solution offers high flexibility for IT and security professionals to work in an integrated environment. For official documentation and in-depth learning resources on Kali tools, visit the Kali Linux Official Docs and Microsoft WSL Documentation.