When we buy a new laptop, often when we open the file explorer we only find one drive (drive C:), even though the hard drive we have has a large enough capacity.
Actually, even with only one C: drive will not have a bad impact on the performance of the Windows OS that we use.
The main disadvantage of using a single C: drive is when a problem occurs with the Windows OS that we use and requires us to reinstall the Windows OS.
Before re-installing, we have to do a backup of the data we have to an external hard drive. The problem will be even more complicated if the damage that occurs is the damaged filesystem of the C: drive. If the filesystem is damaged, we can’t back up data just by “copying and pasting”.
Advantages of creating partitions on Windows

If one day the Windows OS that we use has problems and has to be reinstalled, we no longer bother to backup data.
How to create a new partition in Windows
To create a new partition on Windows, be it Windows 11, Windows 10, or Windows 7, we don’t need any additional applications. Simply by using “Disk Management” which is the default from Windows.
The steps are as follows:
Steps to create a partition on Windows
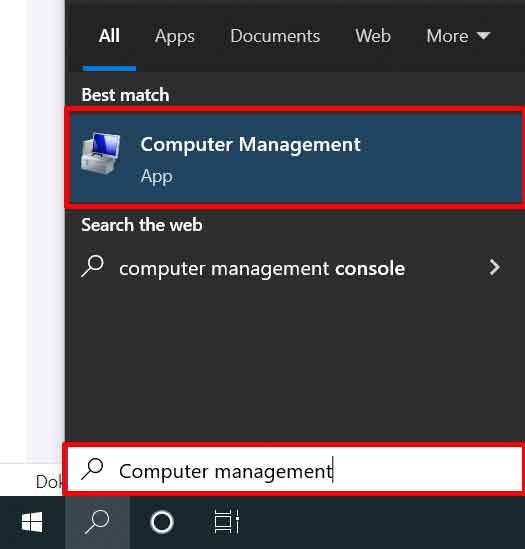
- Open “Computer Management“. To open it just type “Computer Management” in the search button and click “Computer Management” with the computer icon.
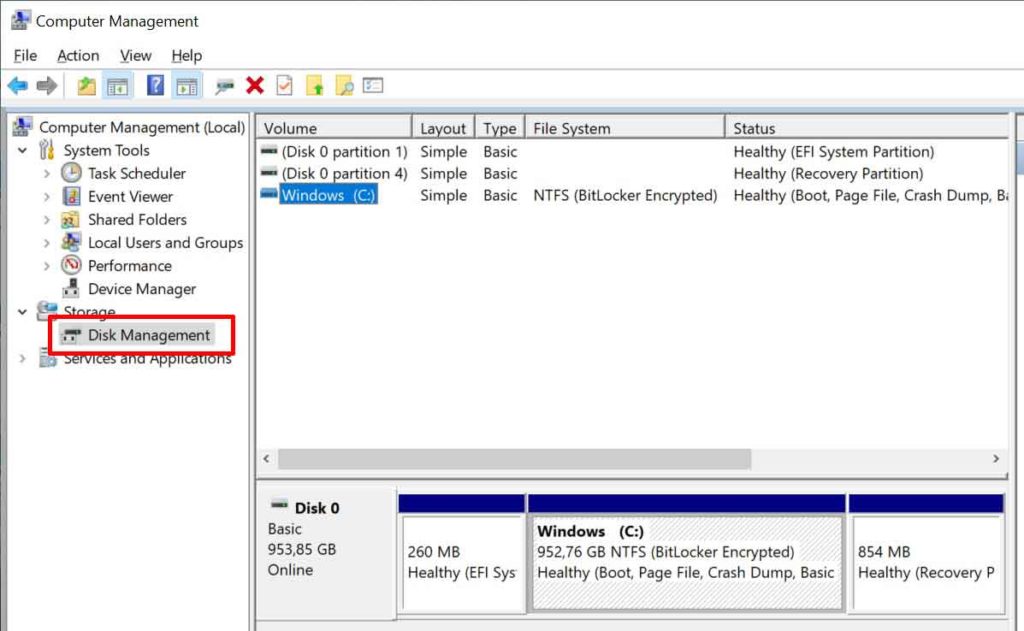
- In Computer Management, select “Disk Management“
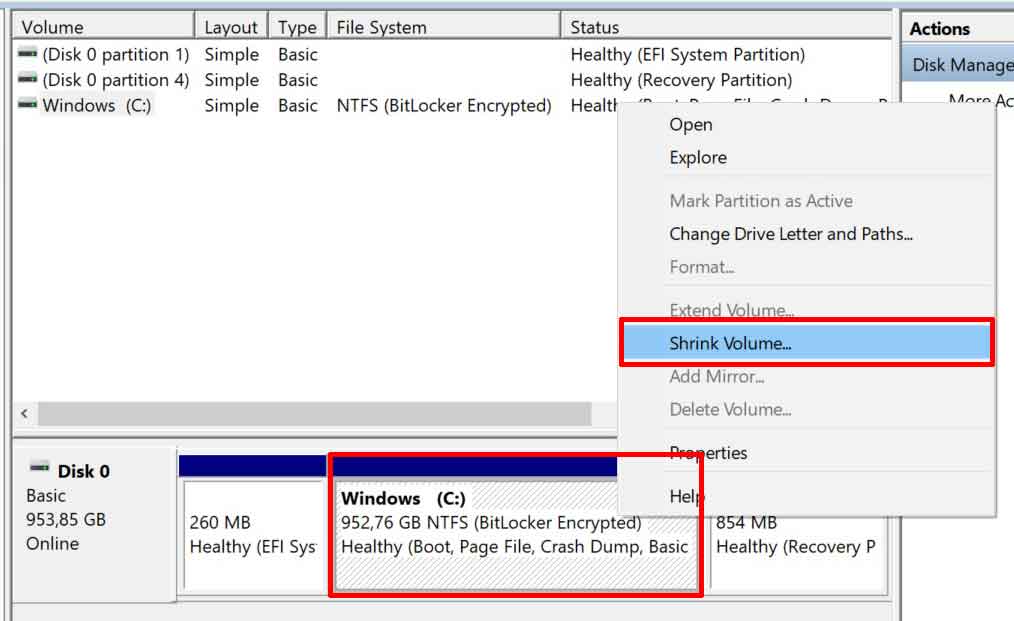
- Then select the drive you want to resize the partition. For example in this example we will resize the C: drive. Click the “Windows (C:)” drive and then right click and select “Shrink Volume“.
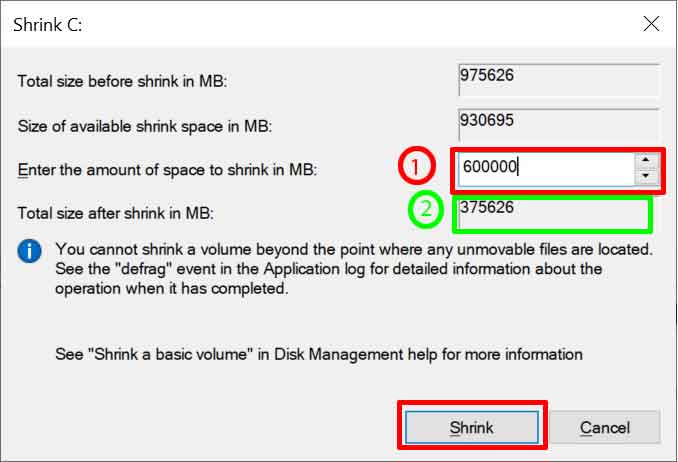
- Next on “Enter the amount of space to shrink” (1) fill in the size of the D: drive that you will create. In this example we will create a D: drive with a size of 600 GB. For writing we have to write it in units of Mega Byte (MB), so we write 600,000 MB. While the green box number 2, shows the size of the C: drive after we partition (we don’t need to fill in this box, only information).
Recommended C: drive size Windows
For drive size C: Windows OS, adjust it according to your needs plan
- 150 – 200 GB –> for standard needs (Windows and Office)
- 200 – 400 GB –> for those of you who need a lot of applications
- > 400 GB –> for those of you who like to play heavy games.
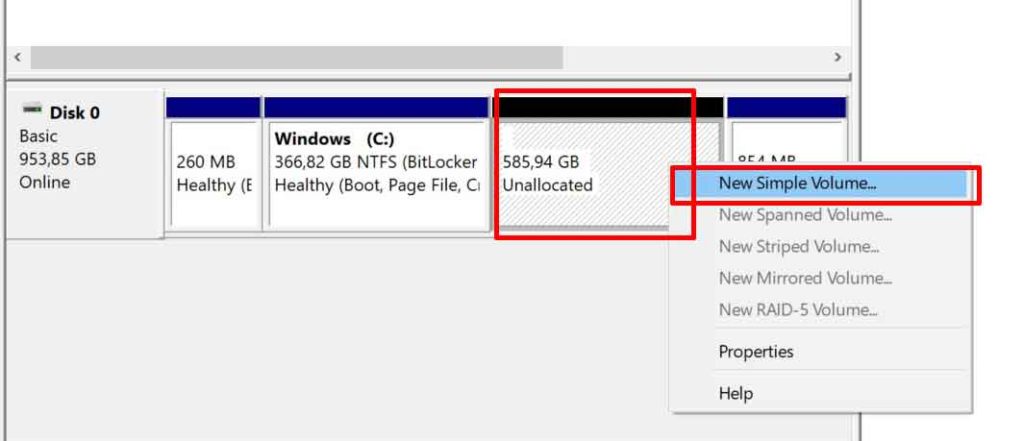
- After the process in step 4 is complete, a new partition will be formed with the status “Unallocated“. Then select the “Unallocated” drive and right-click, select it and click “New Simple Volume“.
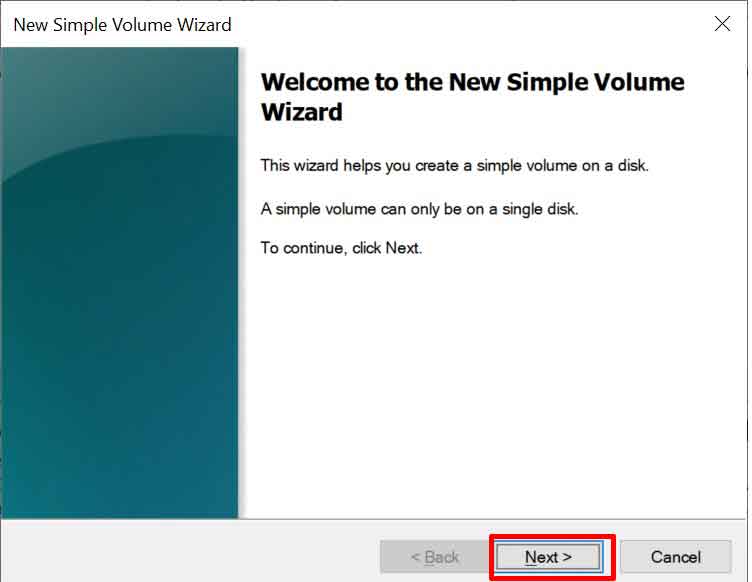
- In the “New Simple Volume Wizard” you just click the Next button on each confirmation that appears until the whole process is complete.
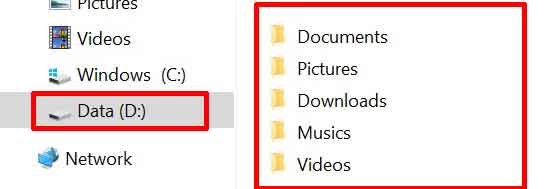
- After the “New Simple Volume Wizard” process is complete, if you open the file explorer a new drive will appear, namely drive D:

Moved default Documents, Downloads, Pictures, Music and Videos directories
When finished creating the partition, the next step is to move the default from the Documents, Downloads, Pictures, Music, and Videos directory to the D: drive that we have created.
- Create a directory named Documents, Downloads, Pictures, Music and Videos on drive D:
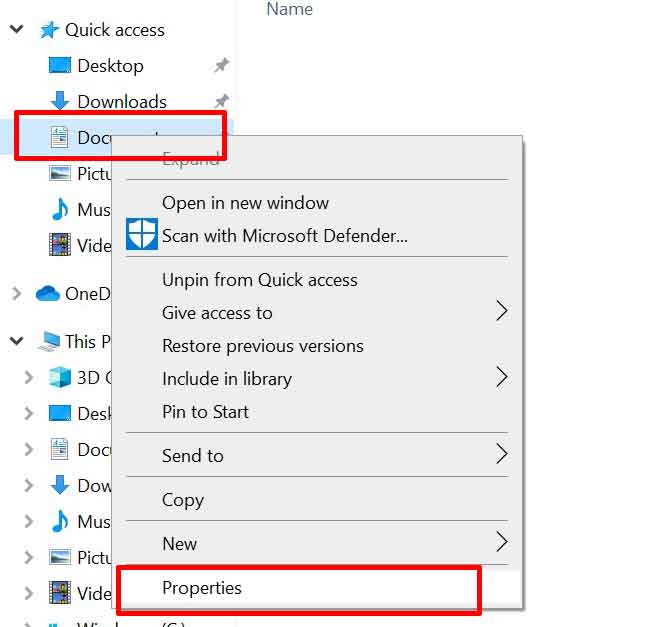
- In the file explorer (Quick access), select the “Documents” directory and then right-click and select “Properties.
- Under “Documents Properties” select the “Location” tab. Then select the “Move” button.
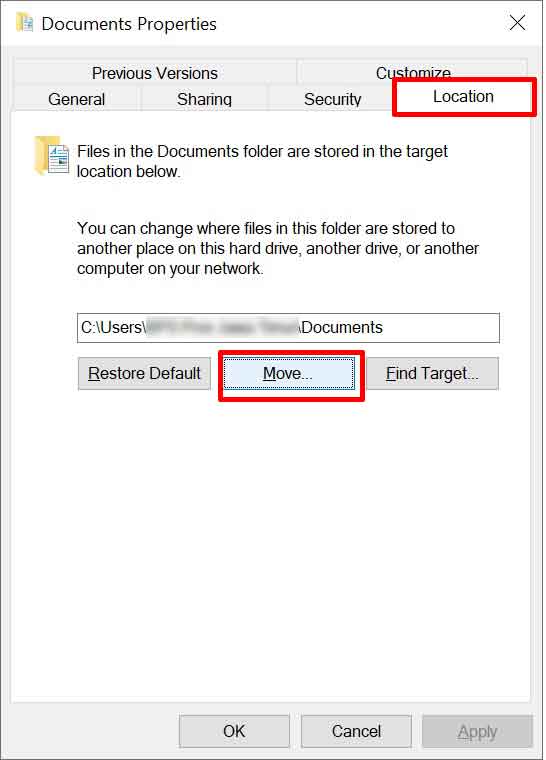
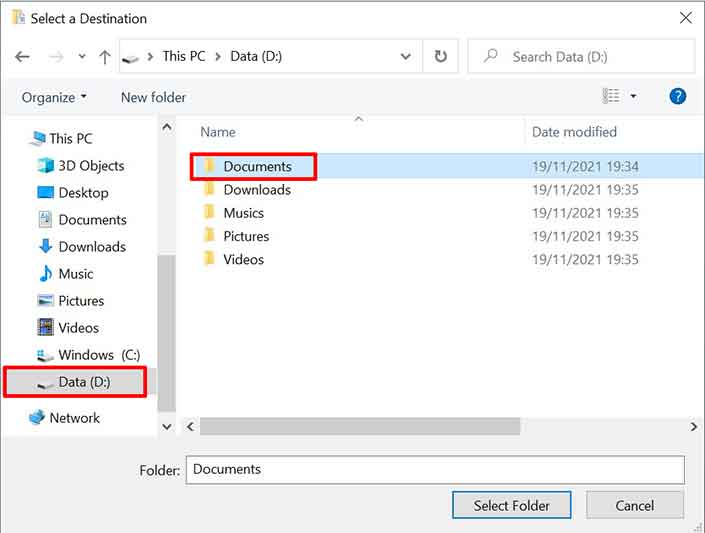
- Next select the “Documents” directory on the D: drive that we created in the first step earlier. Then click the “Select Folder” button.
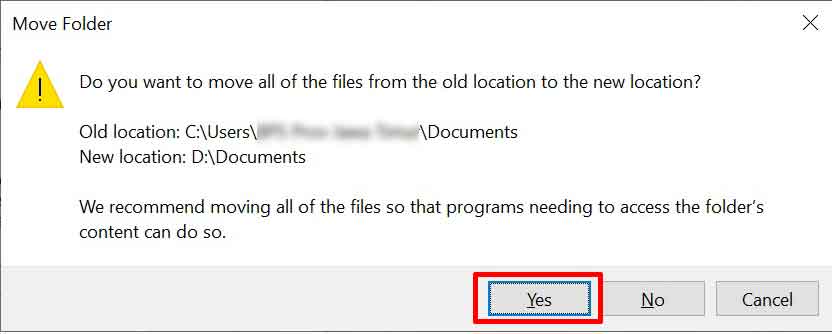
- Click the “Yes” button on the confirmation window that appears.
- Repeat step 2 for the other directories.
That’s the way to partition and move the default directory from Windows that you can apply to Windows 11, Windows 10, and Windows 7.
Hope it is useful…

