You can create applications, surveys, or any type of form by using Microsoft Word.
Microsoft Word lets you create interactive digital forms that others can fill out on their computers before printing or emailing you back. Filling out forms makes it easy to gather information.
With a fillable form, you just need to create a form in Microsoft Word. Then you can distribute it to everyone without the need to print it. This way, you can save on budget expenditures.
Some tools you need to prepare when creating forms include:
- Templates, Forms are often saved as templates so that they can be reused.
- Content control, The part of the form where the user enters information.
- Protection, Users can fill in form fields without being able to change the content or appearance of the form.
Here are the steps to create a fillable form in Microsoft Word.
A. Displaying the Developer Tab
Before you can create a form, you must enable the Developer tab to get access to advanced tools. The Developer tab isn’t displayed by default, but you can add it to the ribbon.
- Open Microsoft Word.
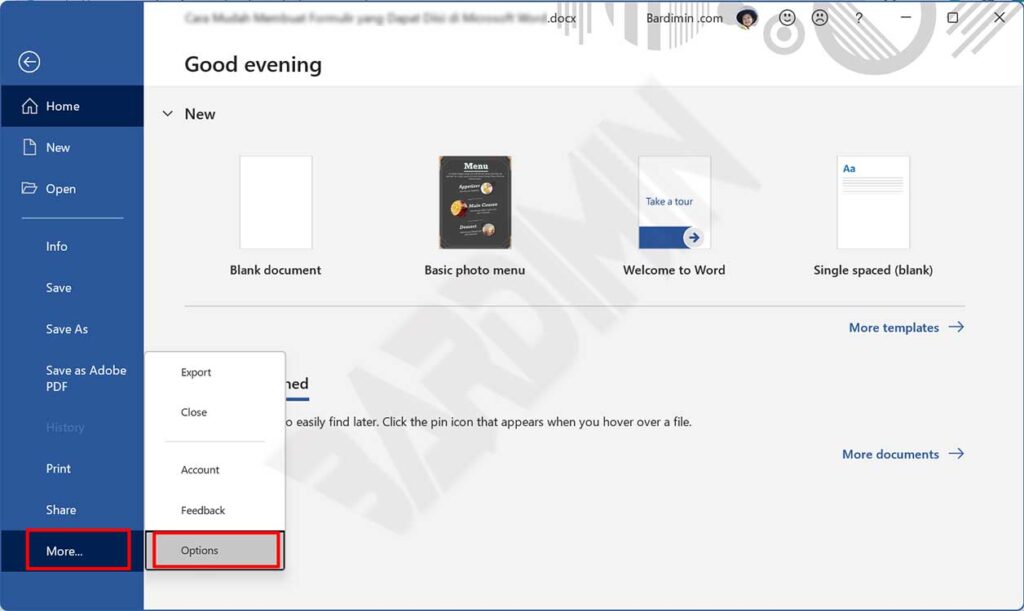
- Then click on it and navigate to “File > More > Options“.
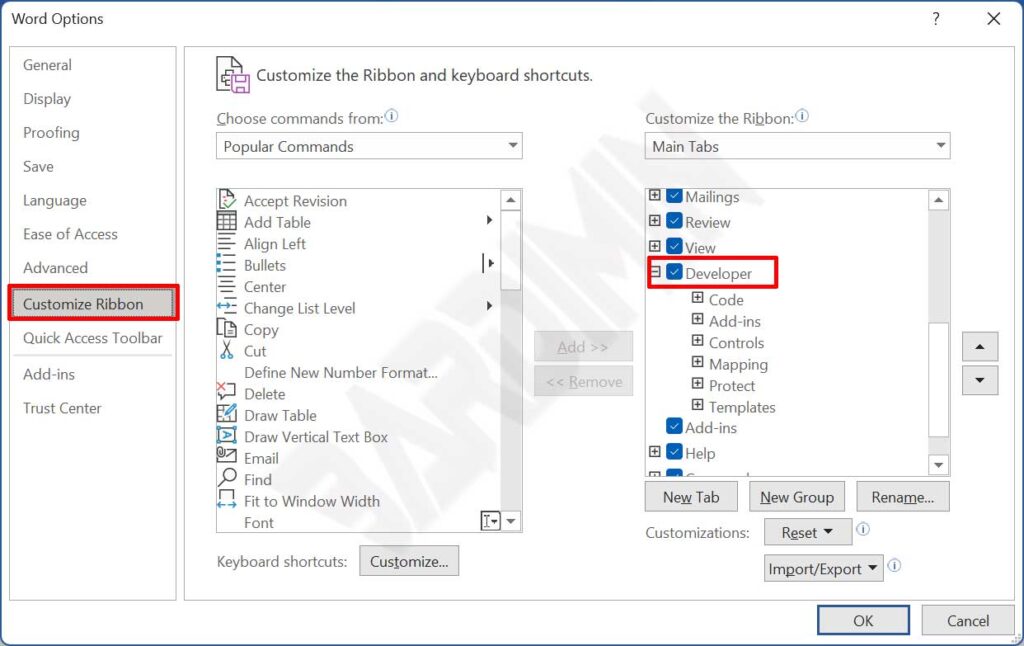
- In the “Word Options” window, select it and click “Customize Ribbon. Then tick the “Developer” item as in the following image and click the OK button.
- The “Developer” tab will be added to the ribbon as follows.

B. Creating a Form in Word
Create a new document
As a first step to creating a form, create a new document and fill out the form outline according to your needs. To save time, you can also use templates that are already available online.
How to create a new document from an online template
- In Microsoft Word, point to “New > File.
- In the “Search online templates” section, type “forms” or the type of form you want and press “ENTER“.

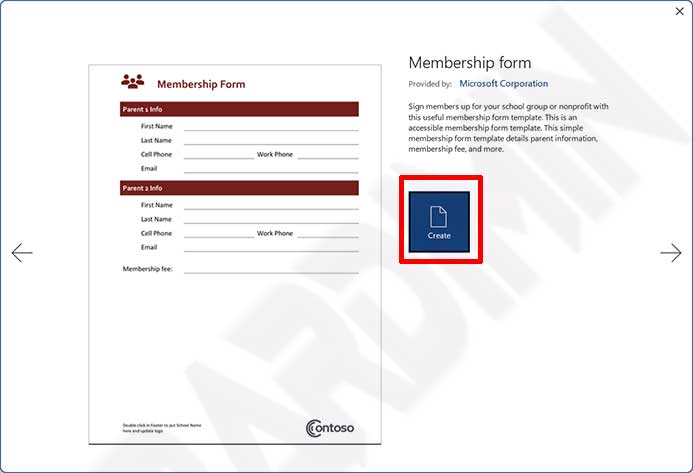
- Select the form template and then click the “Create” button.
Adding Content to a Form
You can set or update the attributes of any content control. The Date Picker control, for example, provides options for the format in which the date should be displayed.
- Place the text cursor in the form field you want to add.
- Click the “Developer” tab on the ribbon.
- Add a content control to a form. If you want to add a “Rich text content control”, click the content icon of that control.
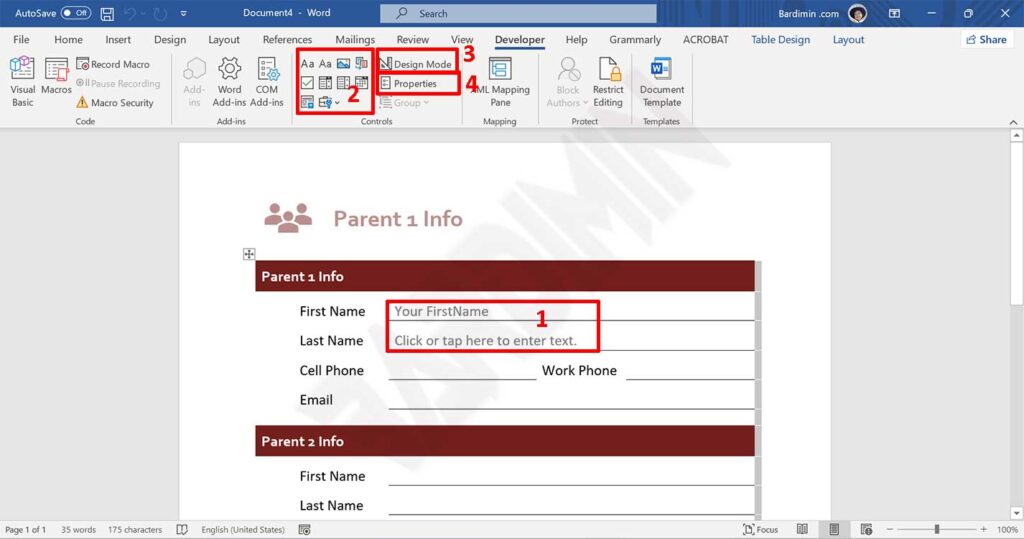
- Click the “Design Mode” button. The controls you enter will be inactive when Design Mode is on. You can also change the placeholder text for some controls.
- Click the “Properties” button to set the title, change the color and style of the text, and specify whether the control can be edited or deleted.
Protect forms from changes
- Click the “Restrict Editing” button on the “Developer” tab.

- Then check “Allow only this type of editing in the document“. And on the dropdown button, select “Filling in forms“.
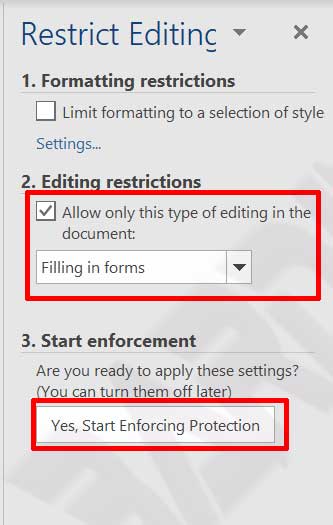
- Next click on the “Yes, Start Enforcing Protection” button.
- Then a dialog box will appear, asking you to create a password, create a password to protect it.
- Now, your form is safe from change. Users can only fill in the form fields and cannot change anything else.


