One very useful and frequently used feature in Excel is autofit. Autofit is a feature that allows you to automatically adjust column width and row height according to the size of the content contained in it. By using autofit, you can make your table look neater and professional, without having to manually set column widths and row heights.
There are several ways to use autofit in Excel, either manually or automatically. In this article, I will explain those methods completely and in detail, and provide some tips and tricks that can help you optimize the use of autofit in Excel.

How to Use Autofit Manually
The simplest way to use autofit manually is to use a mouse. You can automatically adjust column width or row height in the following ways:
- Select the column or row for which you want to adjust the width or height.
- Hover your mouse cursor over the boundary between two selected columns or two rows.
- When the cursor changes to two arrows facing each other, double-click on the border.
Excel will automatically adjust the column width or row height according to the size of the longest or highest content contained in it.
You can also adjust the width of all columns or the height of all rows simultaneously in the following ways:
- Select all cells in the worksheet by pressing Ctrl + A or click the “Select All” button in the upper-left corner of the worksheet.
- Hover your mouse cursor over the boundary between any two columns or two rows.
- When the cursor changes to two arrows facing each other, double-click on the border.
Excel will automatically adjust the width of all columns or the height of all rows according to the size of the longest or highest content present in each column or row.
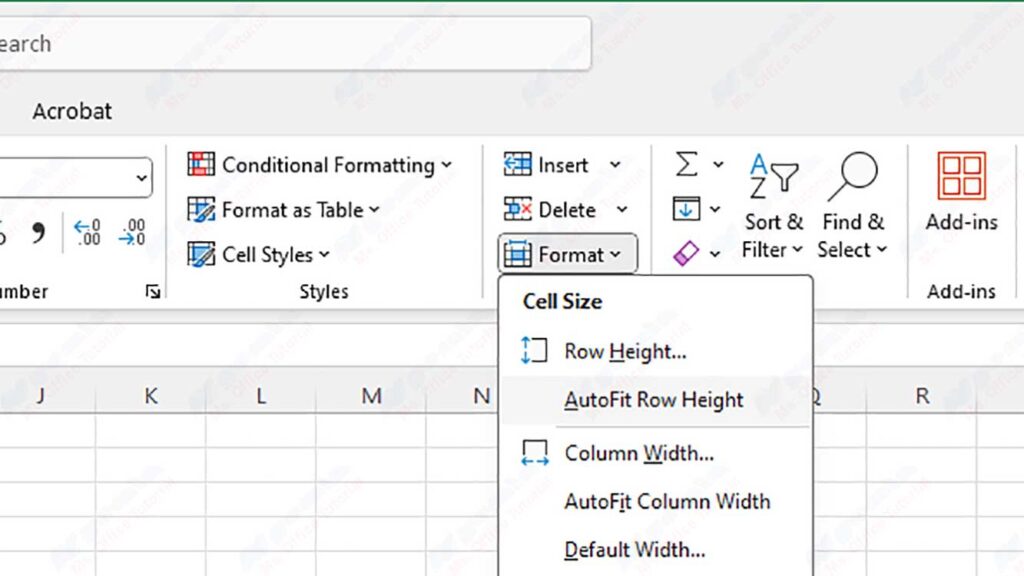
In addition to using the mouse, you can also use the ribbon menu to use autofit manually. The method is as follows:
- Select the column, row, or cell for which you want to adjust the width or height.
- Click the “Home” tab on the ribbon menu.
- In the “Cells” group, click “Format”.
- In the drop-down menu that appears, select “AutoFit Column Width” or “AutoFit Row Height” according to your needs.
Excel will automatically adjust the column width or row height according to the size of the content it contains.
How to Use Autofit Automatically
In addition to using autofit manually, you can also use autofit automatically. Automatic autofit is a feature that allows Excel to automatically adjust column width or row height whenever you add, change, or delete content in it.
To enable automatic autofit, you need to use VBA (Visual Basic for Applications), a programming language integrated with Excel. With VBA, you can create macros, which are a set of commands that Excel can execute automatically.
To create an auto autofit macro, you need to do as following steps:
- Open the Excel worksheet that you want to use automatic autofit.
- Press “Alt + F11” to open the “Visual Basic Editor”, which is the application used to create and edit VBA code.
- In the “Project Explorer” window, double-click on the name of the worksheet for which you want to use automatic autofit, for example “Sheet1”.
- In the “Code” window, type the following code:
Private Sub Worksheet_Change(ByVal Target As Range)
    Target.EntireColumn.AutoFit
    Target.EntireRow.AutoFit
End Sub- The above code means whenever there is a change in any cell in the worksheet, Excel will adjust the column width and row height automatically according to the size of the content contained in it.
- Press “Ctrl + S” to save the code.
- Close the “Visual Basic Editor” by pressing “Alt+Q”.
Now, you can try adding, changing, or deleting content in that worksheet, and see how Excel adjusts column width and row height automatically.
Conclusion
Autofit is a very useful and frequently used feature in Excel. Autofit lets you automatically adjust column width and row height according to the size of the content inside. By using autofit, you can make your table look neater and professional, without having to manually set column widths and row heights.
There are several ways to use autofit in Excel, either manually or automatically. Manually, you can use the mouse or ribbon menu to adjust the column width or row height automatically. Automatically, you can use VBA to create a macro that can adjust column width or row height automatically whenever you add, change, or delete content inside.
Thank you for reading this article. See you in the next article.


