Other Interesting Articles
How to Access Windows File Sharing
To access File sharing, you can do it through File Explorer. You can type the IP address in the address bar. You also type the name of the PC, not all LAN network topology can use the PC name.
For example, you can access it by typing the IP address as follows
\\192.168.1.1

RestrictIng File Sharing Access with Windows Firewall
If you have completed all the steps mentioned above, you have successfully shared a folder. The problem is that all PCs connected to the LAN network will access the folder.
In this step, we will restrict access using the Firewall and only allow certain IP addresses that can access it.
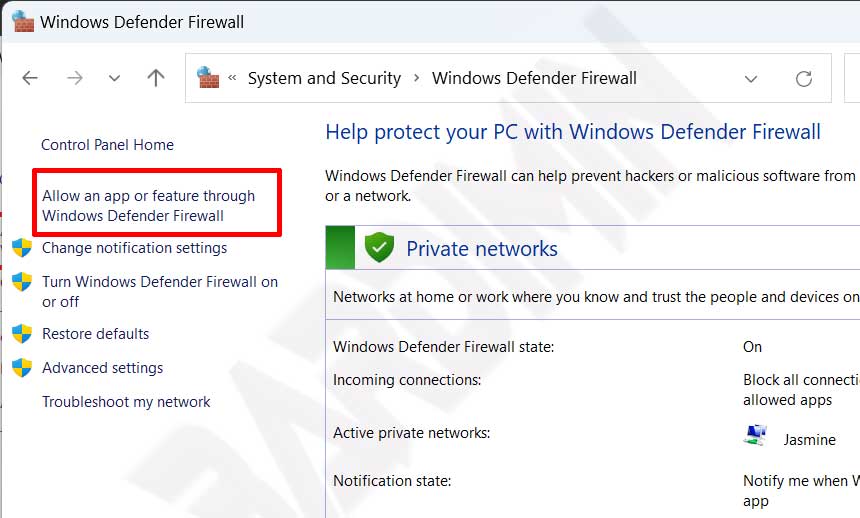
- Go to the “Control Panel” and select “System and Security > Windows Defender Firewall > Allowed apps“.
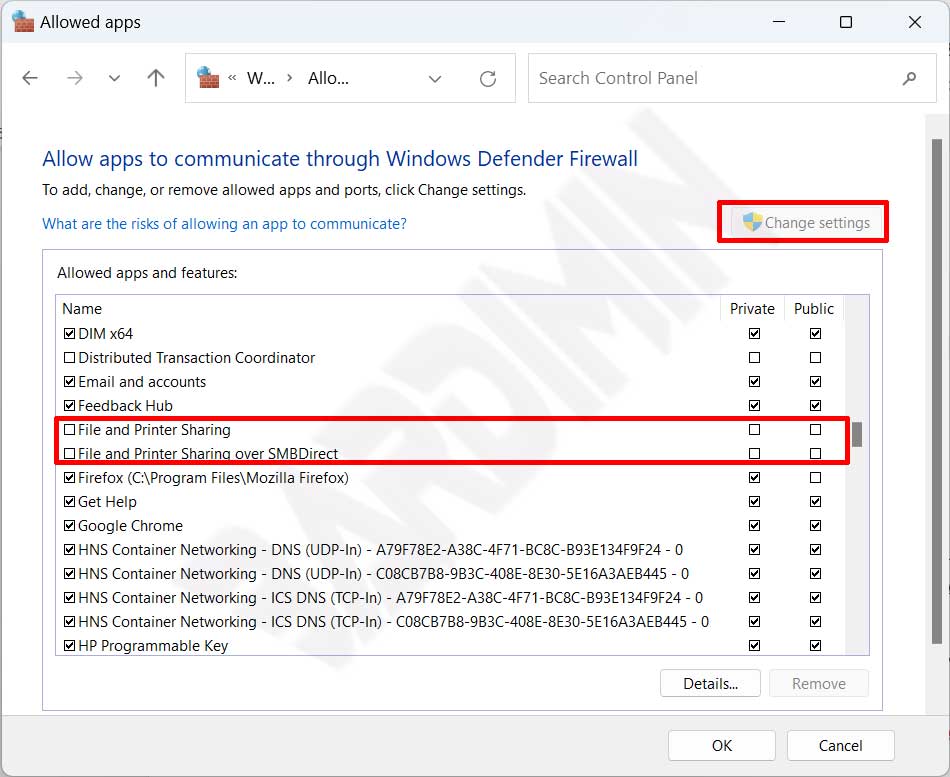
- Then, in the “Allowed apps” window, click the “Change settings” button. You won’t be able to change the settings if you don’t click this button first.
- Uncheck “File and Printer Sharing” and “File and Printer Sharing over SMBDirect” to block all access.
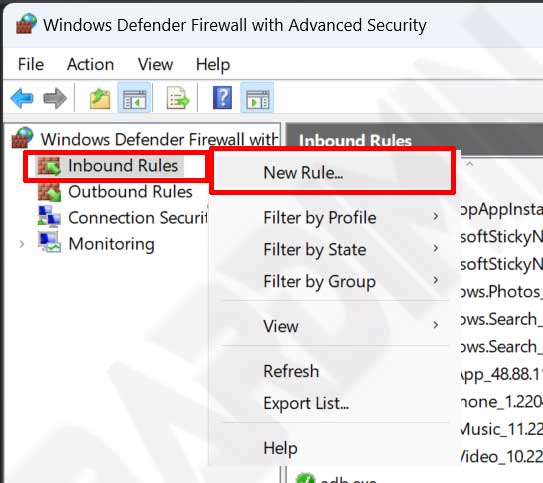
- Then open the “Control Panel” again and select “System and Security > Windows Defender Firewall > Advanced settings”.
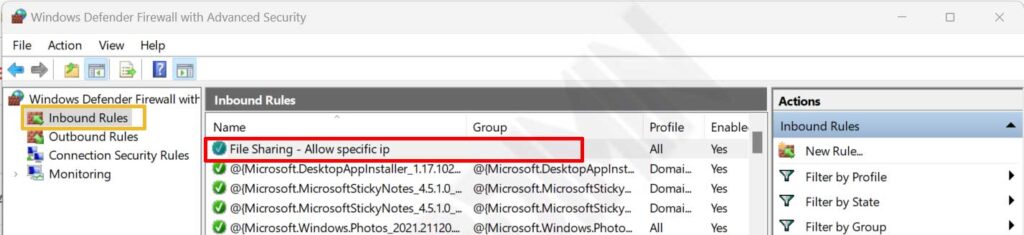
- In the “Windows Defender Firewall with Advanced Security” window, select “Inbound Rule. Then right-click and select “New Rule“.
- Next will open the window “New Inbound Rule Wizard“. In the “Rule Type“, select “Custom” and then click the “Next” button.
- Then on “Programs“, select “All programs“. Click the “Next” button.
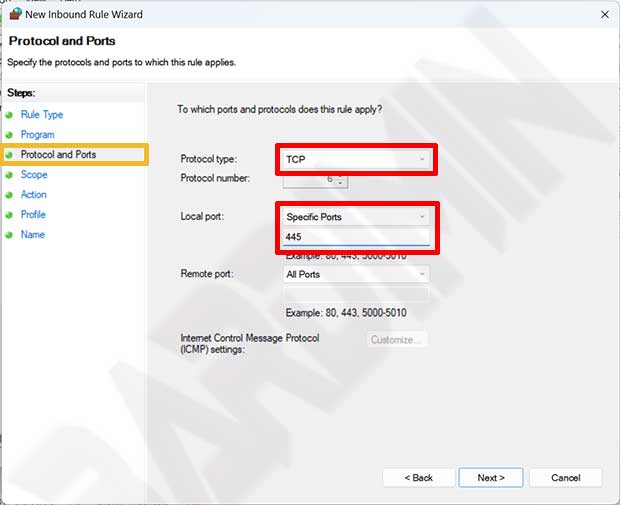
- In the “Protocol and Ports” step, select the “TCP“ protocol. And at the local port, select “Specific Ports” with the port number “445“. Next click on the “Next” button.
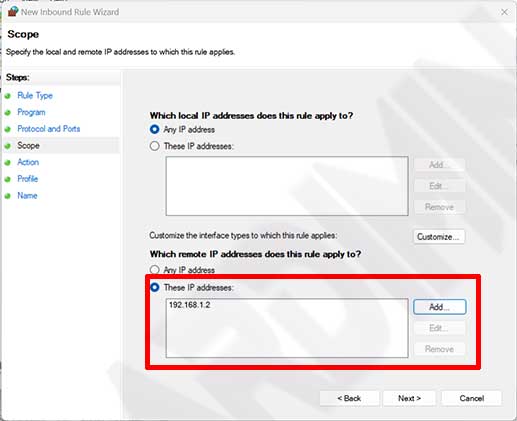
- Then in the “Scope” step, Remote IP section, add the IP of another PC that you allow to access file sharing on your PC.
- In the “Action” step, select “Allow the connection“. Then click the “Next” button.
- And in the “Profile” step, leave everything selected and click the “Next” button.
- The last step is to name the Rule you created. Give it a name that makes it easier for you to recognize it, such as “File Sharing – Allow specific IP”.
You can already restrict file sharing access with only certain IP addresses that can access it.
