An IP (Internet Protocol) address is a series of numbers used to identify devices in a computer network, both Internet and local networks. Each device connected to the internet network has a unique IP address, which consists of four blocks of numbers separated by dots. Examples include 192.168.0.1 or 172.16.254.1.
IP addresses are used by the TCP/IP protocol to address and route data packets between hosts on TCP/IP-based computer networks. IP addresses have two main functions: host or network interface identification and location addressing.

IP addresses are divided into two types, namely public IP addresses and private IP addresses. A public IP address is an IP address used by devices on the internet network that can be accessed from anywhere around the world. Meanwhile, a private IP address is an IP address used by devices on a local network and can only be accessed within that network.
IP addresses can be configured manually or obtained automatically from DHCP (Dynamic Host Configuration Protocol) servers in the network. To find out the IP address of a computer or laptop on Windows, it can be done by opening Command Prompt and typing the command “ipconfig.
How to Check IP Address in Windows
To check the IP address in Windows, there are several ways you can do it. Here are some commonly used ways:
1] Using Command Prompt
- Open Command Prompt (CMD) on Windows.
- Type the command “ipconfig” at the Command Prompt, then press Enter.
- Look for the line that contains “IPv4 Address” to find out the IP address of the computer in the information displayed.
2] Using Settings
- Open Windows 11 Settings by pressing the keyboard key (WIN + I).
- Select “Network & Internet”.
- Then, select the type of connection you’re using (Ethernet or Wi-Fi).
- You will see network connection information, the IP address can be seen in the line “IPv4 Address”.
How to Change IP Address in Windows 11

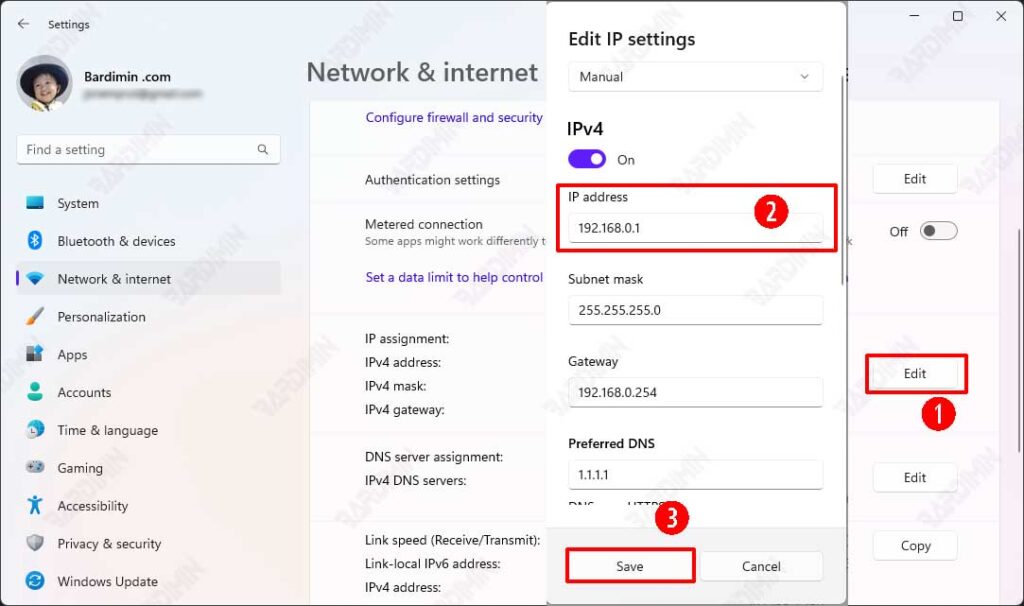
- Open Windows 11 Settings by pressing the keyboard key (WIN + I).
- Select “Network & Internet“.
- Then, select the type of connection you’re using (Ethernet or Wi-Fi).
- Click the “Edit” button on the right panel in the “IP assignment” section.
- Next, type the IP address you want in the “IP address” field.
- Click the “Save” button to save it.
Quick and Easy Ways to Change IP Address on Windows with IPSwitcher Portable
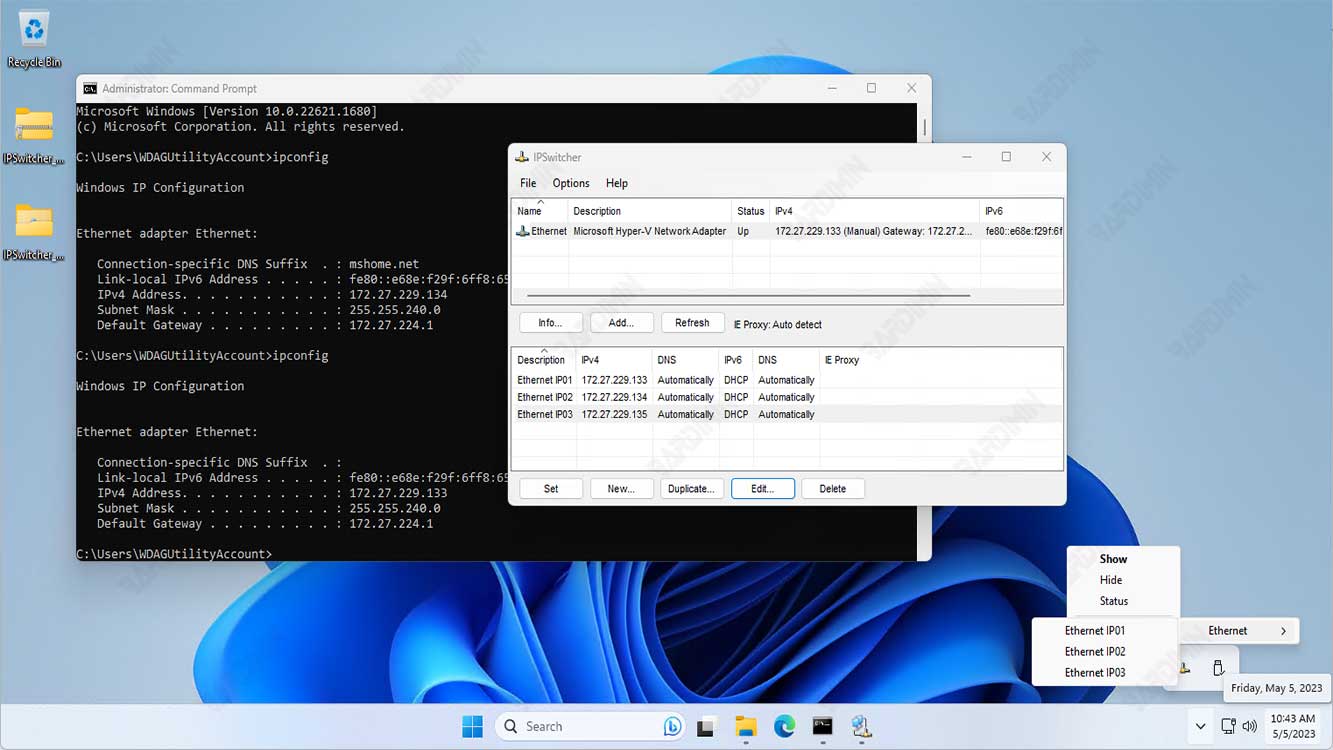
IPSwitcher is a Windows utility that helps manage IP addresses that allow you to quickly change IP addresses, proxies, or other settings to network adapters.
Unlike most network profile management tools, IPSwitcher is capable of setting IP addresses to adapters, and disabling or enabling proxies very quickly and easily.
IPSwitcher allows you to change IP configurations directly from the Windows system tray.
1] Features of IPSwitcher Portable
- Quickly switch IP network settings without restarting.
- Switch Internet Explorer proxy server settings.
- Import Export network settings.
- Support system tray icon, automatic start with Windows.
- A portable version is available, no installation is required
2] IPSwitcher network settings
- IP Address
- Subnet Mask
- Default Gateway
- DNS Server
- WINS Server
- Proxy Settings
3] IPSwitcher-supported operating systems
- Windows 7-8
- Windows 10+
- Windows Server 2008+
4] Download IPSwitcher


