Windows Updates can sometimes cause system or printer errors. This guide teaches you how to properly uninstall updates in Windows 10 and Windows 11 25H2 with precise technical steps, helping technicians and professionals quickly and safely resolve disruptions.
Windows Update is a critical service for the security and stability of the Microsoft operating system. However, certain updates can cause conflicts. Common problems include network printer disruptions, BSOD (Blue Screen of Death) errors, or performance degradation. Therefore, knowing the how to uninstall Windows Update is an essential skill for IT technicians and advanced users.
This article provides the latest guide for the two main operating systems. The procedure in Windows 11 25H2 has some interface differences. We will explain both methods in detail. Next, you can choose the steps that match your system.
Important: Uninstalling security updates can leave security vulnerabilities open. Do this only if the update is causing critical issues. Always monitor Windows Release Health for official fix information.
How to Uninstall Update in Windows 11 25H2
Windows 11 25H2 updates the Settings interface. Here are the steps to remove problematic updates:
- Open Settings by pressing Win + I on the keyboard or clicking the Start Menu and selecting Settings.
- Navigate to Windows Update. In the left sidebar, select Windows Update. Then, in the right panel, click Update history.
- Click Uninstall updates. This link is located in the related settings section. This action will open the classic Control Panel window.
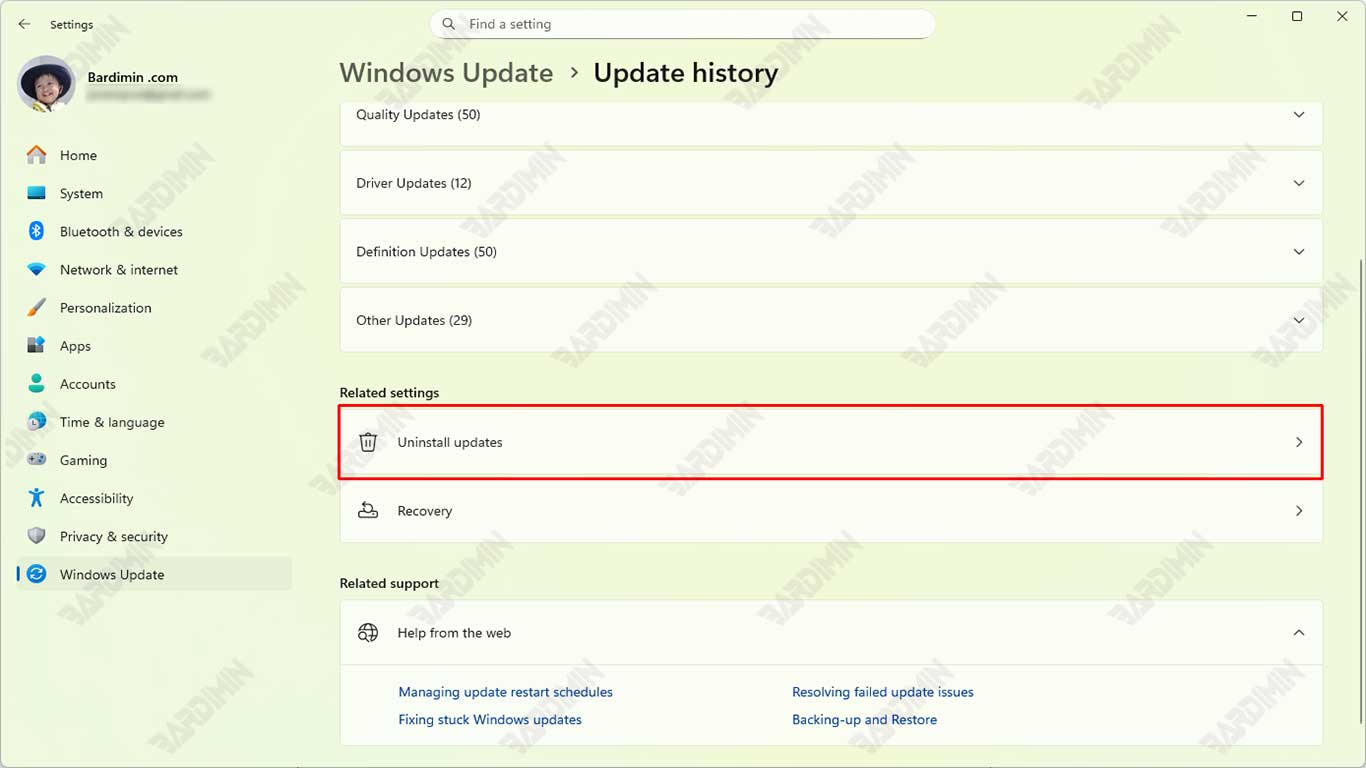
- Uninstall the desired update. In the “Installed Updates” window, find the update by its KB number (e.g., KB5039302). Click once to select it, then click the Uninstall button above the list. Confirm the uninstall process when prompted.
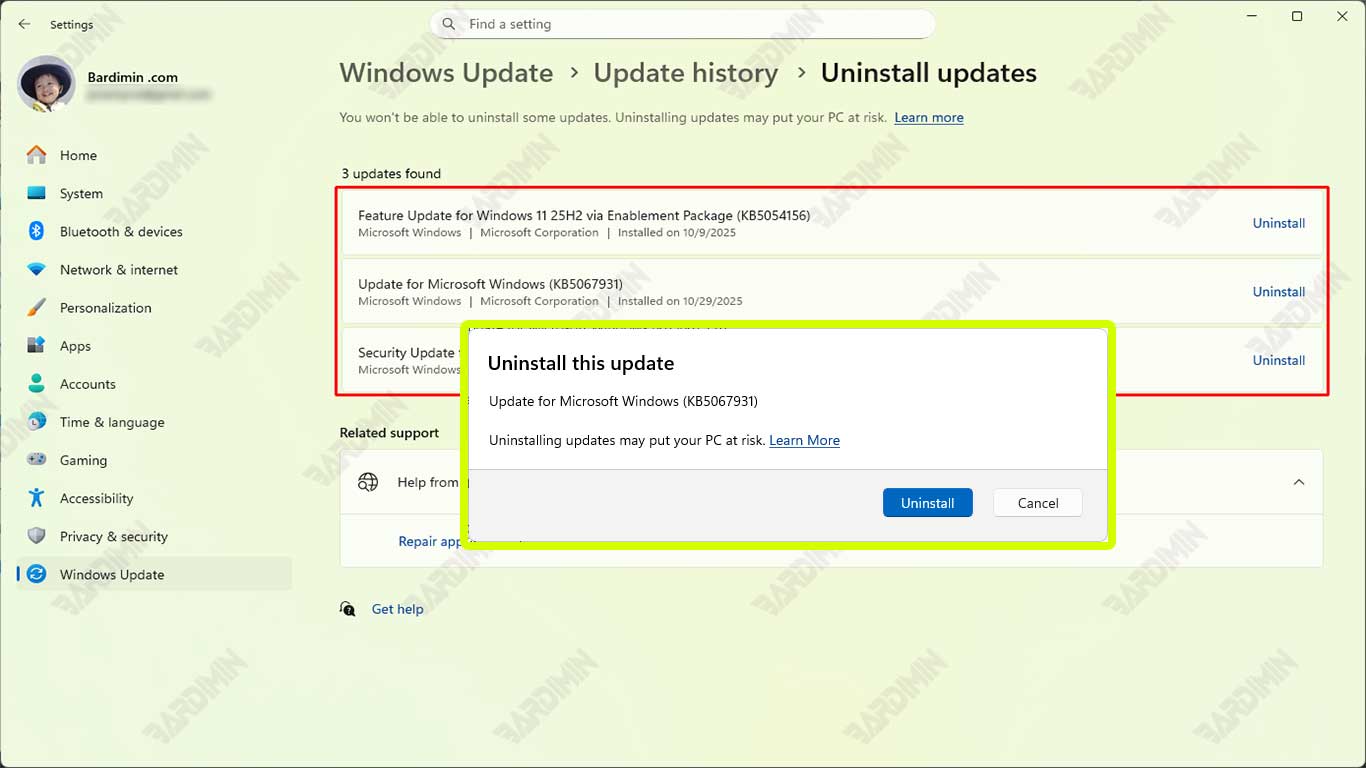
The system will request a restart. After restarting, the update will be removed. To prevent automatic reinstallation temporarily, use the Pause updates feature on the Windows Update Settings page.
How to Uninstall Update in Windows 10
The process in Windows 10 still uses the familiar menu structure. Here is the complete method:
- Press Win + I to open Settings, then select Update & Security.
- Click View update history on the Windows Update tab.
- Click the Uninstall updates link at the top of the window.
- In the opened Control Panel window, find the problematic update. Right-click on the update and select Uninstall, or select it and click the Uninstall button.
- Follow the on-screen instructions and restart the computer when prompted.

Steps After Successfully Uninstalling an Update
- Verify the Issue is Resolved: Ensure the initial error or disruption no longer occurs.
- Pause Updates Temporarily: Use the “Pause updates for 7 days” option in Settings.
- Monitor Official Sources: Visit the Windows Support Center for update information.
- Reinstall After Patch Release: Once Microsoft releases a stable revised update, reinstall it via Windows Update.
By following this guide, you have learned the how to uninstall Windows Update on both operating system versions. This process is an effective solution for compatibility issues. However, always prioritize installing the latest security updates after Microsoft fixes the problem.