Printer sharing provides a practical solution for collaborative work environments, enabling multiple computers to access a single printing device simultaneously. This technology significantly reduces costs and enhances efficiency, particularly in offices, creative studios, or households with multiple users. In this guide, you’ll learn various methods for printer sharing across Windows 11 and earlier versions.
Implementing printer sharing requires stable network connectivity, whether through LAN cables or WiFi. With proper configuration, one printer can serve multiple devices within the same network. The setup process remains consistent across Windows 11, 10, and 7, making this guide universally applicable.
Network-Compatible Printer Types
- USB Printer
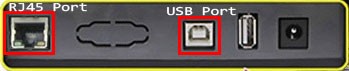
Standard models with USB cable connections, such as Epson L-series and Canon Pixma. These require direct connection to a host computer for printer sharing. - Network Printer (LAN)
Equipped with RJ45 ports for direct network connectivity. Examples include HP LaserJet Enterprise series and Xerox WorkCentre models. - Wireless Printer
Support WiFi connectivity without physical cables. Popular models: Epson L3150 All-in-One and Canon PIXMA TR series.
Beyond these primary categories, some printers feature Bluetooth or parallel port connections. However, these options see limited use in modern printer sharing implementations.
USB Printer Sharing Configuration

Driver Installation Preparation
- Connect all cables following installation manual guidelines
- Download current drivers from manufacturer’s official website
- Complete driver installation before powering on the printer
Always verify driver compatibility with your system architecture (32-bit/64-bit) and Windows version.
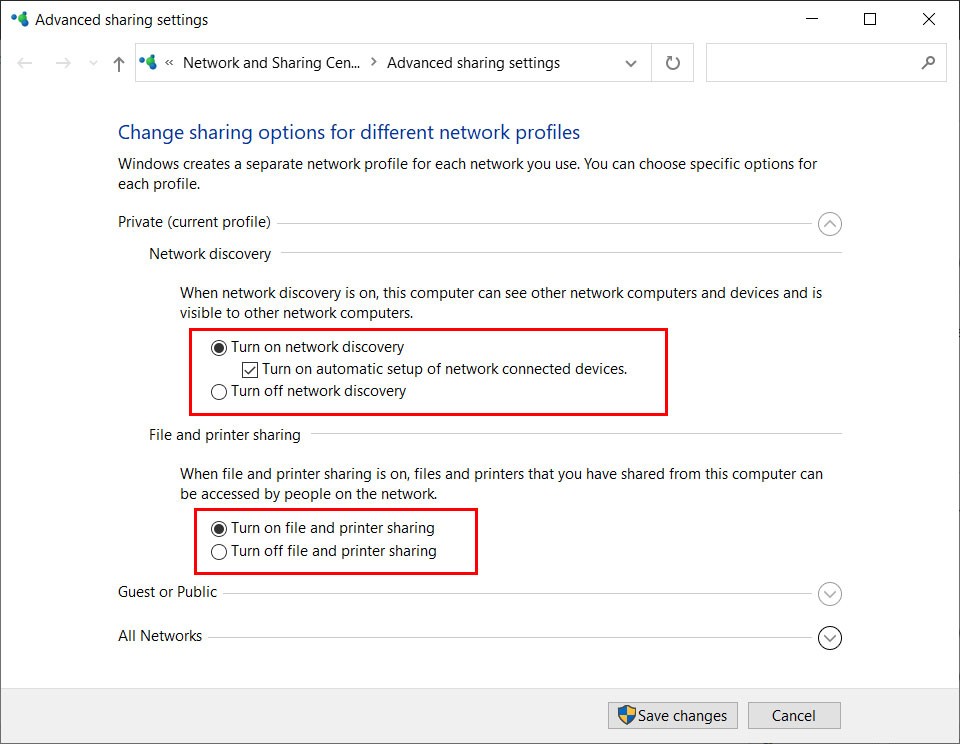
Enable Sharing Features
- Navigate to Control Panel > Network and Sharing Center
- Select Change advanced sharing settings
- Enable both Network Discovery and File and Printer Sharing options
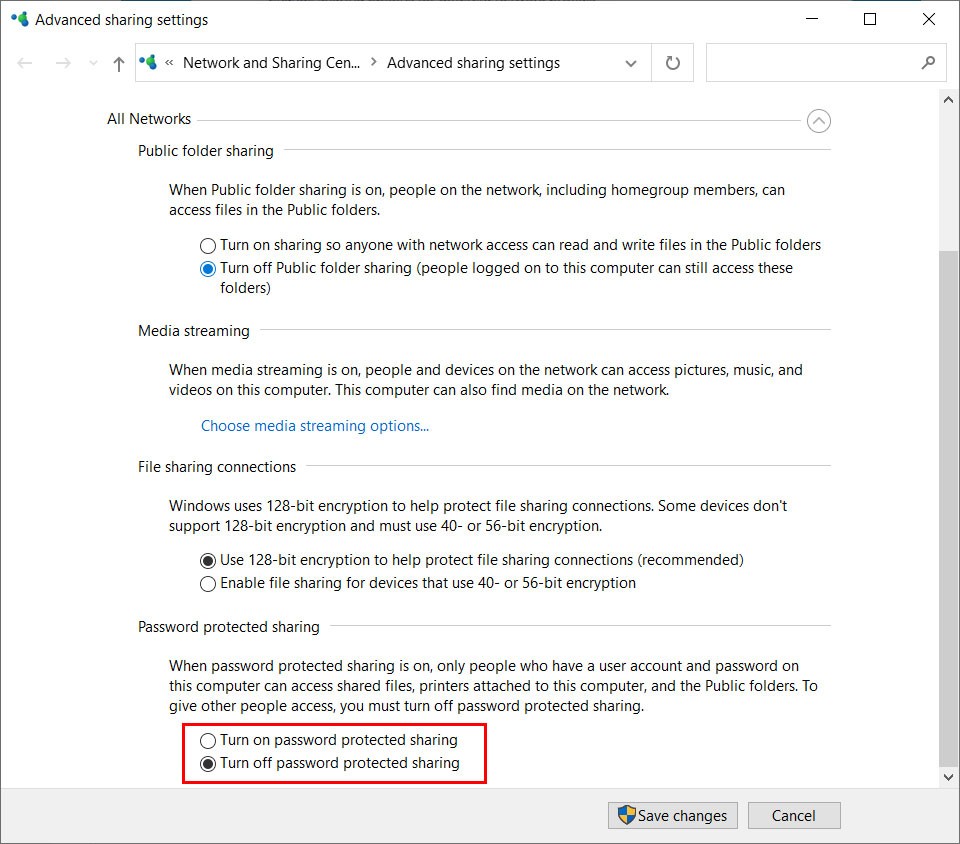
For simplified connectivity, disable Password Protected Sharing. However, assess security implications if operating on open networks.
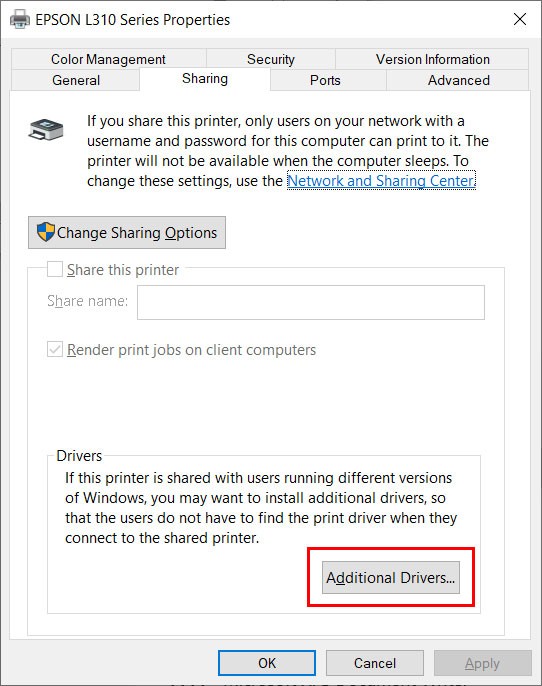
Printer Sharing Activation
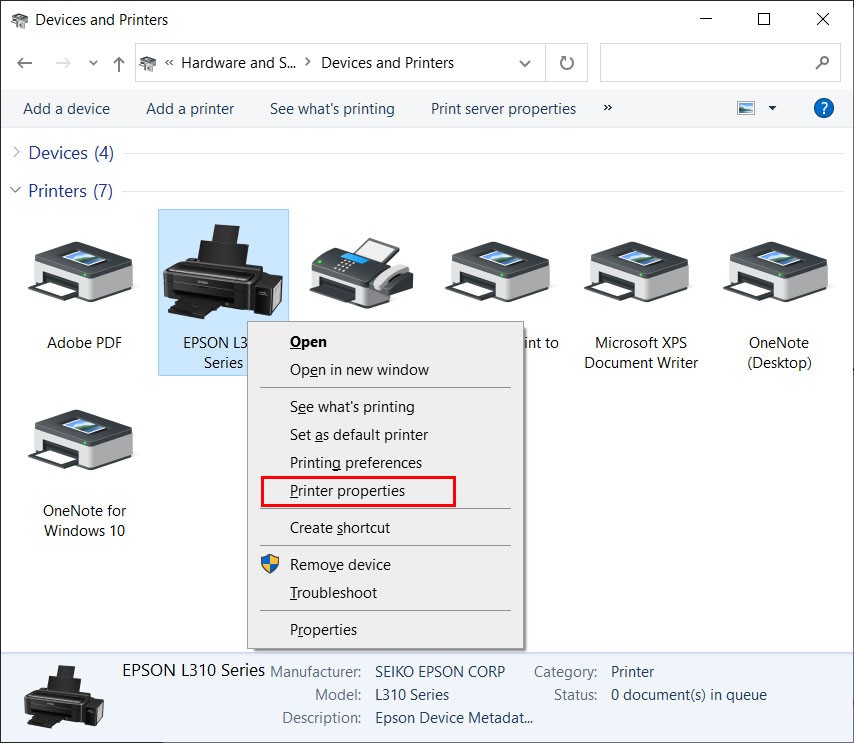
- Access Devices and Printers through Control Panel
- Right-click target printer > choose Printer Properties
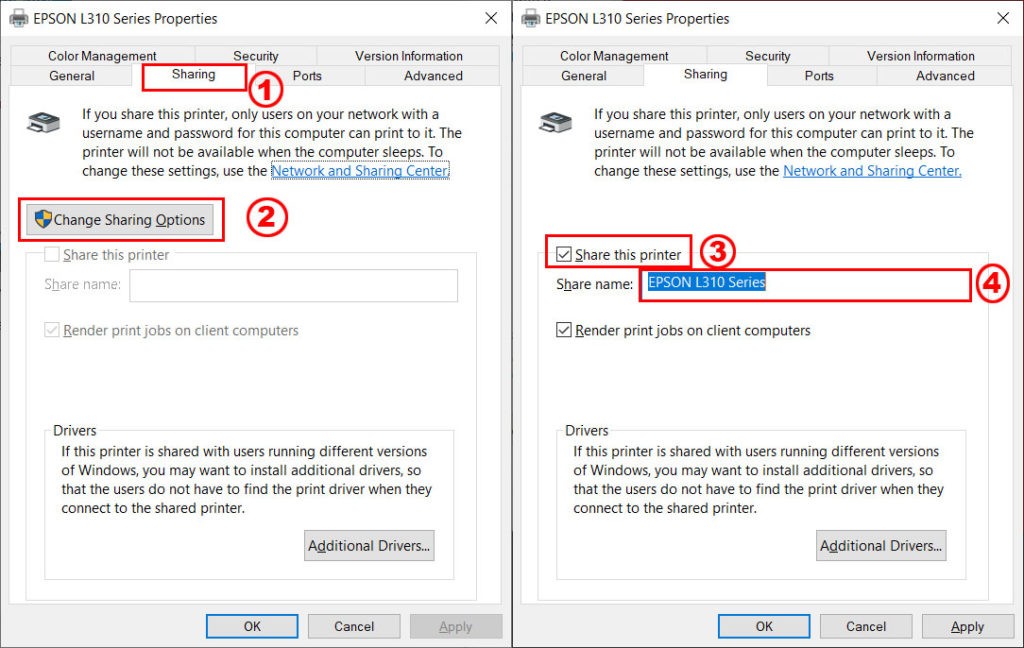
- Select Sharing tab and check Share this printer
Modify the share name according to preference. Descriptive names facilitate easier network identification during printer sharing setup.
Client Computer Connection
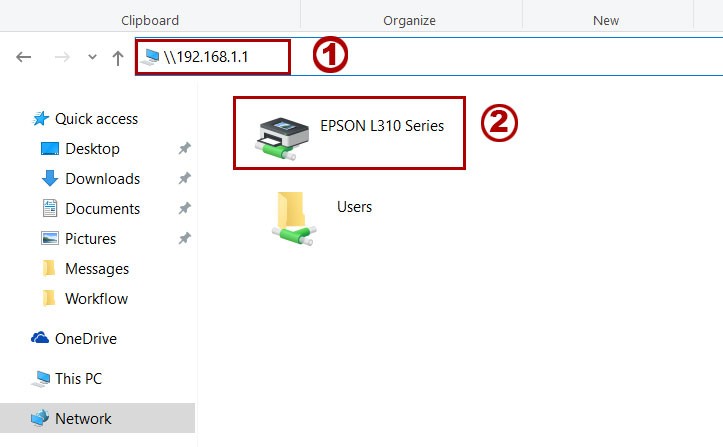
To access shared printers from additional computers, follow these steps:
- Launch File Explorer and enter \\COMPUTER_NAME or \\IP_ADDRESS
- Double-click the available printer icon
- Allow driver installation process to complete automatically
LAN Network Printer Sharing

- Connect printer directly to network via Ethernet cable
- Configure static IP address or utilize DHCP allocation
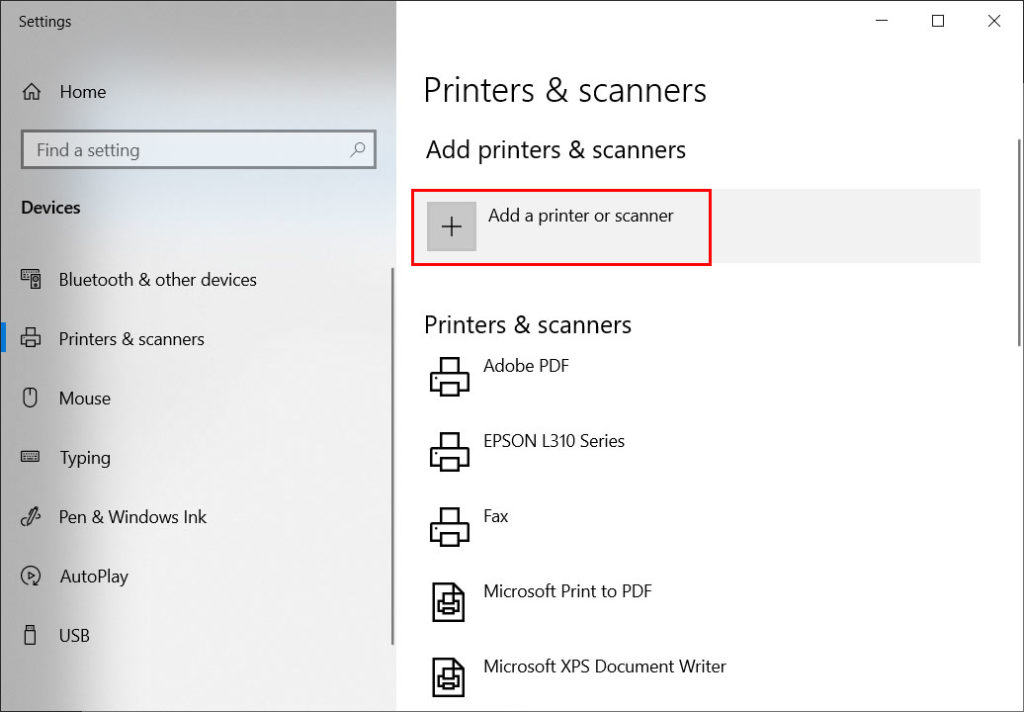
- Open Settings > Devices > Printers & scanners
- Click Add a printer or scanner
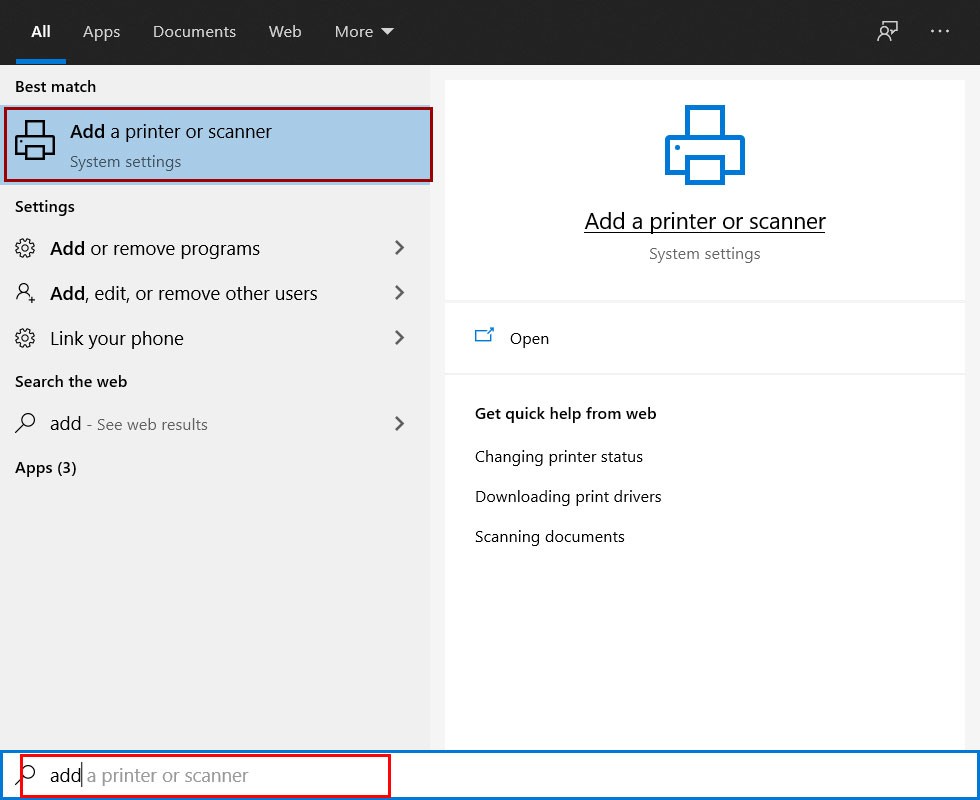
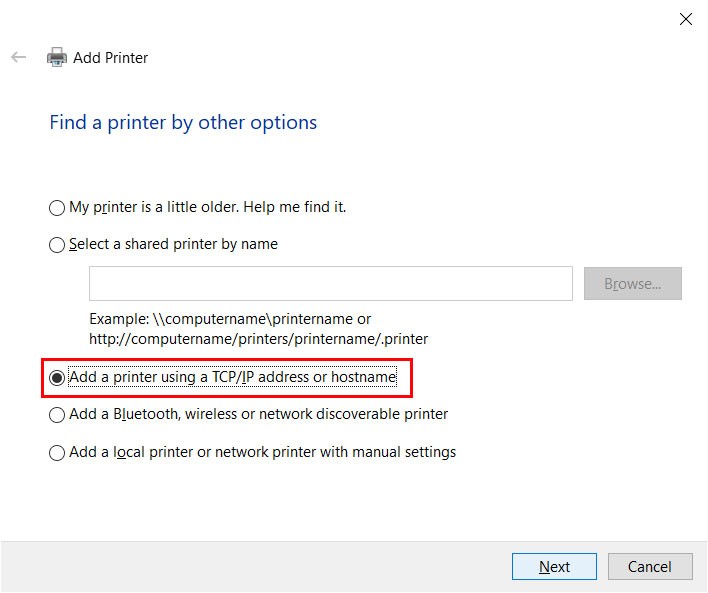
The system automatically detects available network printers. Select from the list and follow installation prompts. If undetected, choose The printer that I want isn’t listed.
Utilize Add a printer using TCP/IP address for direct network connection. Input the printer’s IP address and default port information.
Wireless Printer Sharing Setup
Wireless printer sharing configuration follows similar procedures as wired network printers. Ensure:
- Printer connects to identical WiFi network as client devices
- Wireless network operates in infrastructure mode
- Firewall permissions allow inter-device communication
For troubleshooting assistance, restart networking equipment and printers. Verify current firmware versions. Some models require manufacturer applications for initial wireless setup in printer sharing scenarios.
Mastering printer sharing techniques significantly enhances team productivity and resource utilization. For current technical specifications, consult Microsoft’s official Windows Support documentation.