This article provides a technical guide to protecting sensitive data by securing a USB flash drive using BitLocker encryption in Windows 11. You will learn practical steps to encrypt the drive, manage recovery keys, and disable protection. Portable data security is increasingly crucial for professionals and technicians in today’s digital era.
Encrypting a USB flash drive is an essential method to protect data from unauthorized access. This process converts data into an unreadable format without the correct decryption key. Therefore, if the portable storage device is lost or stolen, the sensitive information within remains secure.
BitLocker Drive Encryption provides a robust built-in encryption solution in Windows. This feature has been available since Windows Vista and is continually updated. In Windows 11, BitLocker offers performance improvements and flexible key management options. You can use this tool to encrypt entire volumes, including USB flash drives.
How to Encrypt a USB Flash Drive with BitLocker in Windows 11
Follow this step-by-step guide to secure your portable drive. Ensure you are using Windows 11 Pro, Enterprise, or Education edition, as this feature is not available in the Home edition.
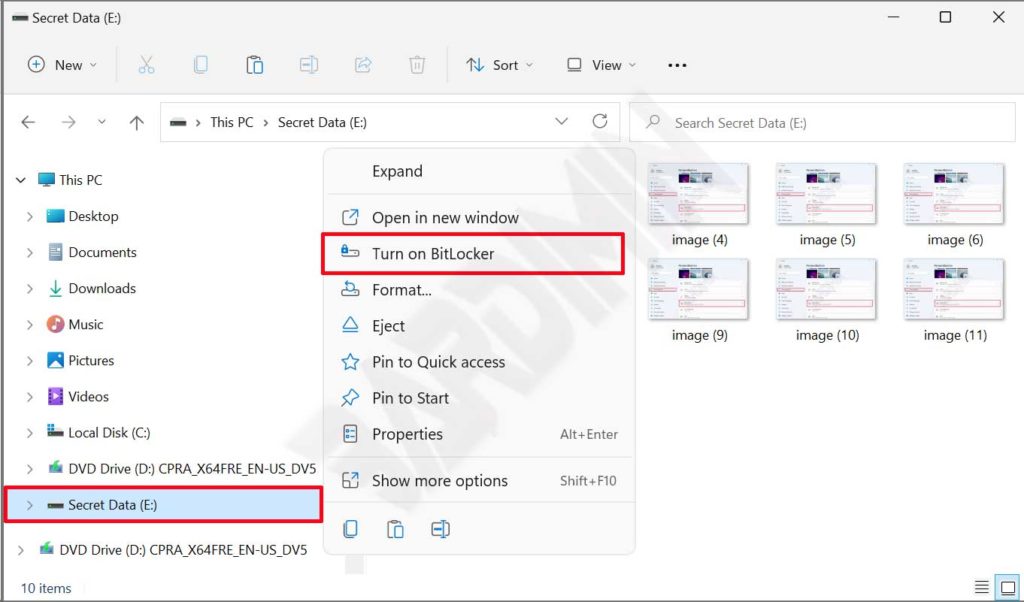
- Connect the USB flash drive to your computer. Open File Explorer and navigate to the drive.
- Right-click on the target drive. Select the “Turn on BitLocker” option from the context menu.
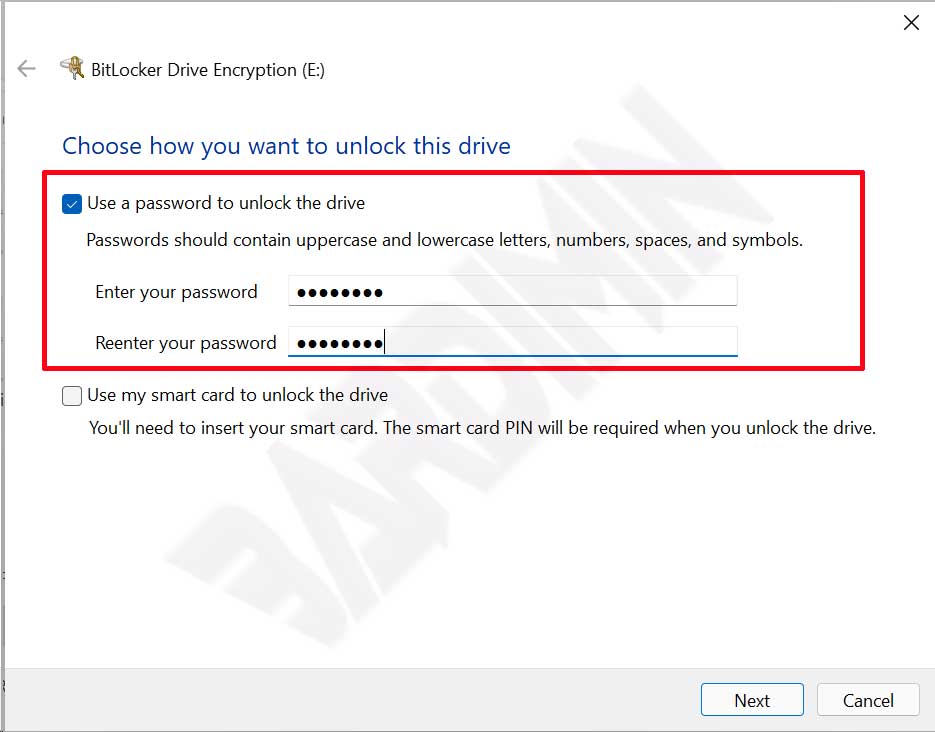
- Check the box for “Use a password to unlock the drive”. Create a strong password of at least 8 characters. Combine uppercase, lowercase letters, numbers, and symbols. Then click “Next”.
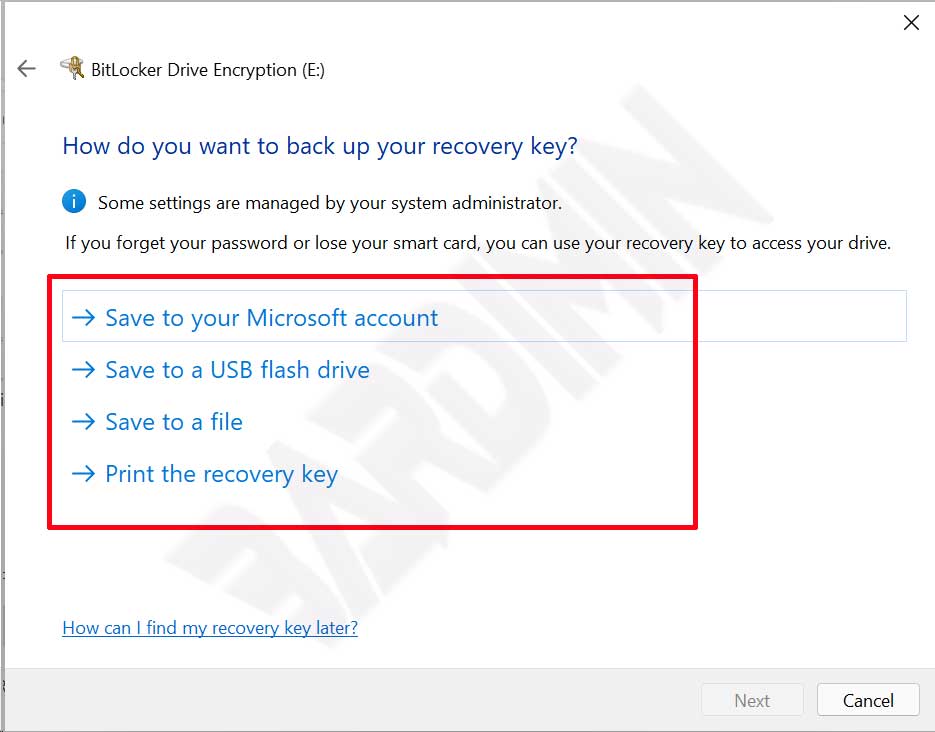
- Choose a method to save the recovery key. The recommended options are saving to your Microsoft account or to a file. Store this key in a safe location separate from the device. Then click “Next”.
The recovery key is vital if you forget the password. Therefore, do not skip this step.
- Select “Encrypt used disk space only” for a faster process. This option is suitable for new drives. However, choose “Encrypt entire drive” if the drive has been used for a while.
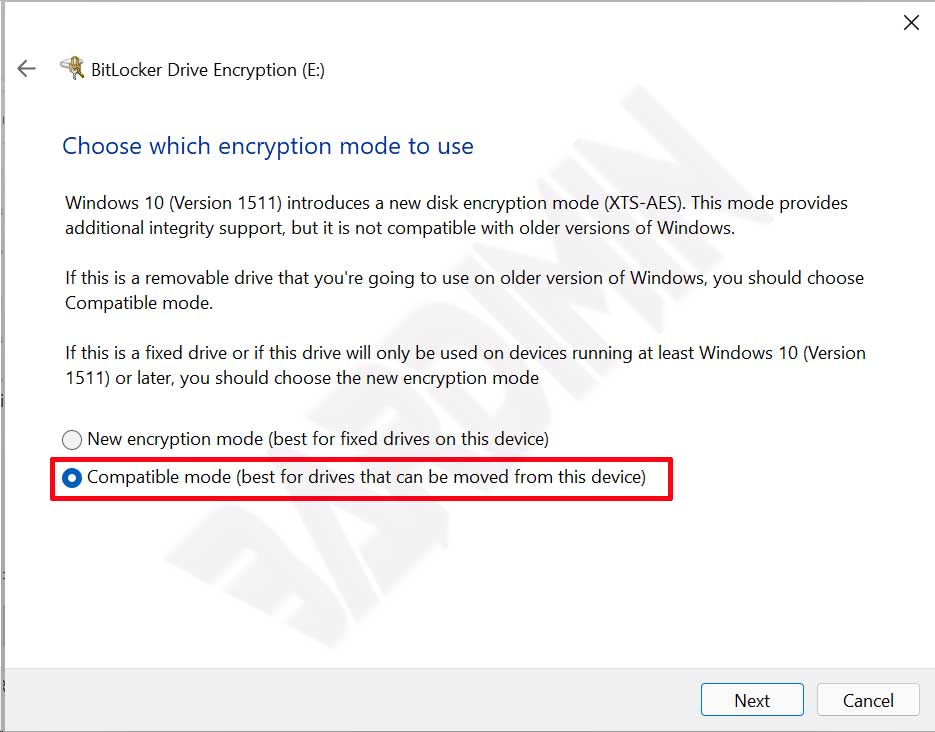
- In the encryption mode window, choose “Compatible mode”. This mode ensures the USB flash drive can be opened on earlier Windows versions. Then click “Next”.
- Review your settings. Finally, click “Start encrypting” to begin the process.
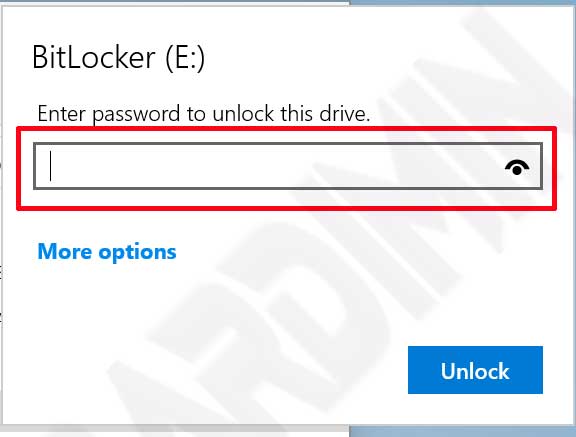
Encryption time varies. The duration depends on drive capacity and data amount. You can continue using your computer during the process. Once complete, unplug and reconnect the USB flash drive. The system will prompt for a password to access the data. This verification indicates the USB flash drive encryption process was successful.
Guide to Disable BitLocker on a USB Flash Drive
If you need to remove protection, follow this procedure. Ensure you have administrator access and the decryption key.
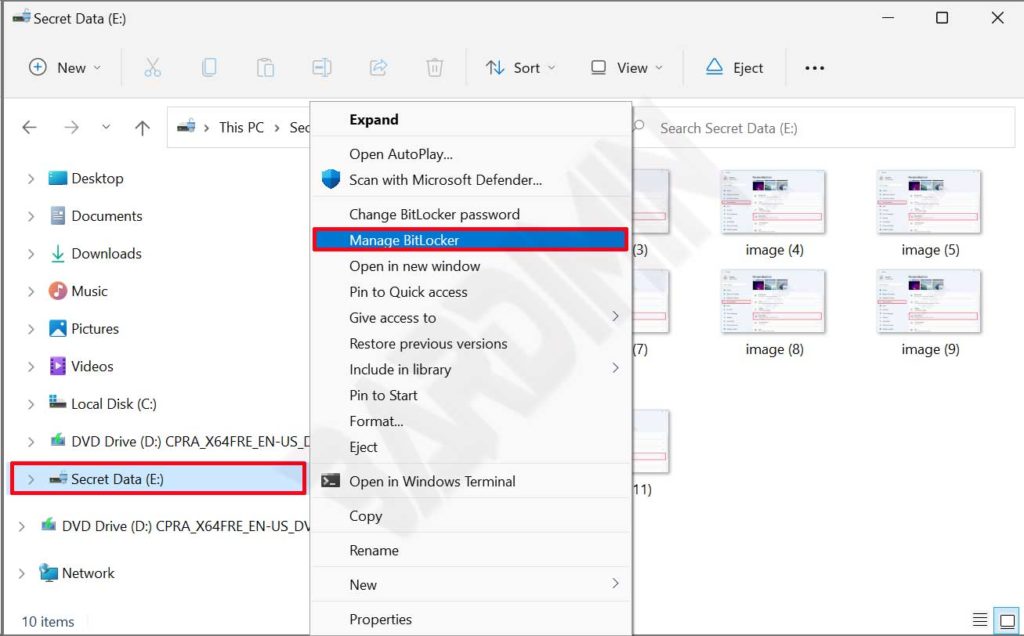
- Open File Explorer. Navigate to the USB flash drive you want to decrypt.
- Right-click on the drive. Select “Show more options”. Then click “Manage BitLocker”.
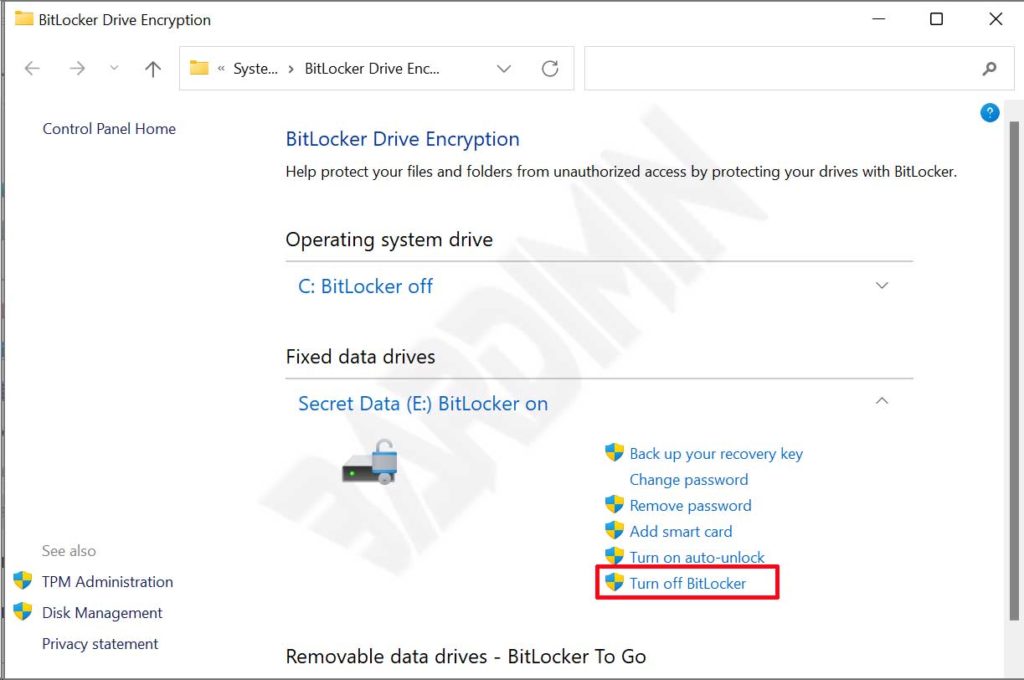
- The BitLocker Drive Encryption window will open. Locate the target drive. Then click the “Turn off BitLocker” option.
The decryption process will run. All data on the drive will be restored to normal format. The process length depends on the drive size. Once finished, the drive can be accessed without a password.
Encryption with BitLocker provides a strong physical security layer for portable data. This solution is highly recommended for professionals who carry sensitive data. Furthermore, this technology is also relevant for gamers who want to protect game save files or modifications. For further technical information, you can refer to the official Microsoft documentation on BitLocker.