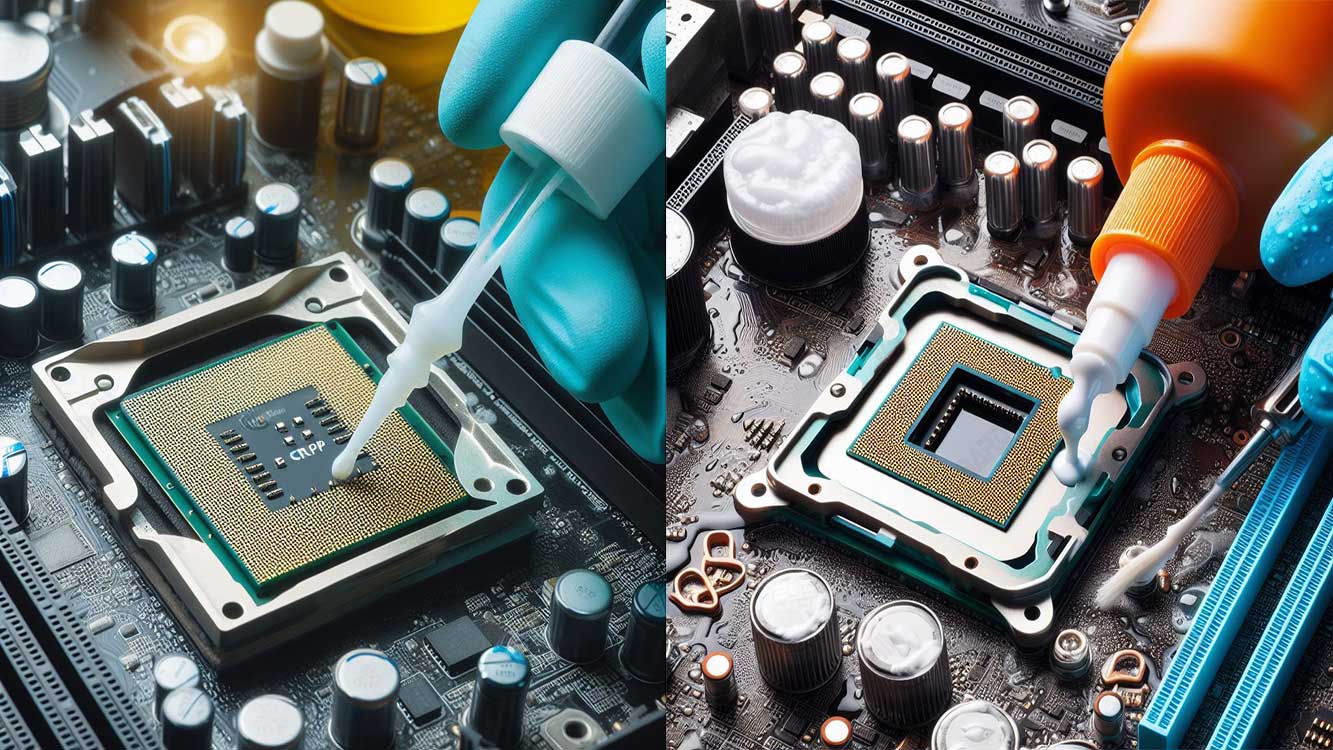
Thermal paste is a material used to increase the thermal conductivity between the CPU surface and the cooler. Thermal paste helps prevent overheating that can damage CPU components. However, thermal paste can also dry out, harden, or accumulate over time, reducing its effectiveness. Therefore, it is important to clean the old thermal paste before replacing or installing a new cooler.
Cleaning thermal paste from the CPU is not a difficult task, but it requires attention and caution. If not done properly, you can damage the CPU or other components inside your PC. In this article, Bardimin will explain the steps you should follow to clean thermal paste from the CPU easily and safely.
Step 1: Prepare the Tools and Materials
Before you clean thermal paste from the CPU, prepare the tools and materials. Here is a list of our recommended tools and materials:
- Screwdriver to open the PC case and remove the cooler from the CPU.
- Cotton swabs or wipes are clean, and lint-free to remove thermal paste from CPU and cooler surfaces.
- Isopropyl alcohol or electronic cleaners that have an alcohol content of at least 90% to clean the remaining thermal paste that sticks. Avoid using cleaners that contain water, oil, or other chemicals that can damage the CPU or cooler.
- Gloves to protect your hands from direct contact with thermal paste or cleaner.
- Antistatic bracelet or antistatic mat to prevent damage because of static electricity. Static electricity can damage sensitive electronic components inside your PC, including the CPU.
Step 2: Shut Down and Unplug the PC from the Power Source
The first step you should take before cleaning the thermal paste from the CPU is to shut down and disconnect the PC from power. This is important to prevent short circuits or damage because of electric current. Here’s how to shut down and disconnect your PC from power:
- Save all the work you are doing and close all running programs on your PC.
- Click the Start button in the lower left corner of the screen and select Shut down or Power off.
- Wait until your PC is completely off and no lights or sounds are on.
- Disconnect the power cord from your PC and the outlet.
- Disconnect all cables and other devices connected to your PC, such as monitors, keyboards, mice, printers, etc.
Step 3: Open the PC Case and Remove the Cooler from the CPU
The next step is to open the PC case and remove the cooler from the CPU. This will allow you to access the CPU and the thermal paste attached to it. Here’s how to open the PC case and remove the cooler from the CPU:
- Place your PC on a table or a flat, stable surface. Make sure you have enough of and bright workspace.
- Wear gloves and an antistatic bracelet or use an antistatic mat. Touch the metal part of the PC to remove static electricity from your body.
- Use a screwdriver to open the PC case. Usually, you’ll need to remove some screws on the back or side of the PC case. Store the screws in a safe place so they don’t get lost.
- Carefully lift the PC case and place it on the side. You can now see the inside of your PC, including the motherboard, CPU, and cooler.
- Find your CPU cooler. CPU coolers are usually box-shaped or cylindrical that are attached to the top of the CPU with the help of screws, clips, or latches. CPU coolers also have fans that connect to the motherboard with a cable.
- Carefully disconnect the fan cable from the motherboard. Do not pull the cable roughly, but hold the connector and pull it gently.
- Remove the cooler from the CPU by removing the screws, clips, or latches that bind it. If the coolant feels stuck or difficult to remove, do not force it, but gently move it left and right to untie the thermal paste. If necessary, use a screwdriver or other tool to help you.
- Carefully remove the cooler from the CPU and place it in a clean, dry place. You can now see the thermal paste sticking to the top of the CPU and under the cooler.
Step 4: Clean the Thermal Paste from the CPU and Cooler
The final step is to clean the thermal paste from the CPU and cooler. This will keep the CPU and cooler surfaces clean and ready to receive a new thermal paste. Here’s how to clean thermal paste from the CPU and cooler:
- Use a cotton swab or a clean, lint-free tissue to remove thermal paste from CPU and cooling surfaces. Do not use nails, knives, or other sharp tools that may scratch or damage the surface of the CPU or cooler. Do not also use bristled or dusty clothes or wipes that could leave debris or particles on the surface of the CPU or cooler.
- Dampen a cotton swab or tissue with a small amount of isopropyl alcohol or an electronic cleaner. Do not get too wet, but enough to dissolve the remaining thermal paste that sticks. Do not pour isopropyl alcohol or electronic cleaners directly onto the surface of the CPU or cooler, as they can seep into other parts and cause damage.
- Scrub the CPU and cooling surfaces with a cotton swab or tissue that has been moistened with isopropyl alcohol or an electronic cleaner. Do it gently and carefully, without pressing too hard. Use circular or circular motions to lift the remaining thermal paste attached. Replace cotton swabs or wipes with new ones if they are dirty or wet.
- Repeat the steps above until the CPU and cooler surfaces are clear of thermal paste. You can check the cleanliness of the CPU and cooler surfaces by looking at them under light. If the surface of the CPU and cooler appears shiny and there are no stains or traces of thermal paste, then you have cleaned it well.
- Allow the CPU and cooler surfaces to dry completely before you apply a new thermal paste. You can use cotton swabs or dry wipes to absorb any remaining moisture or blow it with a hair dryer set at a low temperature. Do not use a hair dryer that is too hot, as it can damage the CPU or cooler.
Conclusion
That’s how to clean the thermal paste from the CPU easily and safely. By following the steps above, you can ensure that your CPU and cooler are clean and ready to receive new thermal paste. The new thermal paste will help improve the performance and lifespan of your CPU.