This article provides an in-depth tutorial for building a realtime application with Node.js, complete with up-to-date technical steps that developers can follow to create a voting or polling system with results updated live across all clients.
Node.js is an open-source and cross-platform JavaScript runtime environment. This technology enables the execution of JavaScript code on the server side. Consequently, it opens opportunities to build dynamic and realtime web applications. Node.js was first released in 2009 by Ryan Dahl and is now governed by the OpenJS Foundation. In this tutorial, you will learn how to build a realtime application with Node.js for a simple voting system.
Core Principles of a Realtime Application with Node.js
The core technology used is Socket.IO. Socket.IO facilitates full-duplex and event-driven communication between the server and clients. Therefore, any data change on the server can be instantly sent to all connected clients. This concept is ideal for features like live voting, chat, or monitoring dashboards.
Steps to Build a Realtime Voting Application
- Install Node.js
Ensure you have installed the latest Node.js LTS version. You can download it from the official Node.js website. The installation process is straightforward and available for various operating systems. - Initialize the Project
Create a new project folder and initialize thepackage.jsonfile via the terminal. However, you can also create it manually as shown in the following example.
{
"name": "realtime-voting-app",
"version": "1.0.0",
"description": "A realtime voting application with Node.js and Socket.IO",
"main": "server.js",
"scripts": {
"start": "node server.js"
},
"dependencies": {
"express": "^4.18.2",
"socket.io": "^4.7.2"
}
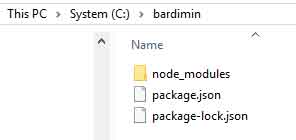
}Next, run the npm install command in the terminal to download the dependencies. This process will create the node_modules folder.
npm install.- Create the Server with Express and Socket.IO
Create a file namedserver.js. The code inside will set up the HTTP server, serve the HTML page, and handle realtime connections.
const express = require('express');
const http = require('http');
const { Server } = require('socket.io');

const app = express();
const server = http.createServer(app);
const io = new Server(server);

// Voting data stored in an object
let voteData = {
  candidateA: 0,
  candidateB: 0
};

// Serve the index.html file
app.get('/', (req, res) => {
  res.sendFile(__dirname + '/index.html');
});

// Handle Socket.IO connections
io.on('connection', (socket) => {
  console.log('A user connected');

  // Send the latest vote data to the new client
  socket.emit('updateVote', voteData);

  // Handle vote events from clients
  socket.on('submitVote', (candidate) => {
    if (voteData.hasOwnProperty(candidate)) {
      voteData[candidate]++;
      // Broadcast the update to ALL connected clients
      io.emit('updateVote', voteData);
    }
  });
});

// Run the server on port 3000
server.listen(3000, () => {
  console.log('Server running at http://localhost:3000');
});- Create the Client Interface (HTML)
Create theindex.htmlfile. This interface will display the voting results and buttons to cast a vote.
<!DOCTYPE html>
<html>
<head>
    <title>Realtime Voting Application</title>
    <script src="/socket.io/socket.io.js"></script>
    <style>
        body { font-family: Arial, sans-serif; max-width: 600px; margin: 40px auto; text-align: center; }
        table { width: 100%; border-collapse: collapse; margin: 20px 0; }
        th, td { border: 1px solid #ddd; padding: 12px; }
        th { background-color: #f4f4f4; }
        button { padding: 10px 20px; background-color: #007cba; color: white; border: none; cursor: pointer; }
        button:hover { background-color: #005a87; }
    </style>
</head>
<body>
    <h1>Realtime Election for Chairman</h1>
    <table>
        <tr><th>Candidate</th><th>Vote Count</th></tr>
        <tr><td>Candidate A</td><td id="countA">0</td></tr>
        <tr><td>Candidate B</td><td id="countB">0</td></tr>
    </table>
    <div>
        <button onclick="vote('candidateA')">Vote for Candidate A</button>
        <button onclick="vote('candidateB')">Vote for Candidate B</button>
    </div>
    <script>
        const socket = io();
        socket.on('updateVote', function(data) {
            document.getElementById('countA').textContent = data.candidateA;
            document.getElementById('countB').textContent = data.candidateB;
        });
        function vote(candidate) {
            socket.emit('submitVote', candidate);
        }
    </script>
</body>
</html>
Testing and Running the Realtime Application
- Run the server with the command
node server.jsin the terminal. - Open a browser and navigate to
http://localhost:3000. - Open the same URL in another browser tab or on a different device.
- Try casting a vote on one client. Instantly, you will see the vote results updated on all open clients. This process demonstrates that the realtime application with Node.js is functioning correctly.

Conclusion
By leveraging Node.js and Socket.IO, you have successfully built a functional realtime system. This architecture can be extended for various purposes such as data monitoring, document collaboration, or live notifications. The code used in this tutorial is modular. Therefore, you can easily adapt it for larger scale and complexity.