2. Access Programs and Features
In the Control Panel window, find and select the Programs (Program) option.
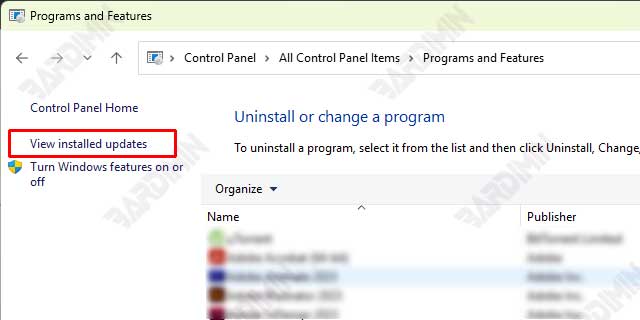
Under the Programs and Features section, click the View installed updates option. This will open a list of all the updates that have been installed on your system.
Tip: If you don’t see the View installed updates option, make sure that you use the Category (Category) view in the Control Panel. You can change this display in the upper-right corner of the Control Panel window.
3. Select the Updates You Want to Delete
On the Installed Updates page, you’ll see a list of updates grouped by category, such as Microsoft Windows, Drivers, and more. Find the update you want to remove.
Right-click on the update you want to uninstall and select Uninstall from the context menu that appears.
Warning: Make sure you only remove updates that are causing the problem. Removing important updates can affect the security or stability of the system.
4. Confirm and Restart
Once you’ve selected Uninstall, you’ll be prompted to confirm the action. Click Yes or Uninstall to continue.
The uninstall process will begin. Wait for the process to complete. The time it takes may vary depending on the size and type of update.
Once the process is complete, you will be prompted to restart the computer. Click Restart now to restart the system immediately.
Tip: If you don’t want to restart your computer right away, you can choose Restart later. However, be sure to restart your computer as soon as possible to apply the changes.
Conclusion
Rolling back and uninstalling updates in Windows 11 is an effective solution to overcome problems that arise after installing updates. By following this guide, you can easily restore your system to its previous state without having to worry about losing data or experiencing further issues.
