5. Unexpected Security Issues
While updates are usually released to improve security, sometimes updates can add new vulnerabilities that can be exploited by irresponsible parties.
Some updates may not match your existing antivirus or security software, causing conflicts that reduce system protection.
6. User Inconvenience
Some updates can change the user interface (UI) in major ways, such as menu layout, icons, or settings. These changes can make users feel uncomfortable or difficult to adjust.
Certain updates may add notifications or pop-ups that pop up constantly, disrupting user activity.
Steps to Rolling Back Updates in Windows 11
Rolling back updates in Windows 11 is a relatively simple process, but it’s important to do it carefully so as not to cause additional problems. Here is a step-by-step guide to restore the system to the state it was in before the update was installed:
1. Open Settings
Press the Windows + I keys on your keyboard at the same time. This will open the Settings (Settings) app in Windows 11.
Once the Settings opens, search for and select the Windows Update option from the left-hand menu. This option is usually under the System (System) section.
Note: If you can’t find Windows Update, make sure you’re using an administrator account, as some settings may not be available for regular user accounts.
2. Access Update History
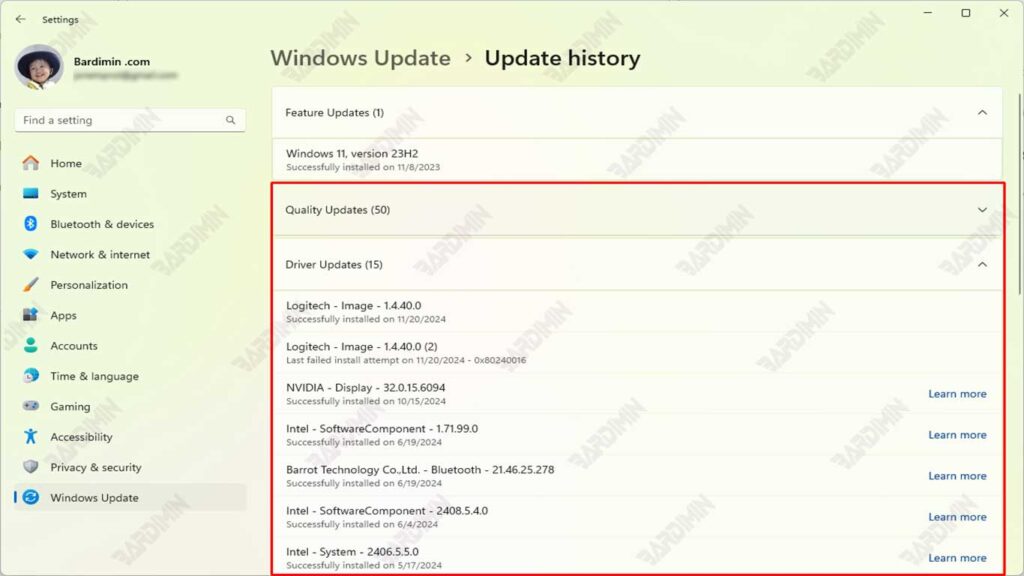
On the Windows Update page, scroll down until you find the Update history option. Click on this option to see a list of all the updates that have been installed on your system.
On the Update History page, you’ll see a list of updates grouped by category, such as Quality Updates, Driver Updates, and Definition Updates. Search for the update you want to roll back.
Tip: If you’re not sure which update is causing the problem, pay attention to the update installation date and compare it to the time when the problem started appearing.
3. Select Uninstall Updates
Once you’ve found the update you want to roll back, click on the Uninstall updates option which is usually located at the top of the Update History page. This will open a new window that displays a list of updates that can be uninstalled.
Find the update you want to remove from the list. Click on the update, then select Uninstall. You may be asked to provide confirmation or enter an administrator password.
Warning: Make sure you only remove updates that are causing the problem. Removing important updates can affect the security or stability of the system.
4. Restart the Computer
Once the uninstall process is complete, you will be prompted to restart your computer. Click Restart now to restart the system immediately.
After the computer restarts, the system will return to the state it was in before the update was installed. Check to see if the problem you’re experiencing is resolved.
Tip: If the problem persists after rolling back, you can try using the System Restore feature to restore the system to a previous restore point.
Steps to Uninstall Updates in Windows 11
Uninstalling updates in Windows 11 is a process that can help resolve system issues caused by problematic updates. Here is a step-by-step guide to uninstalling updates using Control Panel:
1. Open the Control Panel
Press the Windows key + R on your keyboard at the same time. This will open the Run window.
Type the control panel in the field provided, then press Enter or click OK. This will open Control Panel in Windows 11.
Note: If you prefer, you can also open the Control Panel by searching for it through the Start Menu or Search Bar.
