Have you ever encountered the automatic repair loop issue on Windows 11? This is a situation where your computer cannot start Windows normally, but keeps repeating the automatic repair process unsuccessfully. This can be very annoying and make you unable to access your data and applications.
Automatic repair loop problems can be caused by a variety of factors, such as system damage, driver errors, hardware problems, or viruses. Fortunately, there are several ways you can try to resolve this issue and restore your Windows.
In this article, Bardimin will describe some of the most common and effective solutions to solve the automatic repair loop problem in Windows 11.
Solution 1: Shut Down the Computer and Turn It Back On
The first solution you can try is to shut down your computer and turn it back on. This may sound simple, but sometimes it can fix temporary problems and allow Windows to start normally. Here are the steps you should follow:
- Press and hold the power button on your computer for a few seconds until the computer shuts down.
- Wait about 10 seconds, then press the power button again to turn on the computer.
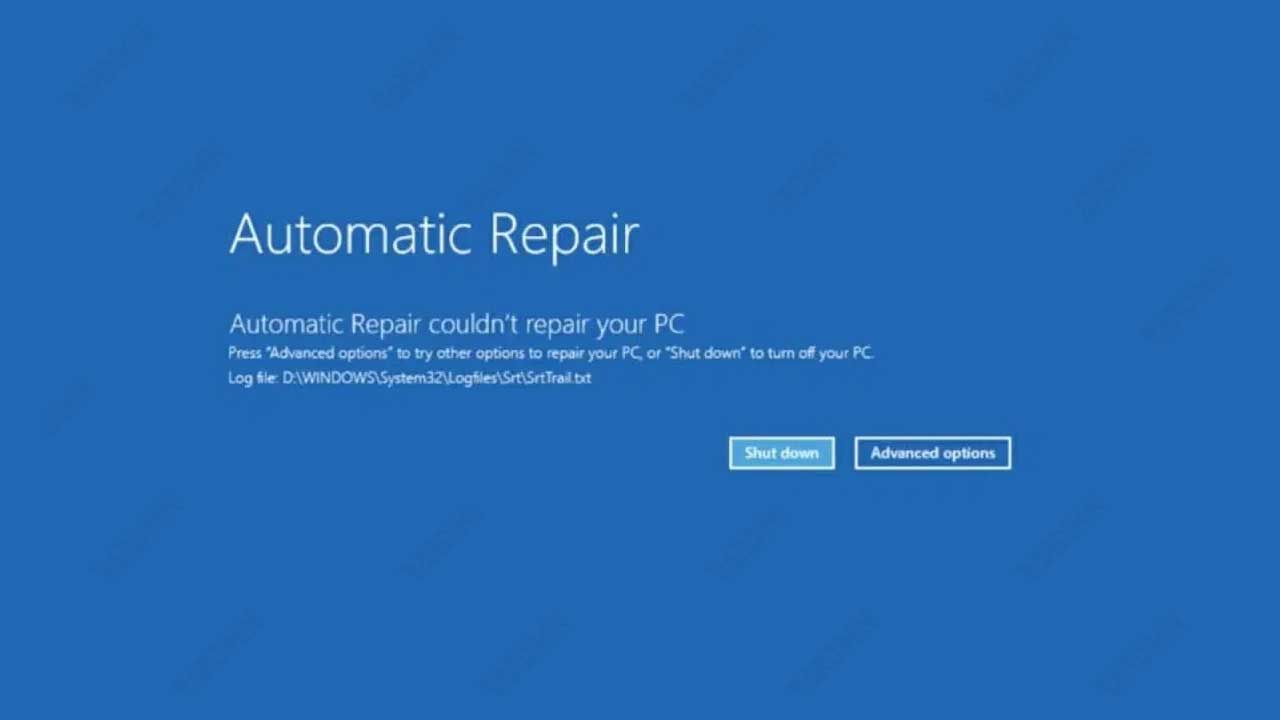
- If your computer has a menu boot option, press the appropriate key (usually F12, F8, or Esc) to open it.
- Select the boot option that corresponds to your Windows 11, for example, Windows Boot Manager or UEFI Hard Drive.
- If your computer successfully started Windows 11, then your problem has been resolved. If not, proceed to the next solution.
Solution 2: Starting Windows 11 in Safe Mode
The second solution you can try is to start Windows 11 in mode aman. Safe mode is a diagnostic mode that allows Windows to start with minimal configuration and without unnecessary drivers or services. Thus, you can isolate and identify the cause of the automatic repair loop problem. Here are the steps you should follow:
- When your computer tries to start Windows 11, press and hold the Shift key on your keyboard, then press the power button on the Choose an option screen.
- Select the Troubleshoot option > Advanced options > Startup Settings > Restart.
- After your computer restarts, you will see a list of options startup. Press the number pad corresponding to Enable Safe Mode (usually 4 or F4).
- If your computer successfully started Windows 11 in safe mode, then you can try to do some of the following to fix your problem:
- Update or restore the problematic driver. You can do so by going to Device Manager, right-clicking on the driver you want to update or restore, and selecting the appropriate option.
- Check for and repair system crashes. You can do this by opening Command Prompt as an administrator, and running the following commands: sfc /scannow and dism /online /cleanup-image /restorehealth.
- Remove programs or apps that you recently installed or updated. You can do this by opening Settings > Apps > Apps & features, and clicking on the program or application you want to remove, then selecting the Uninstall option.
- Scans and removes viruses or malware. You can do this using an antivirus program you trust, or using Windows Security that is already integrated with Windows 11.
- After you perform the above steps, restart your computer and see if the automatic repair loop problem has been resolved. If not, proceed to the next solution.
Solution 3: Restore the System to a Previous Restore Point
The third solution you can try is to restore your system to a previous restore point. A restore point is a snapshot of the state of your system at any given time, which you can use to restore your system to the state it was in before the problem occurred. However, this solution applies only if you have created a restore point before, or if Windows has created it automatically. Here are the steps you should follow:
- When your computer tries to start Windows 11, press and hold the Shift key on your keyboard, then press the power button on the Choose an option screen.
- Select Troubleshoot option > Advanced options > System Restore.
- Select your user account and enter your password if prompted.
- Select an available restore point that corresponds to the date before you experienced the automatic repair loop issue. If there are no restore points available, then you cannot use this solution.
- Follow the on-screen instructions to complete the system restore process.
- Once the process is complete, restart your computer and see if the automatic repair loop problem has been resolved. If not, proceed to the next solution.
Solution 4: Reset Windows 11
The fourth and final solution you can try is to reset Windows 11. Resetting Windows 11 is the process that will remove all your files, programs, and settings, and reinstall Windows 11 with a clean, new version. This is the most drastic solution, but also the most effective for solving the automatic repair loop problem. However, before you do this solution, make sure you have backed up your important data, as you will lose all your data after resetting Windows 11. Here are the steps you should follow:
- When your computer tries to start Windows 11, press and hold the Shift key on your keyboard, then press the power button on the Choose an option screen.
- Select Troubleshoot option > Reset this PC.
- Choose the Keep my files or Remove everything option, depending on your preference. The Keep my files option will remove all your programs and settings but will retain your files. The Remove everything option will erase all your files, programs, and settings, and give you a whole new Windows 11.
- Follow the on-screen instructions to complete the Windows 11 reset process.
- Once the process is complete, your computer will restart and start the new Windows 11. You can set up Windows 11 to your liking, and reinstall the programs and apps you need.