Other Interesting Articles
Reset Windows Audio Servicing in Windows 11
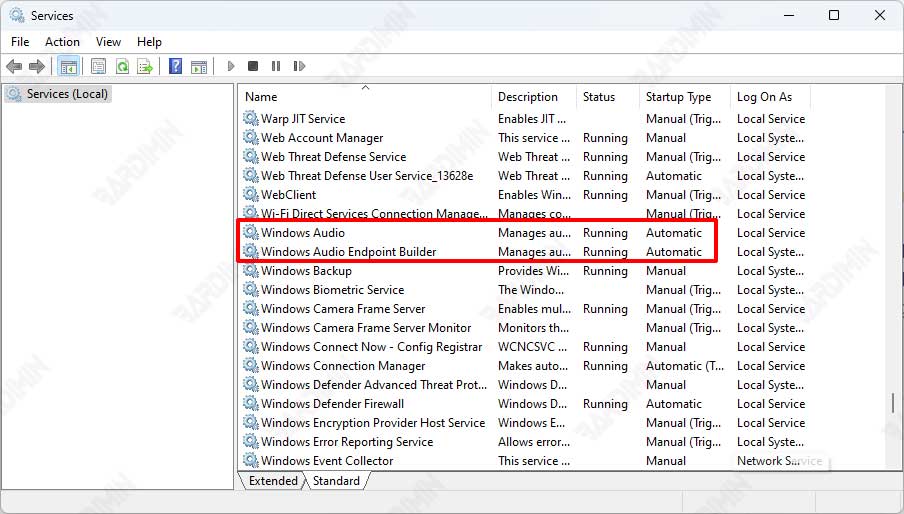
Windows uses several services to manage sound. “Windows Audio” and “Windows Audio Endpoint Builder” are two Windows 11 services that work with sound on your PC.
If you have problems with the clarity of your computer’s voice, you can restart the program. To do so, follow these steps.
Here are the steps on how to reset Windows Audio Service on Windows:
- Open “Services” by pressing the Windows key + R on the keyboard, then type “services.msc” and press Enter.
- Look for “Windows Audio” on the list of services. Make sure that this service is running, and the status is “Started”.
- If the service is not running, double-click on “Windows Audio” to open the “Properties” window.
- Select the “Automatic” option from the dropdown menu under “Startup type”, and then click the “Start” button to start the service.
- If the service is already running, right-click on “Windows Audio” and select the “Restart” option.
- Repeat the steps for the “Windows Audio Endpoint Builder” service.
If the audio problem persists, be sure to check the sound settings on the computer and make sure that the operating system has correctly detected the installed audio device. Otherwise, you may need to install the audio driver or check the audio device for issues.
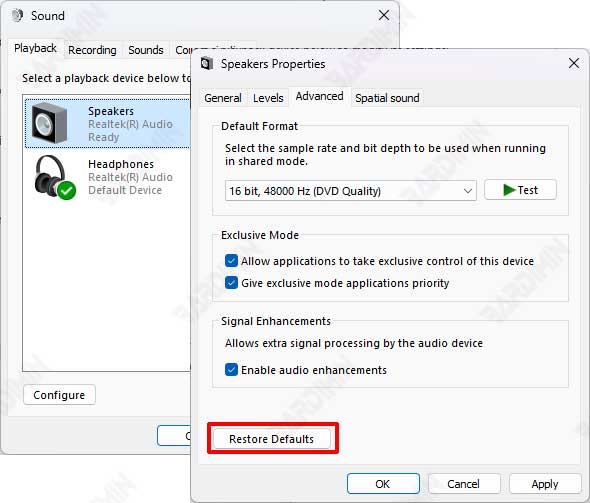
Reset speakers in Windows 11
- Open the Windows “Control Panel“.
- Click “Sound“.
- Then right-click on the Speaker you want to reset and select “Properties“.
- Select the “Advanced” tab of the dialog box.
- Click the “Restore Defaults” button.
Be sure to check the speaker cable and make sure that the operating system has correctly detected the attached audio device.
