Other Interesting Articles
2] Using WinZip’s Command Utility
- Download the WinZip Command Line.
- Install the file on the same computer as your corrupted ZIP file.
- Then open Command Prompt (CMD) and run it as administrator.
- Change to the folder where the corrupted ZIP file is located. You can use the “cd” command to move folders.
- Next, type the following command:
C:\Program Files\WinZip\wzzip" -yf corrupt_zip_file.zip
- Press the Enter key on the keyboard.
WinZip will repair the zip file and open it for you. You should now be able to access files in the zip that you couldn’t open before.
3] Using WinRAR Utility
- Open WinRAR.
- Then click “Tools > Repair archive“. You can also use keyboard shortcuts (ALT+R).
- Click the “Browse” button and navigate to the folder where the damaged ZIP file is located.
- Next, select the archive file type “Treat the corrupt archive as ZIP”.
- Click the “OK” button.
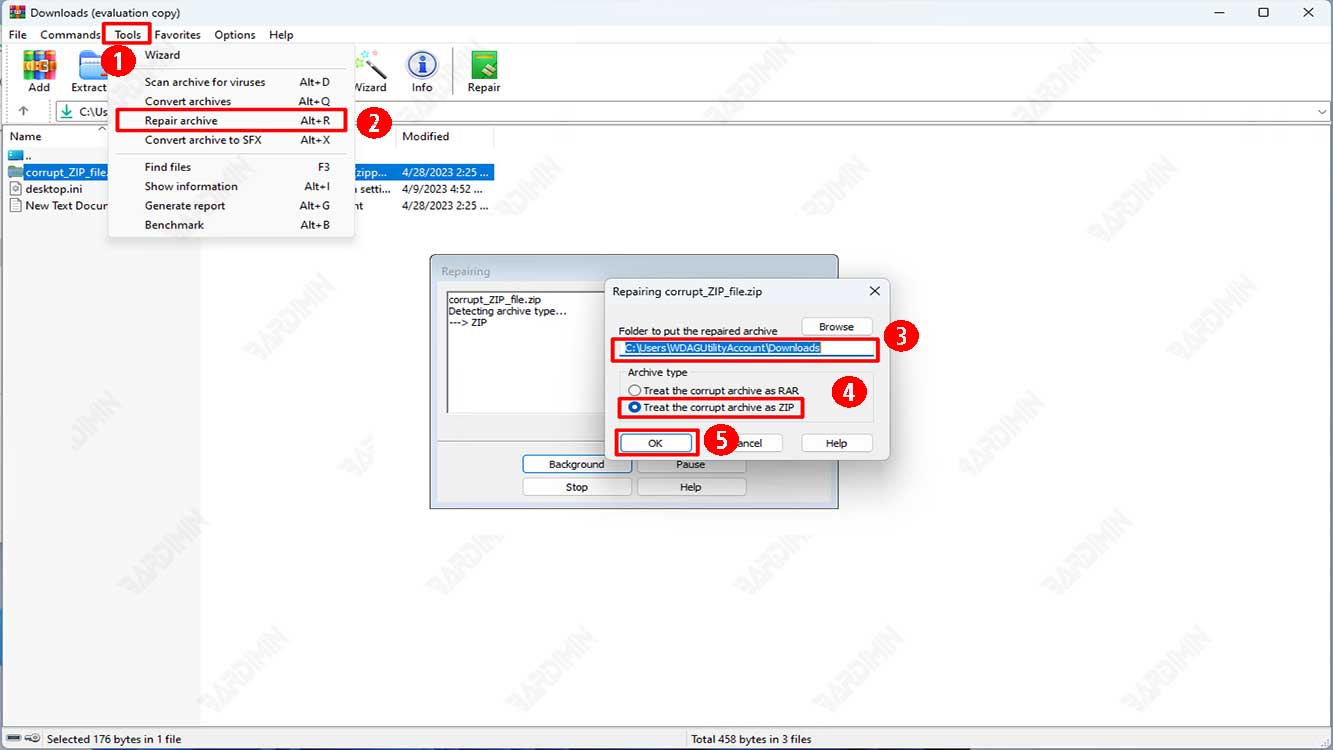
In a few seconds, the selected archive will be repaired and recreated in the location you have previously selected.
4] Using DiskInternals ZIP Repair
- Download and install DiskInternals ZIP Repair.
- Open the DiskInternals ZIP Repair program.
- Select the ZIP file you want to repair by clicking the “Browse” button and locate the file on your computer.
- Once you have selected the damaged ZIP file, click the “Next” button to continue the repair process.
- Wait until the scanning process is complete. This process may take a few minutes depending on the size and condition of the damaged ZIP file.
- Once the process is complete, you can see a list of successfully recovered files. Select the file you want to save and click the “Save” button.
- Select the destination directory to save the repaired file.
- Once the saving process is complete, you can now open the repaired ZIP file.
