Steps to Disable Safeguard Hold via Windows Group Policy
Here are the steps to disable Safeguard Hold via Group Policy in Windows:
Step 1: Open the Group Policy Editor
Open the Group Policy Editor by typing “gpedit.msc” in the search box or the Run menu (press Windows key + R).
Step 2: Navigate to the Relevant Settings
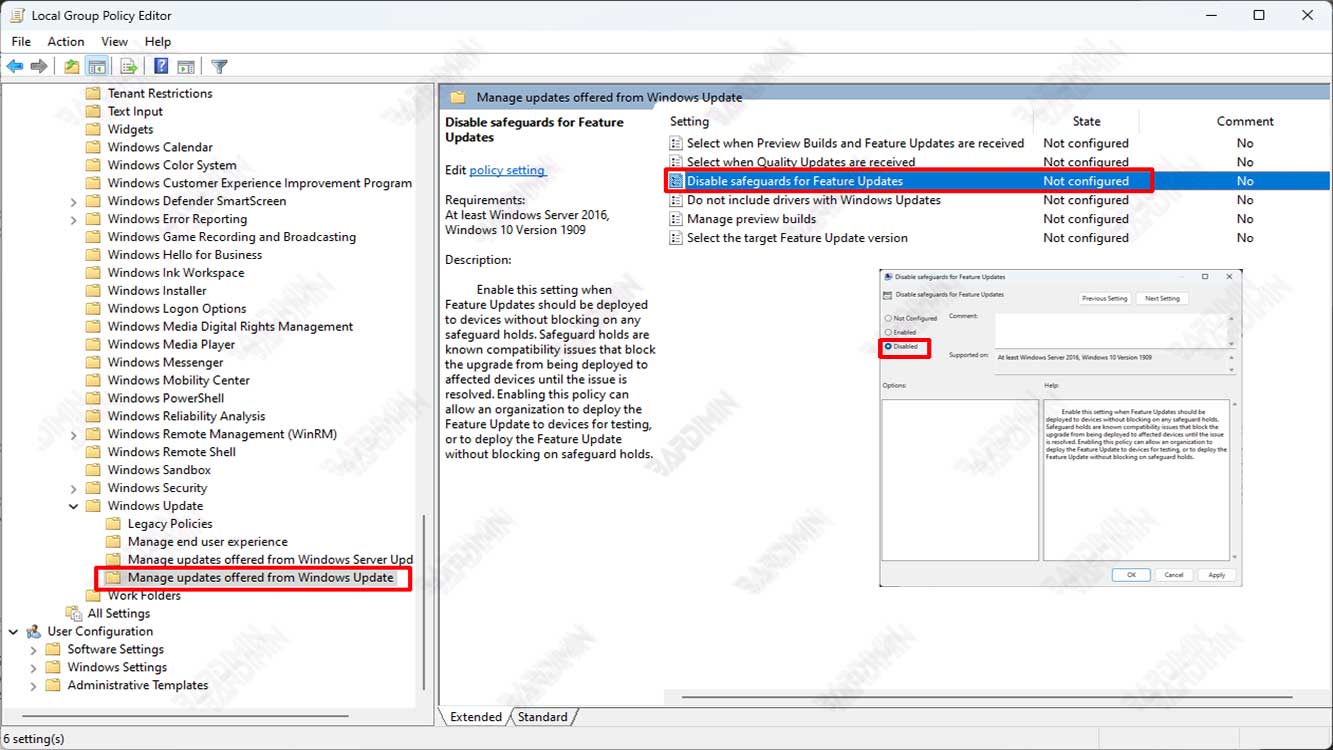
Once the Group Policy Editor opens, navigate to “Local Computer Policy >> Administrative Templates >> Windows Components >> Windows Update >> Manage updates offered from Windows Update”.
Step 3: Disable Safeguard Hold
Find the option “Disable safeguards for Feature Updates” in the right pane and open its settings by double-clicking.
In the window that appears, select the “Disabled” option to disable Safeguard Hold. Click “Apply” and “OK” to save changes.
Step 4: Restart Your Computer
After changing the Group Policy settings, you need to restart your computer for the changes to take effect effectively.
Conclusion
Safeguard Hold is an important feature in Windows 11 that ensures users have a safe and positive experience when upgrading their operating system. However, sometimes Safeguard Hold can get in the way of an update, even when your device doesn’t have compatibility or performance issues.
If Safeguard Hold gets in your way when trying to update Windows 11, follow the steps above to disable it and easily update your operating system.
