Step 1: Change Power Plan Settings
The first step to keeping an external HDD active in Windows 11 is to make adjustments to the power settings. By default, Windows will shut down the drive after a few minutes of inactivity to conserve energy, especially when using Balanced or Power Saver mode.
Let’s “tame” this overly aggressive Windows power-saving feature! Follow these steps carefully:
How to Disable Sleep Mode for External HDDs
1. Open the Power Options Menu
- Right-click the battery icon in the taskbar (for laptops)
- Or open Control Panel → Power Options
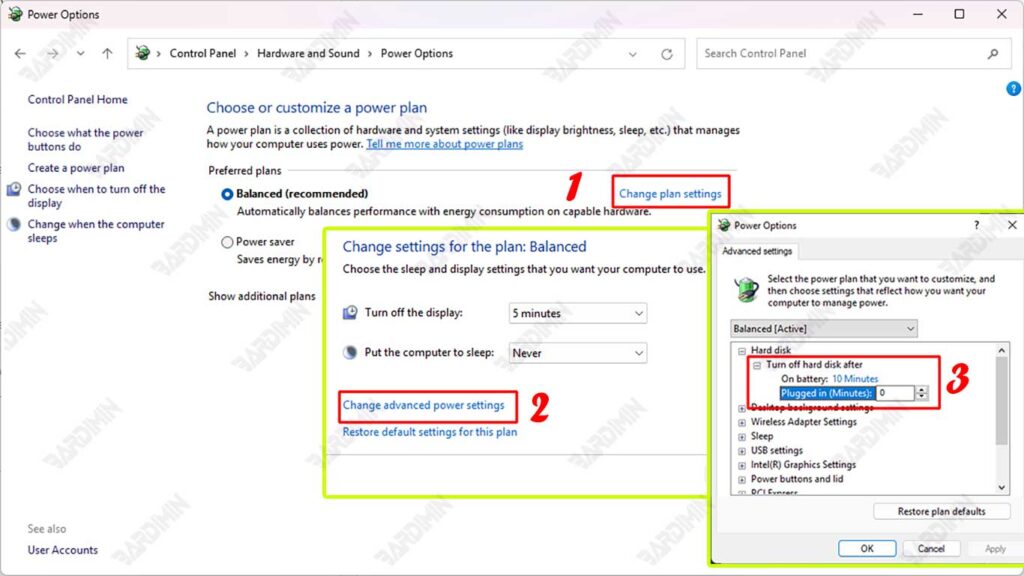
2. Edit Power Plan
- Select an active plan (usually “Balanced”)
- Click “Change plan settings”
- Select “Change advanced power settings”
3. Turn off the HDD Sleep Timer
- Look for the “Hard disk” option → “Turn off hard disk after”
- Change all values to “0” (Never)
- On battery: 0
- Plugged in: 0
- Click on “Apply” and then “OK.”
Step 2: Disable USB Selective Suspend
USB Selective Suspend is a power-saving feature that allows the operating system to disable specific USB ports individually when they are considered inactive. While this feature is effective for saving energy, especially on laptop devices, it can disrupt the stability of external HDD connections connected via USB ports.
This feature is like a Windows “electrician” who likes to cut off the power to the USB port at will. When Windows detects a “quiet” USB port for a while, it will:
- Unilaterally disconnect power
- Consider USB devices unimportant
- Causes an external HDD to suddenly disappear from the system
How to turn off USB Selective Suspend:
1. Open Advanced Power Settings
- Control Panel > Power Options
- Select “Change plan settings” in the active plan
- Click “Change advanced power settings”
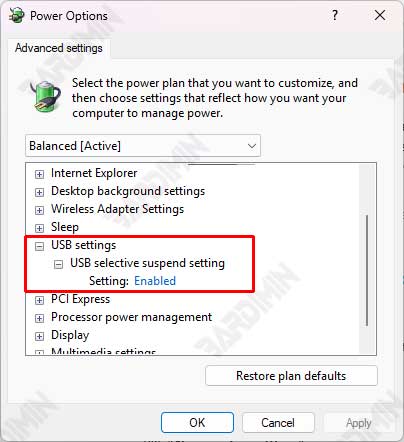
2. Find the USB Settings
- Scroll to the “USB settings” section
- Open the “USB selective suspend setting” submenu
3. Disable Completely
- Change both options to “Disabled”:
- On battery: Disabled
- Plugged in: Disabled
- Click “Apply” or “OK”
Step 3: Check Device Manager – Power Management Settings
In addition to doing the setup via Power Options, you also need to make sure that Windows doesn’t automatically turn off the USB port via Device Manager.
Windows likes to “cheat” on us! Even though it has turned off USB Selective Suspend, some USB ports can still be force-shut off via Device Manager. This is often the cause of external HDDs suddenly disconnecting!
How to Disable Power Management for USB Ports in Device Manager
Follow these steps to disable the power-saving setting on each USB port used by your external HDD:
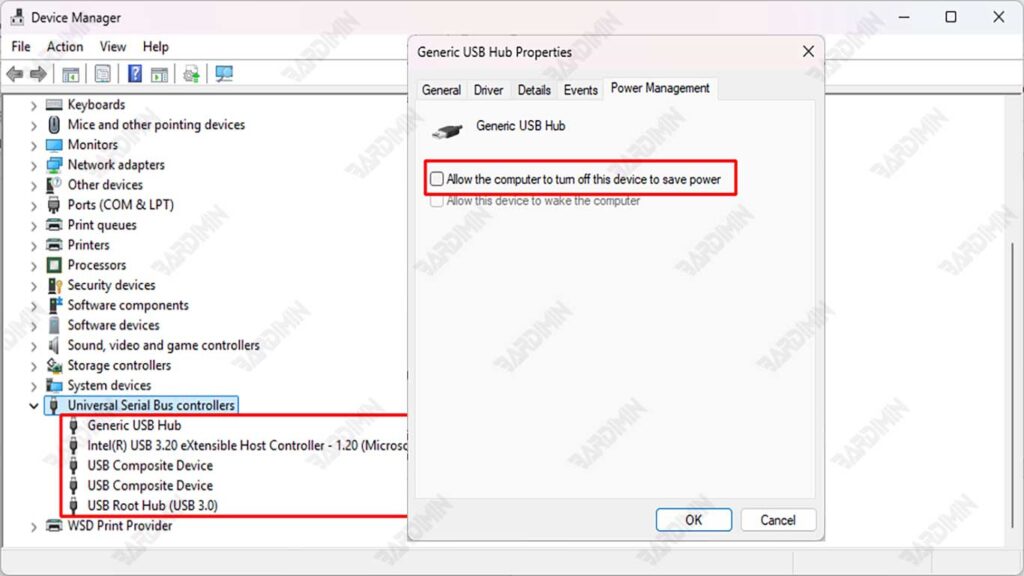
1. Open Device Manager
- Right-click the Start menu → Select Device Manager
- Search and open the → Universal Serial Bus controllers category
2. Turn Off the Power Saving Option on Each USB Port
- Right-click on USB Root Hub (USB 3.0), Generic USB Hub, and USB Composite Device
- Select Properties → Open the Power Management tab
- Uncheck “Allow the computer to turn off this device to save power.”
- Click OK
3. Repeat for All Ports Used by External HDDs
- Test the USB port where the HDD is connected (unplug & plug in to be sure).
- Disable this option on all listed USB Hubs.
If you’re not sure which port is being used by the external HDD, disable this setting for all available USB ports. This is safe and ensures nothing is missed.
This change does not affect the overall performance of the system, but it is especially beneficial for devices that require constant connectivity, such as external HDDs.
