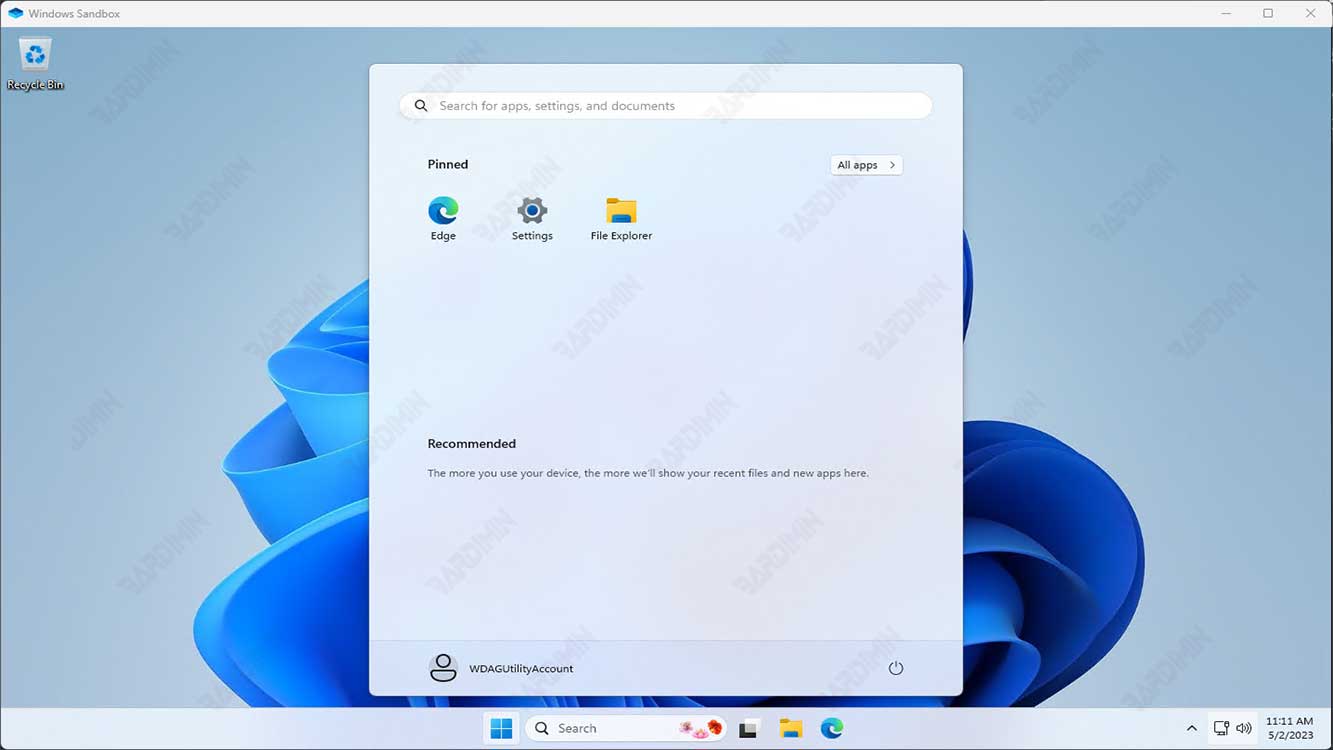
Windows Sandbox is a very useful feature for testing applications. But unfortunately, in some cases, Windows Sandbox fails to start and or displays a “0x80070015, 0x80070057, 0x800706d9, 0x80070002, 0x80070569, 0x80072746 or 0xc0370106” error message.
A feature of Windows Sandbox is that it allows users to run programs or applications in an isolated and secure environment. Windows Sandbox acts as a temporary virtual desktop environment.
With Windows Sandbox, users can run applications or programs that they don’t trust, or that they worry could harm their operating system, without worrying about side effects.
Windows Sandbox works by creating an isolated and clean work environment every time a user runs an application on it. Once the user finishes using the app, Sandbox deletes all data and information associated with the app, keeping the operating system safe and clean.
How Windows Sandbox Works
Windows Sandbox generates a virtual machine by duplicating your current operating system image. Your Windows Sandbox environment is always running a new, clean version of Windows, complete with the latest updates. However, unlike other virtualization technologies, you don’t need to keep a backup of the operating system to boot.
Because virtual machines require a lot of resources, the host system must share its hardware. Windows Sandbox leverages intelligent memory management to dynamically allocate memory between the host and the Sandbox, preventing the host from being terminated.
Windows Sandbox uses two standard virtualization technologies known as Snapshot and Clone to reduce the load on the host system. Windows Sandbox can use snapshots to boot the environment once and then “save memory, CPU, and device state to disk.” Instead of starting the environment every time a new instance of the sandbox is needed, the environment can be restored from disk.
Causes of Windows Sandbox failing to start
There could be various reasons why Windows Sandbox is not working. Some factors that can cause Windows Sandbox to fail to start include:
- The Windows operating system does not have support for virtualization features, such as Intel VT-x or AMD-V. Windows Sandbox requires virtualization support to run, so if the operating system does not support this feature, then Windows Sandbox will not be able to run.
- The CPU used does not have support for virtualization features. Some older CPUs may not support the virtualization features required by Windows Sandbox.
- Incompatible GPU drivers. Windows Sandbox uses separate GPU drivers to process the graphics required by the applications running on it. If the GPU driver is incompatible or installed incorrectly, then Windows Sandbox will not be able to run.
- The Windows Sandbox feature is not enabled. You must enable this feature to use it.
- The service is disabled. If sandbox-related services are stopped, Windows Sandbox will not start. Make sure the services and dependencies responsible for the feature are running.
- Corrupted or missing system files can cause Sandbox to fail to launch. To fix this, you have to repair system files via Command Prompt.
- Third-party security software such as antivirus or firewall might block Windows Sandbox for security reasons. To make sure that Windows Sandbox can run, make sure that the security software that you use is configured correctly.
- Windows Sandbox requires sufficient disk space and memory to run. Make sure that the system has sufficient disk space and memory before attempting to run Windows Sandbox.
How to Fix Windows Sandbox Fails to Start Error in Windows 11
Regardless of which Sandbox error code you receive, the following guide will show you that can help troubleshoot the Windows Sandbox won’t start issue.
- Disable and Re-enable Windows Sandbox.
- Run the Windows services required by Sandbox.
- Restart Hyper-V and other applications listed on the “Windows Features” screen.
- Use the Windows Troubleshooting Tool.
- Repair Windows system files.
- Restore Windows to a Previous State.
- Update your device.
1] Disable and Re-enable Windows Sandbox.
- Open Windows Features. You can open it by pressing the keyboard key (WIN + R) to access the “Run” dialog box. Type “optionalfeatures” and press Enter to open the Windows Features program.
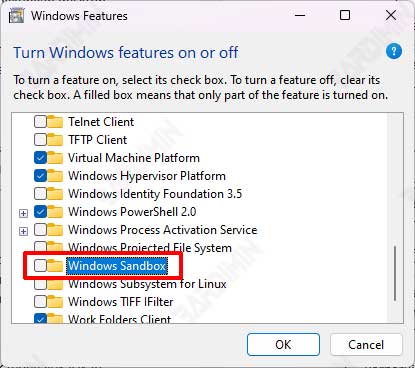
- Then swipe down on the Windows Features window. Find “Windows Sandbox” and uncheck it to disable it.
- Click the OK button.
- Restart your computer.
After Windows restarts, repeat it and activate Windows Sandbox by checking it.
2] Run the Windows services required by the Sandbox.
When certain Windows services are disabled, Sandbox errors usually appear. To run correctly, Windows Sandbox requires the Windows service “Hyper-V Remote Desktop Virtualization Service” to be running.
- Open Windows Services. Press the keyboard keys (WIN + R) to access the “Run” dialog box. Type “services.msc” and press Enter to open Windows services.
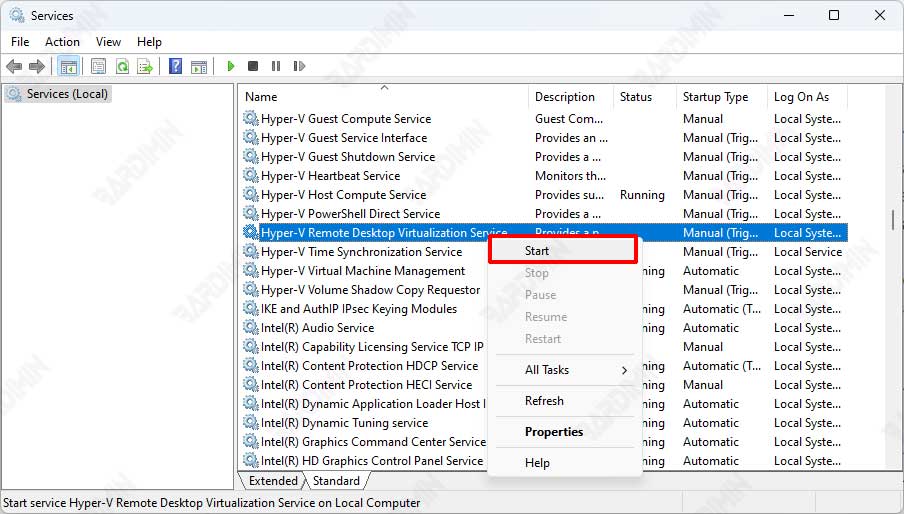
- Then in the Windows Services window, search for and find the “Hyper-V Remote Desktop Virtualization Service” service.
- Right-click the service and select the “Start” option.
If Windows Sandbox still fails to start, also make sure the following services are also running. Use the above to run:
- Hyper-V Host Service
- Hyper-V Time Synchronization Service
- Virtual Disk
3] Restart Hyper-V and other applications listed on the “Windows Features” screen.
Restarting some programs on the Windows Features screen can help. However, this method will only be effective if you restart the features on which the Sandbox tool depends.
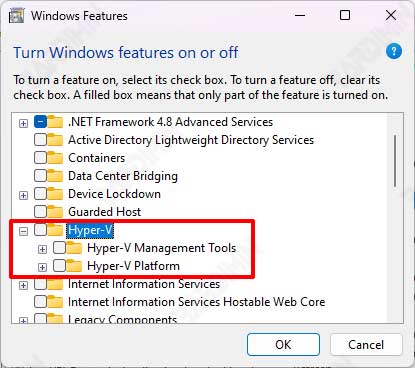
In this case, restarting the “Hyper-V”, “Hyper-V Management Tools”, and “Hyper-V Platform” features might help resolve the issue.
- Open Windows Features. You can open it by pressing the keyboard key (WIN + R) to access the “Run” dialog box. Type “optionalfeatures” and press Enter to open the Windows Features program.
- Then swipe down on the Windows Features window. Find “Hyper-V” and uncheck it to disable it. Also, make sure to uncheck “Hyper-V Management Tools” and “Hyper-V Platform“.
- Click the OK button and restart the computer.
After the computer turns back on, repeat the steps to re-enable “Hyper-V”, “Hyper-V Management Tools”, and “Hyper-V Platform” by checking them.
4] Use the Windows Troubleshooting Tool.
- Open Windows “Settings” by pressing the keyboard keys (WIN + I).
- Then navigate to “System > Troubleshoot“.
- Select “Other troubleshooters” on the right panel.
- Select the hardware or device and press the Run button.
- Restart the computer by following the instructions on the screen.
5] Repair Windows system files.
- Open “Command Prompt (CMD)” and run it as administrator.
- To repair system files, use the following command:
sfc /scannow
- Then, run the following commands one by one:
DISM /Online /Cleanup-Image /CheckHealth
DISM /Online /Cleanup-Image /ScanHealth
DISM /Online /Cleanup-Image /restorehealth
- Restart the computer when all processes are complete.
6] Restore Windows to its Previous State.
In Windows 11, you can restore from the restore system by:
- Open the “Control Panel“.
- Click “Recovery“.
- In the “Recovery” window that opens, select “Open System Restore” on the right panel.
- Next will open the “System Restore” dialog box. Click the “Next” button.
- Then select the restore point on the date the computer is still working properly and normally. Click the “Next” button to continue.
- Click the “Finish” button to start the restore process.
- Wait until the restore process is complete. Your PC will restart when finished.
7] Update your device.
- Open Windows “Settings” by pressing the keyboard keys (WIN + I).
- Then select “Windows Update“.
- On the right panel click the “Check for Updates” button.
- Update Windows if available, and update to the latest version.