AutoPlay is a feature in Windows 11 that automatically recognizes and responds when an external device such as a USB flash drive, SD card, or CD/DVD is connected to a computer. This feature allows users to choose their desired action, such as opening a folder to view files, playing music, or running a specific app.
It is important to note that AutoPlay is different from AutoRun. AutoRun is a feature that instantly executes a specific file (usually autorun.inf) when the device is connected, while AutoPlay gives the user the option to specify the desired action. AutoRun is often considered riskier because it can be used to spread malware, while AutoPlay is more secure because it require interaction from users.
How Does AutoPlay Work When An External Device Is Connected?
When you connect an external device such as a USB flash drive or SD card to a computer that uses Windows 11, the system will automatically detect the device. AutoPlay will then display a pop-up window that offers several options for actions based on the type of content detected. Examples:
- If the device contains music files, AutoPlay may offer the option to play songs with the default music player app.
- If your device contains photos, AutoPlay might suggest opening a folder or importing images into a gallery app.
Users can choose the desired option or close the AutoPlay window if they don’t want to do anything.
Why Should You Disable AutoPlay in Windows 11?
Disabling AutoPlay in Windows 11 is an important step to improve the security and performance of your system. Here are some reasons why you should consider disabling this feature:
Security Risks from External Devices
External devices such as USB, external hard disks, or CDs/DVDs can be an avenue for attackers to spread malware. With AutoPlay enabled, the system can directly run applications or files from that device without the user’s confirmation. This opens up opportunities for infected devices to damage your system, especially if they come from unknown sources.
Malware Threat Through AutoPlay
AutoPlay feature can be a conduit for malware. Media files that look safe can store malicious code that is automatically executed when the device is connected. While Windows 11 has security features like Microsoft Defender, relying on one layer of protection isn’t enough. Attackers are always looking for new loopholes, and disabling AutoPlay can reduce this risk.
Influence on Windows 11 System Performance
In addition to security risks, AutoPlay can also affect system performance. When an external device is connected, the system must process AutoPlay commands, which can drain CPU and memory resources. This can lead to performance degradation, especially if multiple devices are connected or if those devices have large content. By disabling AutoPlay, you can reduce the load on your system and keep Windows 11 performing optimally.
How to Disable AutoPlay in Windows 11 Manually
Windows 11 offers several ways to turn off AutoPlay, including through Settings, Control Panel, Group Policy Editor, and Registry Editor. Here are the steps to disable it.
a. Via Settings
This method is the easiest and recommended for ordinary users who want to turn off AutoPlay without the need to change the system settings in depth.
Steps to disable AutoPlay via Settings:
- Open Settings by pressing the Win + I button.
- In the Settings window, click Bluetooth & devices in the left panel.
- Select the AutoPlay menu on the right side of the screen.
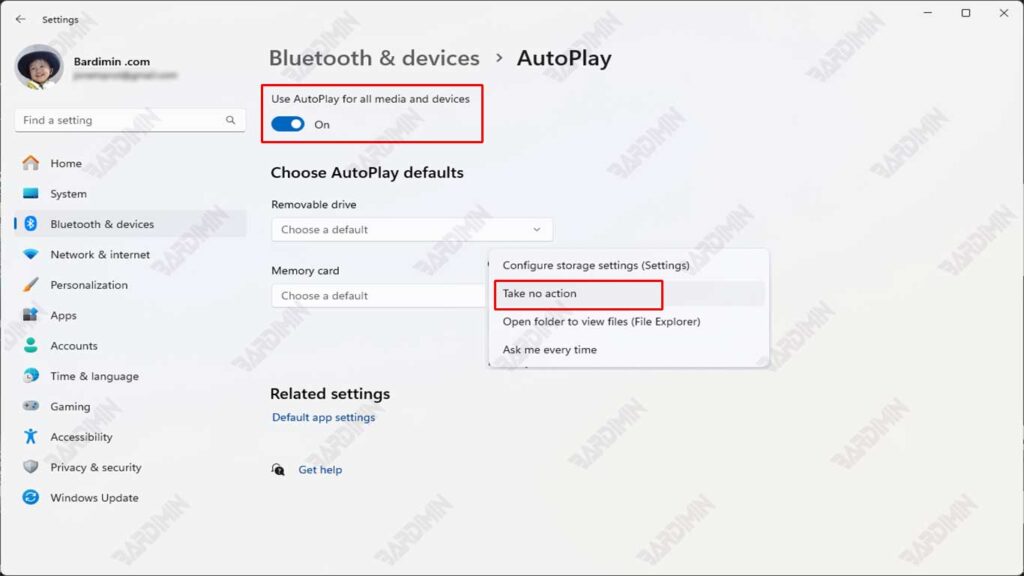
- Find the Use AutoPlay for all media and devices option.
- Slide the switch to the “Off” position to turn off the AutoPlay feature.
- Close the Settings and restart the computer if needed.
Setting Up AutoPlay for Specific Devices
If you don’t want to disable AutoPlay completely but want to set its behavior for a specific device, follow these steps:
- In the AutoPlay menu, look for the Choose AutoPlay Defaults section.
- For each type of media or device (for example, Removable drive, Memory card, etc.), click the dropdown and select an option:
- Take no action (Doing nothing).
- Open folder to view files (Open folders in File Explorer).
- Ask me every time (Asks for confirmation every time the device is connected).
- Save the changes and close Settings.
This way, you can still set up certain external devices without having to completely disable AutoPlay.
b. Using the Control Panel
Disabling AutoPlay through the Control Panel is another option if you prefer to use the classic Windows view.
Steps to Disable AutoPlay via Control Panel:
- Open the Control Panel by pressing Win + R, type control, and then press Enter.
- Select the category Hardware and Sound.
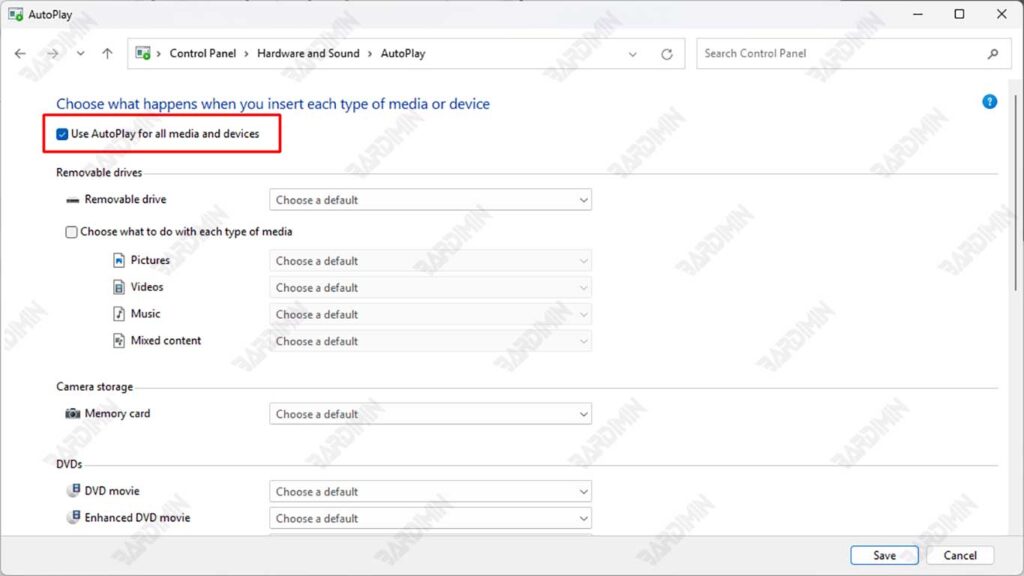
- Click on the AutoPlay option.
- Uncheck the Use AutoPlay for all media and devices option at the top.
- Scroll down and make sure each device category (such as Removable Drive, Memory Card, etc.) is set to Take no action or Ask me every time if you want to select an action every time a device is connected.
- Click the Save button to apply the settings.
How to Check if AutoPlay is Disabled
Once you’ve turned off AutoPlay in Windows 11, it’s important to make sure the settings are applied correctly. Here are two easy ways to check if AutoPlay has been turned off:
1. Try Connecting a USB or DVD and Observe if AutoPlay Appears
The easiest way to check if AutoPlay is turned off is to connect an external device such as a USB flash drive or DVD to your computer.
Steps:
- Connect a USB flash drive or insert a DVD into your computer.
- Observe if the AutoPlay window appears automatically.
- If the AutoPlay window doesn’t appear, it means that the feature has been successfully turned off.
2. Use PowerShell to Check Settings
If you want to make sure AutoPlay settings are more technical, you can use PowerShell to check the registry values associated with AutoPlay.
Steps:
- Open PowerShell by typing “PowerShell” in the Start Menu and selecting Run as Administrator.
- Run the following command to check the registry value:
Get-ItemProperty -Path “HKLM:\SOFTWARE\Microsoft\Windows\CurrentVersion\Policies\Explorer” -Name NoDriveTypeAutoRun- The result of this command will display the value of NoDriveTypeAutoRun. Here is the meaning of the value:
- Value 0: AutoPlay enabled for all drive types.Value 255 (0xFF): AutoPlay disabled for all drive types.
- Other values: AutoPlay disabled for a specific type of drive (this value is a combination of drive codes).
Solutions If AutoPlay Is Still On After Being Disabled
If you have disabled AutoPlay in Windows 11 but this feature is still active, don’t worry. Here are some solutions you can try to make sure AutoPlay is completely turned off:
1. Make Sure Windows 11 is Updated to the Latest Version
Sometimes, AutoPlay issues that are still active are caused by bugs or compatibility issues in the version of Windows that you are using. Ensuring your operating system is updated to the latest version can help resolve this issue.
2. Check for Third-Party Software That May Re-Enable AutoPlay
Some third-party apps, especially those related to device management or media players, maybe reactivating AutoPlay without you even realizing it. Check if there are any such apps installed on your computer.
3. Restart Your Computer After Changing Settings
Often, the settings change does not take effect immediately until the computer is restarted. Make sure you restart your computer after disabling AutoPlay.
4. Check Registry Settings
If all of the above steps don’t work, you can check your registry settings to make sure that AutoPlay is completely turned off.