To enable or disable hibernation mode in Windows 11, you must first display the corresponding menu item. If the hibernate menu does not appear, you can change it to the “Power Options” setting.
In Windows, hibernation mode allows you to reverse off the computer while saving your work, allowing you to immediately pick up where you left off the last time you turn on the computer again.
Hibernation mode is like Sleep mode. The main difference is that in Hibernation mode, it saved open documents and programs to files on your hard disk, not in RAM as in Sleep mode.
Hibernation mode consumes less power than Sleep mode but requires a large amount of HDD storage space. When you use Hibernation mode, your work is stored in a secret file named hiberfil.sys.
Enabling and Disabling Hibernation Mode
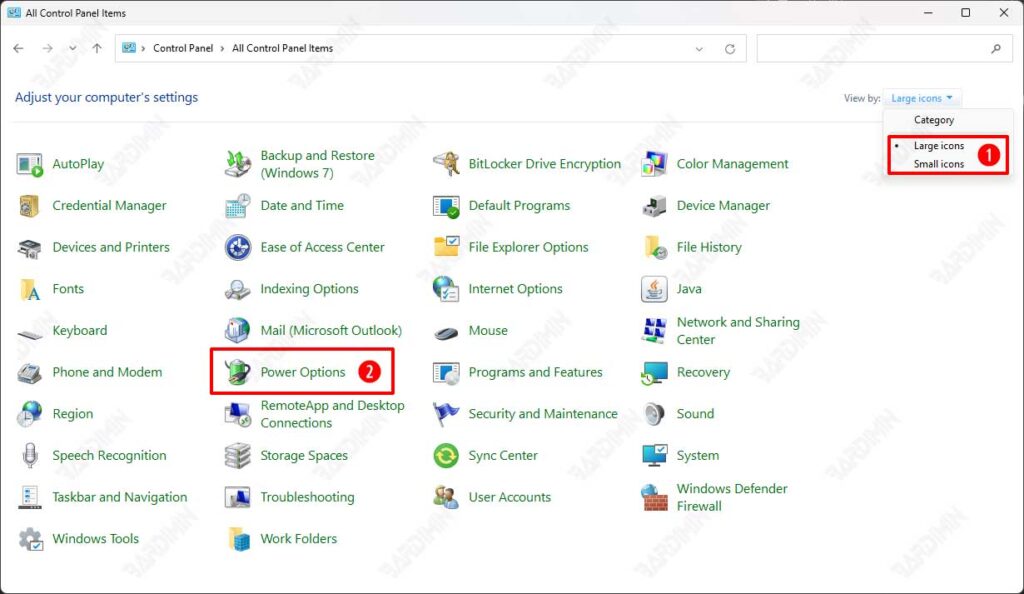
- Open the “Control Panel” Windows 11. You can use the search feature of the Start menu or type “control” into the “Run” dialog.
- In the Control Panel, change first “Viewed by:” select the option “Large icons” or “Small icons.

- Next, select the “Power Options” menu.
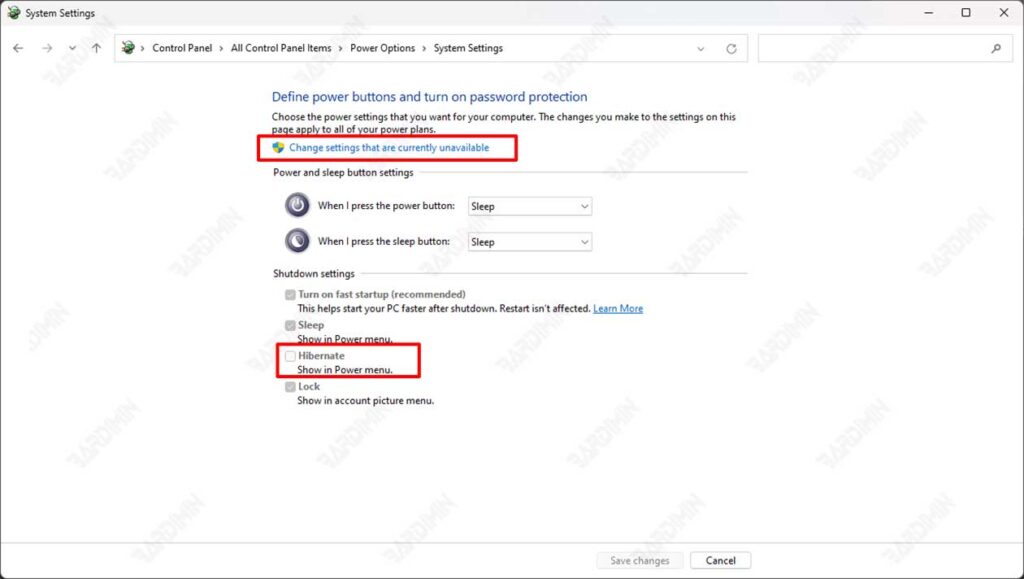
- Then click “Choose what the power buttons do“.

- Check “Hibernate” from the Shut-down settings menu to enable it. If the settings menu is grayed out, click “Change settings that are currently unavailable.” Click the “Save changes” button to save the settings.

- Test whether the “Hibernate” option is already displayed on the Start menu button.
- To disable it, you simply uncheck “Hibernate“.


