Running out of C drive space can cause Windows performance problems. Moving installed applications and programs to another drive is one solution to this problem.
In terms of disk drive space usage, it is recommended that you leave at least 15% – 20% free space. Running out of free space on drive C will cause problems because Windows 11 store’s system updates and settings on that drive.
If you have free space on another disk drive, such as drive D, you can easily move applications and programs to that drive.
To move applications from the Microsoft Store, you can do it easily with no additional applications. As for the applications you installed, you can do this by uninstalling and installing them again on a new drive.
The easiest way to move your installed programs is to use a third-party application.
Moving apps to another drive in Windows 11
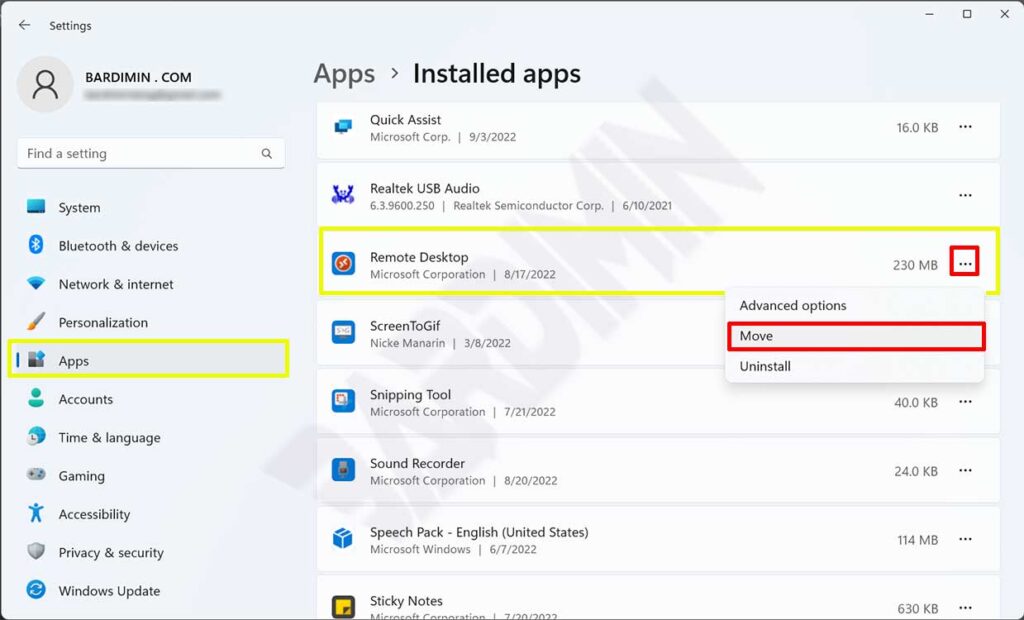
The following way is to move installed apps from Microsoft Store. The default locations for applications installed from the Microsoft Store are on the Windows “Local Disk (C)” drive in the %ProgramFiles%\WindowsApps (applications) and %LocalAppData%\Packages (user application data) folders.
- Open “Settings” Windows 11. You can use the keyboard shortcut (WIN + I ).
- Navigate to “Apps > Installed apps ”.
- Then select the application you want to move, and click the button with the “three dots” icon. In the options, select ” Move “.

If the “Move” option is grayed out, it means the app cannot be moved. To move it requires a third-party application.
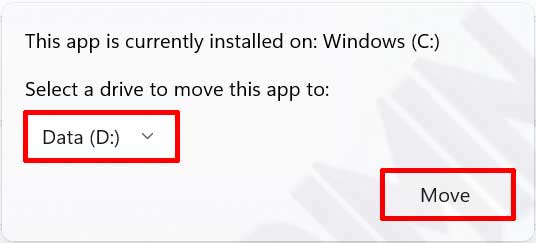
- Next, select a new drive for the application and click the “Move” button to move.

- Repeat for other applications.
Move installed programs to another drive with EaseUS Todo PCTrans
Moving applications from the C: drive to the D: drive manually is not that difficult. But if the “Move” option is grayed out next to a program or you’re not comfortable with the command line, the software is the best option for moving programs between drives.
- Free download and install EaseUS Todo PCTrans.
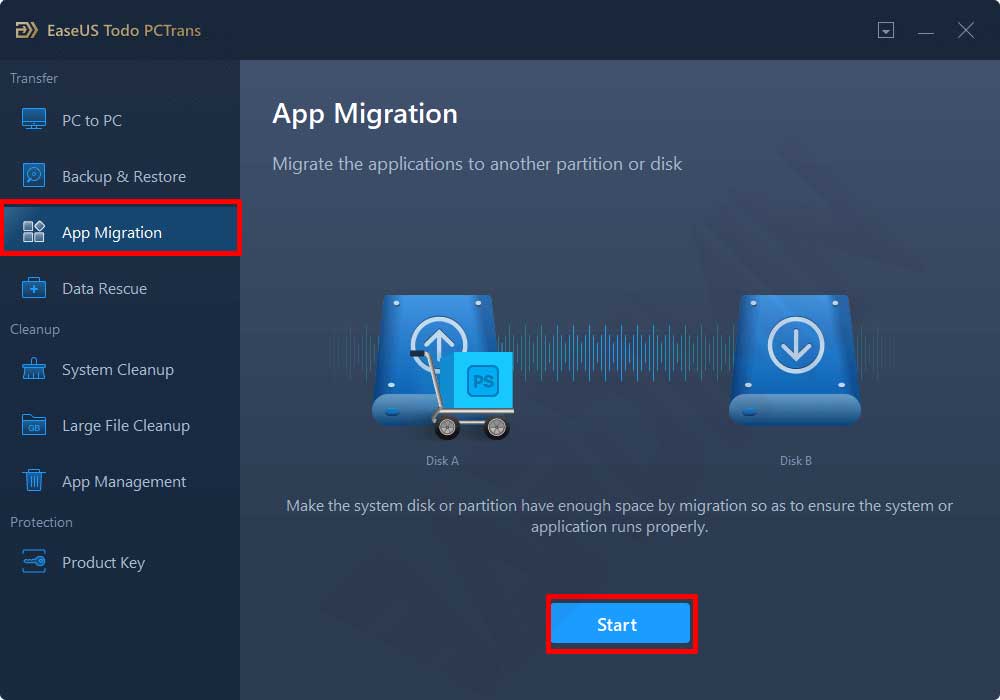
- Launch EaseUS Todo PCTrans, select ” App Migration “, and click ” Start ” on the main screen.

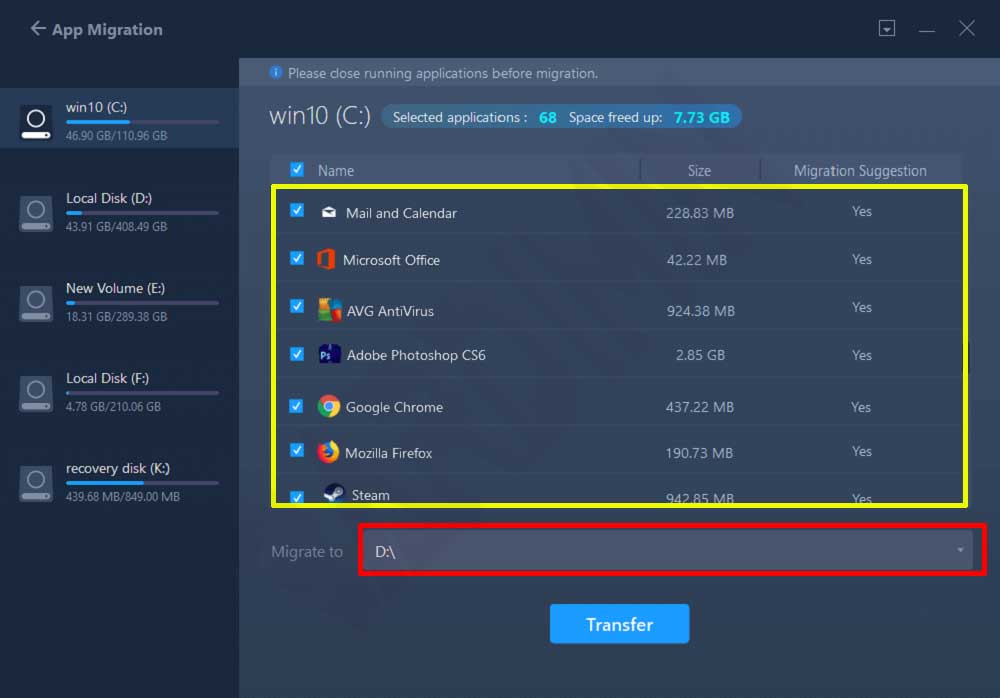
- EaseUS Todo PCTrans will automatically scan and display all supported programs.

- Find the program you want to change the location for and select it.
- Also, click the triangle icon to select the drive to which the program migrates.
- Click ” Transfer ” to change the program’s installation location.
- Restart your computer after the transfer process is complete to save all changes.


