Windows Superfetch on some devices causes problems with a 100% hdd activity rate. To fix this, you need to reset or disable it.
In Windows, Superfetch is a standard feature that loads the apps you use the most. Superfetch is like a caching drive that will copy all your usual files to RAM. By loading these programs first, Superfetch Service Host aims to speed up your PC.
While Superfetch usually helps, it can sometimes slow down your PC. As a background service, Superfetch constantly uses some CPU and RAM resources. If your system doesn’t have the latest hardware, Superfetch Service Host can easily cause high disk usage.
What usually happens is that the Superfetch service causes disk usage at 100%, if you monitor it in Task Manager. If you encounter this problem, don’t worry. How Bardimin shares this can solve your problem.
How to Reset Windows Superfetch
To resolve superfetch issues on Windows, you can reset the Superfetch cache.
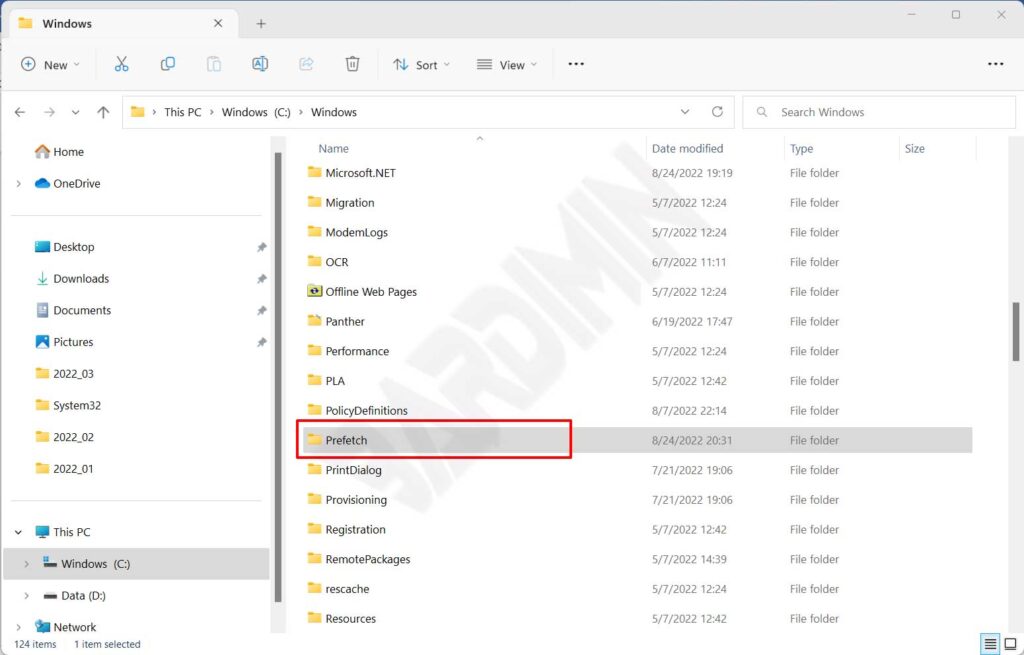
- Open File Explorer.
- Navigate to the “Prefetch” folder under “C:\Windows\Prefetch“.
- Delete all contents of the “Prefetch” folder.
How to Disable Superfetch Windows
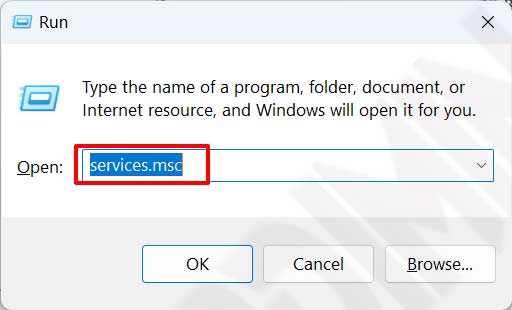
- Open the “Services”. You can open it by using the keyboard keys (WIN + R) and typing “services.msc. In addition, you can also open it from the Start button and type “services” in the search box.
- In the Services window, search for a service with the name “SysMain” for Windows 10 and 11. Whereas in Windows it was previously named “Superfetch“.
- Then right-click and select the “Properties” option. Click the “Stop” button to turn off the service and on the Startup type, click the dropdown button and select “Disabled.
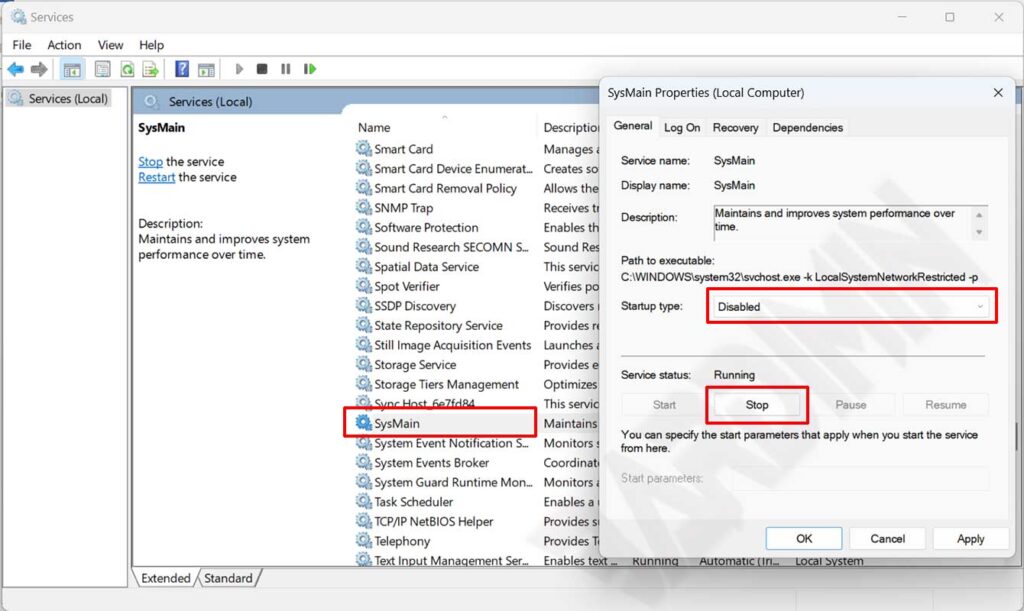
- Click the OK button and close the Services window.