How to Disable the Search Feature in Content
To disable the search feature in content in File Explorer in Windows 11, follow these steps:
- Open “File Explorer” by clicking on its icon in the taskbar or Start menu, or press the “Windows + E” logo key on your keyboard.
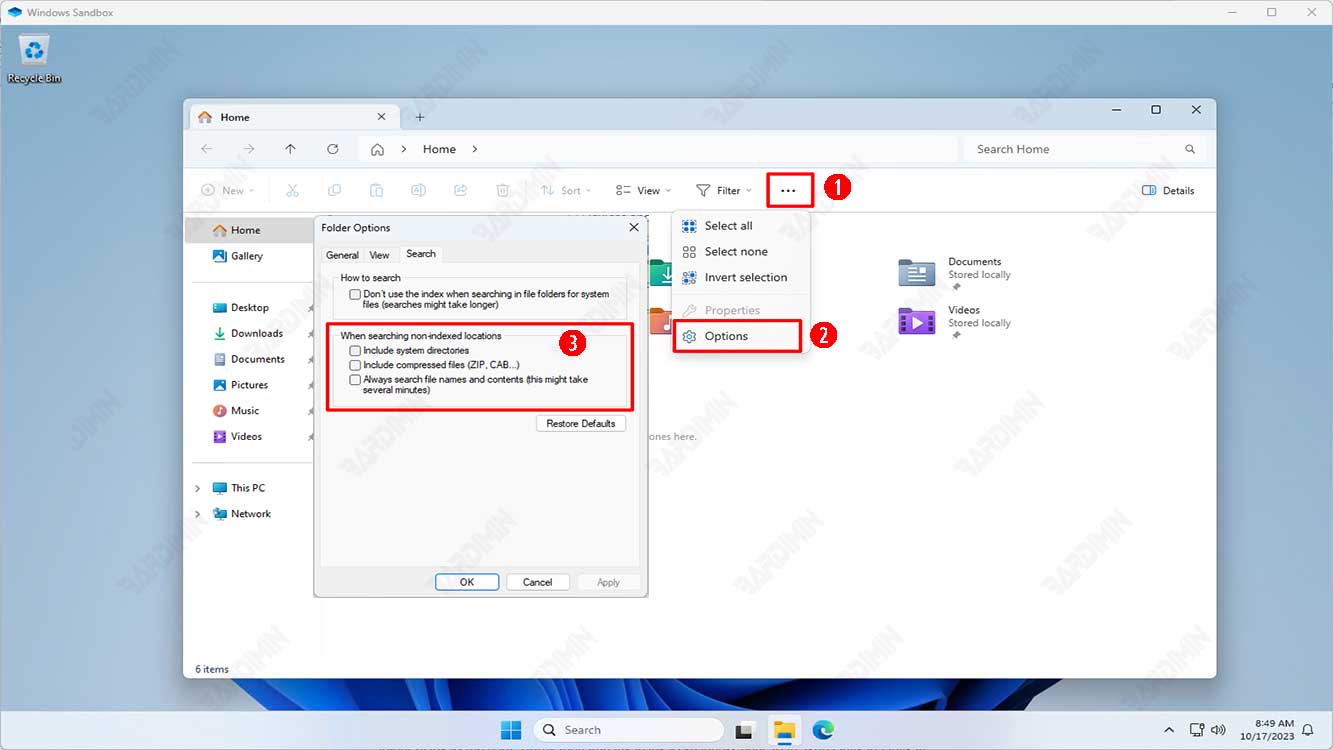
- Click the three horizontal dots icon in the top-right corner of the “File Explorer” window, then select “Options” from the menu that appears.
- Di jendela “Folder Options” yang terbuka, klik tab “Search”, lalu pada bagian “When Searching Non-Indexed Locations”, hapus centang “Always search file names and contents (this might take several minutes)”.
- Click OK to save the changes.
Now, if you search for a file in a location that isn’t indexed, Windows will only search for the file name, making the search faster and more efficient.
How to Add a Location to the Search Index
If you want to search for files by file name and contents in a location that isn’t indexed, you can add that location to the search index. That way, Windows will periodically scan that location and update the search index with information about files and folders in that location. To add a location to the search index, follow these steps:
- Open the “Control Panel” by pressing the “Windows + R” logo key on your keyboard, then type “control” and press Enter.
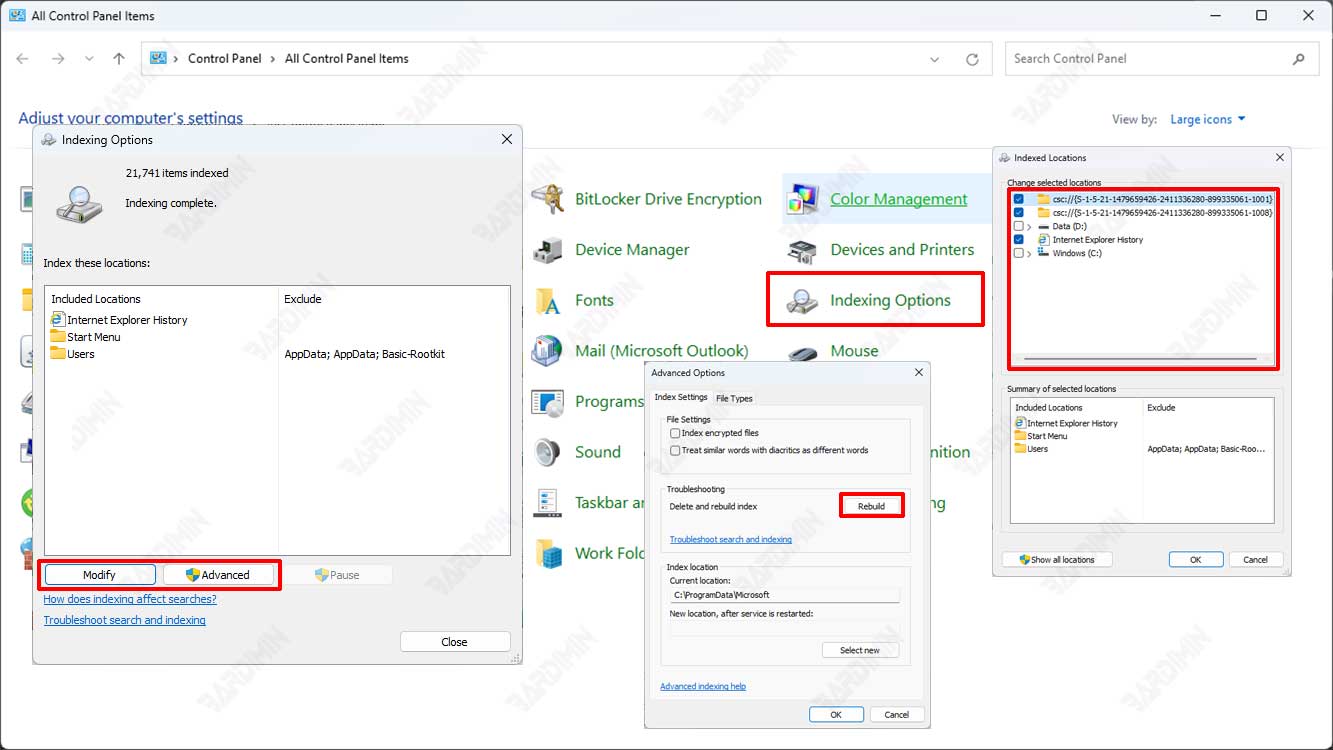
- In the “Control Panel” window that opens, click on the “Indexing Options” icon.
- In the “Indexing Options” window that opens, click the “Modify” button.
- In the “Indexed Locations” window that opens, check (add) or uncheck (remove) the locations you want to enter or remove from the search index, then click OK when finished.
- You can see a list of locations that are already included in the search index. If you are logged in as an administrator, you can also click the “Show all locations” button to see all available locations.
- If the index doesn’t automatically start rebuilding, you must manually rebuild the index to update it. The trick is to click the “Advanced” button in the “Indexing Options” window, then click the “Rebuild” button under the “Troubleshooting” section.
You can close the Indexing Options window when finished.
How to Use Other File Finder Tools
In addition to using Windows’ built-in search feature, you can also use other file search tools that are more advanced and flexible. Some of the popular and free file search tools are:
- “Everything”: A very fast and lightweight file search tool that can search all the files and folders on your computer in a matter of seconds. “Everything” uses its indexation method that differs from Windows Search, so it can search for files regardless of whether their location has been indexed or not. “Everything” also supports searching using regex (regular expression) syntax which can make searches more specific and accurate.
- “Agent Ransack”: A file search tool that can search for files by name, content, size, date, attributes, etc. “Agent Ransack” also supports searching using regex and Boolean syntax. “Agent Ransack” can also display a preview of the contents of a file without having to open it first.
- “UltraSearch”: A file search tool that can search for files very quickly because it uses information from the NTFS Master File Table (MFT). “UltraSearch” can also search for files by extension, size, date, attributes, etc. “Ultra Search” also supports searching using regex and wildcard syntax.
Those are some ways you can do to increase the speed of searching for file names in Windows 11 File Explorer. By disabling the search feature in content, adding locations to the search index, or using another file search tool, you can find the files you need more quickly and easily. Hope this article is useful and helps you in managing files and folders on your computer. Thanks for reading!
