Managing Windows startup applications is a critical step for optimizing system performance, especially for professionals, technicians, and gamers. This article provides an in-depth technical guide on startup folder locations, how to disable or enable programs, and effective management strategies to ensure your PC’s stability and speed.
Every time you turn on your Windows PC, a number of applications and services automatically run in the background. This process is known as Windows startup. While designed to prepare features for immediate use, too many startup programs can strain system resources. Therefore, understanding and managing them is an essential skill for maintaining computer efficiency.
Programs in Windows startup come from various sources. These include hardware driver installations, third-party applications, built-in system utilities, and in rare cases, malicious software. Each application running at startup consumes RAM memory, CPU cycles, and in some instances, network bandwidth and GPU power. The accumulation of these processes can lead to slow booting, operational lag, and increased power consumption.
The impact is most noticeable on PCs with limited specifications. However, even on powerful systems, poor startup management can reduce resources available for heavy applications like rendering software or AAA games. Conversely, by disabling unnecessary applications, you can free up valuable resources, making the system more responsive.
Understanding Windows Startup Folders
The Startup folder is a physical location in the Windows file system containing shortcuts to programs. The system runs all programs linked in this folder every time a user logs in. There are two primary locations you should know:
- Current User Startup: Applies only to the currently logged-in user account.
- All Users Startup: Applies to every user account on that computer.
How to Access the Startup Folder
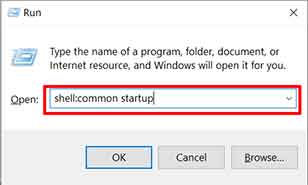
You can quickly open the startup folder using the Run dialog. Press the Windows + R keys on your keyboard, then type one of the following commands:
- For Current User Startup: Type
shell:startupand press Enter. - For All Users Startup: Type
shell:common startupand press Enter.
Startup Folder Path Locations
By default, the path or directory address for the startup folder in the Windows system is as follows:
Current User Startup:
C:\Users\[UserName]\AppData\Roaming\Microsoft\Windows\Start Menu\Programs\Startup
All Users Startup:
C:\ProgramData\Microsoft\Windows\Start Menu\Programs\StartUp
Note that the AppData and ProgramData folders are usually hidden. You need to configure Explorer to show hidden items to view them.
How to Disable or Enable Startup Programs
Windows 10 and 11 provide a centralized interface for managing startup programs through Settings. This method is safer and recommended for most users. Additionally, Task Manager offers similar options with clearer startup impact information.
Steps via Settings App
- Click Start and select the Settings icon (gear). Alternatively, press Windows + I.
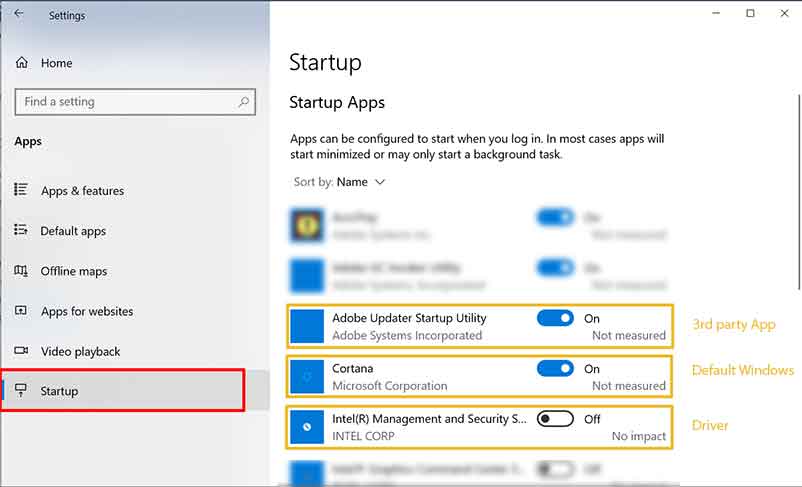
- In the Settings window, select the Apps menu on the left, then click Startup.
- You will see a list of all applications with startup capability. Slide the toggle switch to the On position to enable, or Off to disable them.
Steps via Task Manager
- Right-click the Start button and select Task Manager, or press Ctrl + Shift + Esc.
- If a simplified view appears, click More details.
- Open the Startup tab. Here you can see the application name, publisher, status, and startup impact (High, Medium, Low, None).
- Right-click the application you want to manage, then select Enable or Disable.
The startup impact information in Task Manager is very valuable. Applications with “High” impact should be reviewed further. If not essential, consider disabling them to optimize Windows startup performance.
How to Add Applications to Windows Startup
If there is a program you want to run automatically, you can add it to the startup folder. The method involves creating a shortcut to that program and copying it to the appropriate startup folder.
- Find the executable file (.exe) of the desired program. Right-click the file, then select Create shortcut.
- Move or copy the newly created shortcut into the
shell:startupfolder (for your account only) orshell:common startupfolder (for all accounts). - Afterward, restart the computer or log off and log back on. The program will run automatically upon login.

As a best practice, limit the number of manually added applications. Too many startup applications will diminish the benefits of previous optimizations. Always evaluate the need and its impact on overall system performance.
For further official information about the startup process, you can refer to Microsoft documentation: Official Windows Support.