Node.js is an open-source and cross-platform runtime environment for JavaScript. With Node.js we can run JavaScript code anywhere, not just limited to the browser environment.
Node.js was first created and introduced for users on Linux systems in 2009. Node.js was developed by Ryan Dahl and sponsored by Joyent, the company he works for.
With Node.js we can create real-time applications easily. How???
In this article, we will make an election application to choose the chairman, can the class chairman, the chairman of RT?RW or whatever. Election results will appear in real-time, where every member who provides the option will update all election results pages that are being opened by users.
Rare-step creating real-time applications with Node.j
- Download and install Node.js. Select and customize the OS you are using.
- Create an empty folder to save the project.
This folder we will use to secure node scripts.js and also as the root of our project.
For example, we create a folder with the name “bardimin” on the “C” dive. - Create a file with the name “package.json” on “C:bardimin” and copy the following code
{
  "name": "Belajar_aplikasi_realtime",
  "description": "Learn real-time applications with Nodes.JS",
  "version": "1.0.0",
  "license": "MIT",
  "repository": "https://github.com/",
  "dependencies": {
    "express": "latest",
    "socket.io": "latest"
  }
}- Then open the promt/CMD command and go to “C:bardimin”. Type the following command
npm install
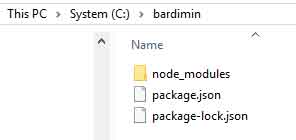
Once the process is complete, the directory structure will be seen as the following image
- Next step, create a “server.js” file in the folder you have created and copy the following code:
var app = require("express")();
var http = require('http'). Server(app);
var io = require("socket.io")(http);

Listening port
http.listen(3000, function () {
    console.log("Listening on 3000");
});

html file
app.get("/", function (req, res) {
    res.sendFile(__dirname + '/index.html');
});

Global Variable
const myData = {akbar: 0, goldie: 0};

/* This is auto initiated event when Client connects to Your Machien.  */
io.on("connection", (socket) => {
    console.log("A user is connected");
    socket.emit('newData', myData);
    socket.on('addData', (data) => {
        if (data === "akbar") {
            myData.akbar++;
        } else {
            myData.goldie++;
        }
        io.emit('newData', myData);
    })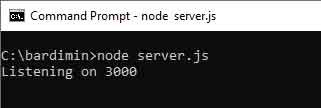
});- Next, you reopen the CMD and type the command “server node.js”. If all is right, it will look like this.
- The final step is to create an “index.html” file, still in the same folder and copy the following code
<html>
<head>
    <title>Chairman's election</title>
    <script src="/socket.io/socket.io.js"></script>
    <script src="https://ajax.googleapis.com/ajax/libs/jquery/2.1.3/jquery.min.js"></script>
    <style>
        table, th, td {
            border: 1px solid black;
            border-collapse: collapse;
            text-align: center;
        }
    </style>
    <script>
        $(document).ready(function () {
            const socket = io();
            socket.on('newData', (data) => {
                $("#pilihAkbr").text(data.akbar);
                $("#pilihGoldie").text(data.goldie);
            });
            $("#submit").click(() => {
                socket.emit('addData', $("#calon").val());
            });
        });
    </script>
</head>
<body>
<div style="width: 400px;margin:auto;text-align: center">
    <blockquote><b>Chairman's election</b></blockquote>
    <div>
        <table width="100%">
            <tr>
                <th>Candidates for Chairman of</th>
                <th>the Voting Results</th>
            </tr>
            <tr>
                <td>Akbar</td>
                <td id="pilihAkbr">0</td>
            </tr>
            <tr>
                <td>Goldie</td>
                <td id="pilihGoldie">0</td>
            </tr>
        </table>
    </div>
    <blockquote>
        <b>Choose your candidate:</b>
        <select id="calon" name="calon">
            <option value="akbar">Akbar
            <option value="goldie">Goldie
        </select>
        <blockquote>
            <button type="button" id="submit">Submit</button>
        </blockquote>
    </blockquote>
</div>
</body>
</html>
- The creation of the application is complete. Now it’s time to test if the app is already running.