Microsoft Word is one of the most popular word-processing applications in the world. This application has various features that can help its users create attractive and professional documents. One such feature is the ability to align text.
With Word, you can create different types of documents, such as letters, reports, handouts, books, and more. One of the important features you have to master in Word is how to align text. Aligning text means positioning text horizontally or vertically in a document.
The alignment of the text you select will affect the look of your document. For example, if you use left-aligned title text, it will stand out more than text that uses center-alignment or right-alignment.
Text alignment can also be used to create a more organized or attractive look. For example, you can use center alignment for text that you want to place in the center of the page.
There are several ways to align text in Word: buttons, menus, or keyboard shortcuts. In this article, Bardimin will explain how to align text in Word easily and quickly.
How to Align Text Horizontally
Aligning text horizontally means positioning it in line with the left, right, center, or both edges of the document. There are four types of horizontal alignment you can use in Word, namely:
- Left Aligned: Text aligns with the left edge of the document, but doesn’t align with the right edge. This is the default alignment in Word.
- Right Align: Text aligns with the right edge of the document, but does not align with the left edge.
- Center: The text is in the center of the document, not aligned with the left or right edge.
- Right-Left Aligned: Text aligns with both edges of the document, adding space between words if necessary.
To align text horizontally, you can use one of the following ways:
1] Using the Alignment Button
The alignment button is the button located in the Paragraph group on the Home tab. This button has four icons representing four types of horizontal alignment. To use this button, follow these steps:
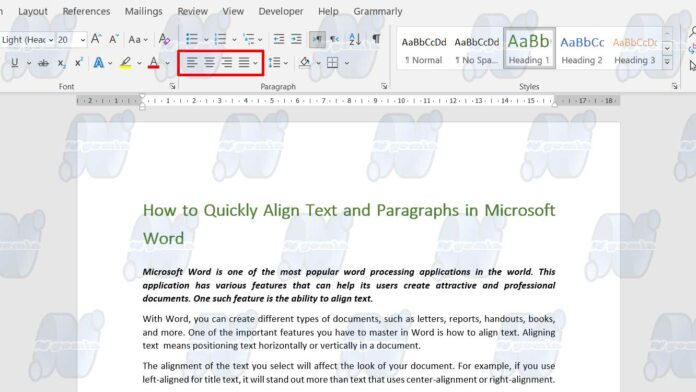
- Select the text you want to align. If you don’t select any text, alignment is applied to the paragraph where the cursor is located.
- Click the alignment button that corresponds to the type of alignment you want. For example, click the Center button if you want to center text.
- The text will be adjusted immediately according to your choice.
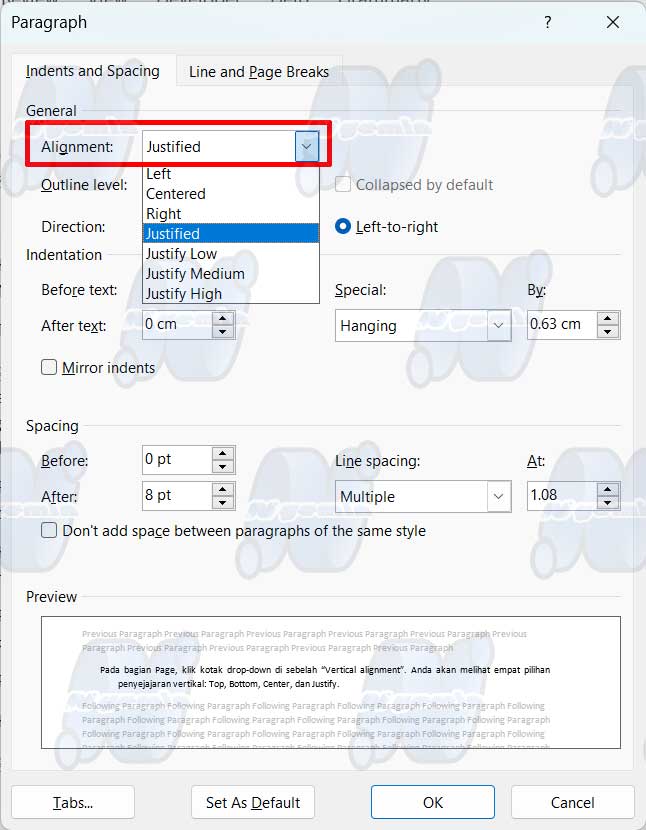
2] Using the Paragraph Menu
The Paragraph menu is a menu that you can access by clicking the small arrow in the lower-right corner of the Paragraph group on the Home tab. This menu has several options for organizing paragraphs, including horizontal alignment. To use this menu, follow these steps:
- Select the text you want to align. If you don’t select any text, alignment is applied to the paragraph where the cursor is located.
- Click the small arrow in the lower right corner of the “Paragraph” group on the “Home” tab. The Paragraph menu appears.
- In the “General” section, click the drop-down box next to “Alignment.” You’ll see four horizontal alignment options: Align Left, Align Right, Center, and Align Right-Left.
- Select the alignment you want from the drop-down box.
- Click OK to apply the alignment.
3] Using Keyboard Shortcuts
Keyboard shortcuts are key combinations that you can press to perform certain commands without using the mouse. Keyboard shortcuts can help you work faster and more efficiently in Word. To align text horizontally using keyboard shortcuts, you can use one of the following combinations:
- Ctrl+L: Align text to the left.
- Ctrl+R: Align text to the right.
- Ctrl+E: Center the text.
- Ctrl+J: Align text right-left.
To use this keyboard shortcut, follow these steps:
- Select the text you want to align. If you don’t select any text, alignment is applied to the paragraph where the cursor is located.
- Press the key combination that corresponds to the type of alignment you want. For example, if you want to align text to the right, press Ctrl+R.
- The text will be adjusted immediately according to your choice.
How to Align Text Vertically
Aligning text vertically means aligning text to the top, bottom, center, or both parts of the document. There are four types of vertical alignment that you can use in Word, namely:
- Top: Text is at the top of the document, leaving a blank space at the bottom.
- Bottom: Text is at the bottom of the document, leaving a blank space at the top.
- Center: Text is centered in the document, leaving equal white space at the top and bottom.
- Justify: Text occupies the entire document, adding space between lines if necessary.
To align text vertically, you can use the following ways:
Use the Page Layout menu
The Page Layout menu is a menu that you can access by clicking the Layout tab on the ribbon. This menu has several options for setting the page layout, including vertical alignment. To use this menu, follow these steps:

- Click the “Layout” tab on the ribbon.
- Click the small arrow in the lower right corner of the “Page Setup” group. The Page Setup menu will appear.
- Select the “Layout” tab on the Page Setup menu.
- In the Page section, click the drop-down box next to “Vertical alignment”. You’ll see four vertical alignment options: Top, Bottom, Center, and Justify.
- Select the alignment you want from the drop-down box.
- In the “Apply to” section, choose whether you want to apply alignment to the entire document or only to specific sections.
- Click OK to apply the alignment.
Conclusion
That’s how to align text in Word easily and quickly. Mastering this method makes your Word documents neater and more professional. Hope this article will be useful for you. If you have any questions or suggestions, please leave a comment below. Thanks for reading this article and see you soon.